Create an LLM policy
This guide will walk you through creating an LLM policy on Witboost
1. Introduction
The LLM endpoint configuration is needed to create a computational policy with LLM. A subscription with Azure OpenAI or Gemini is also needed because Witboost adopts a bring-your-own LLM approach. The first step is to go in the Governance Panel of Witboost in the policy registry
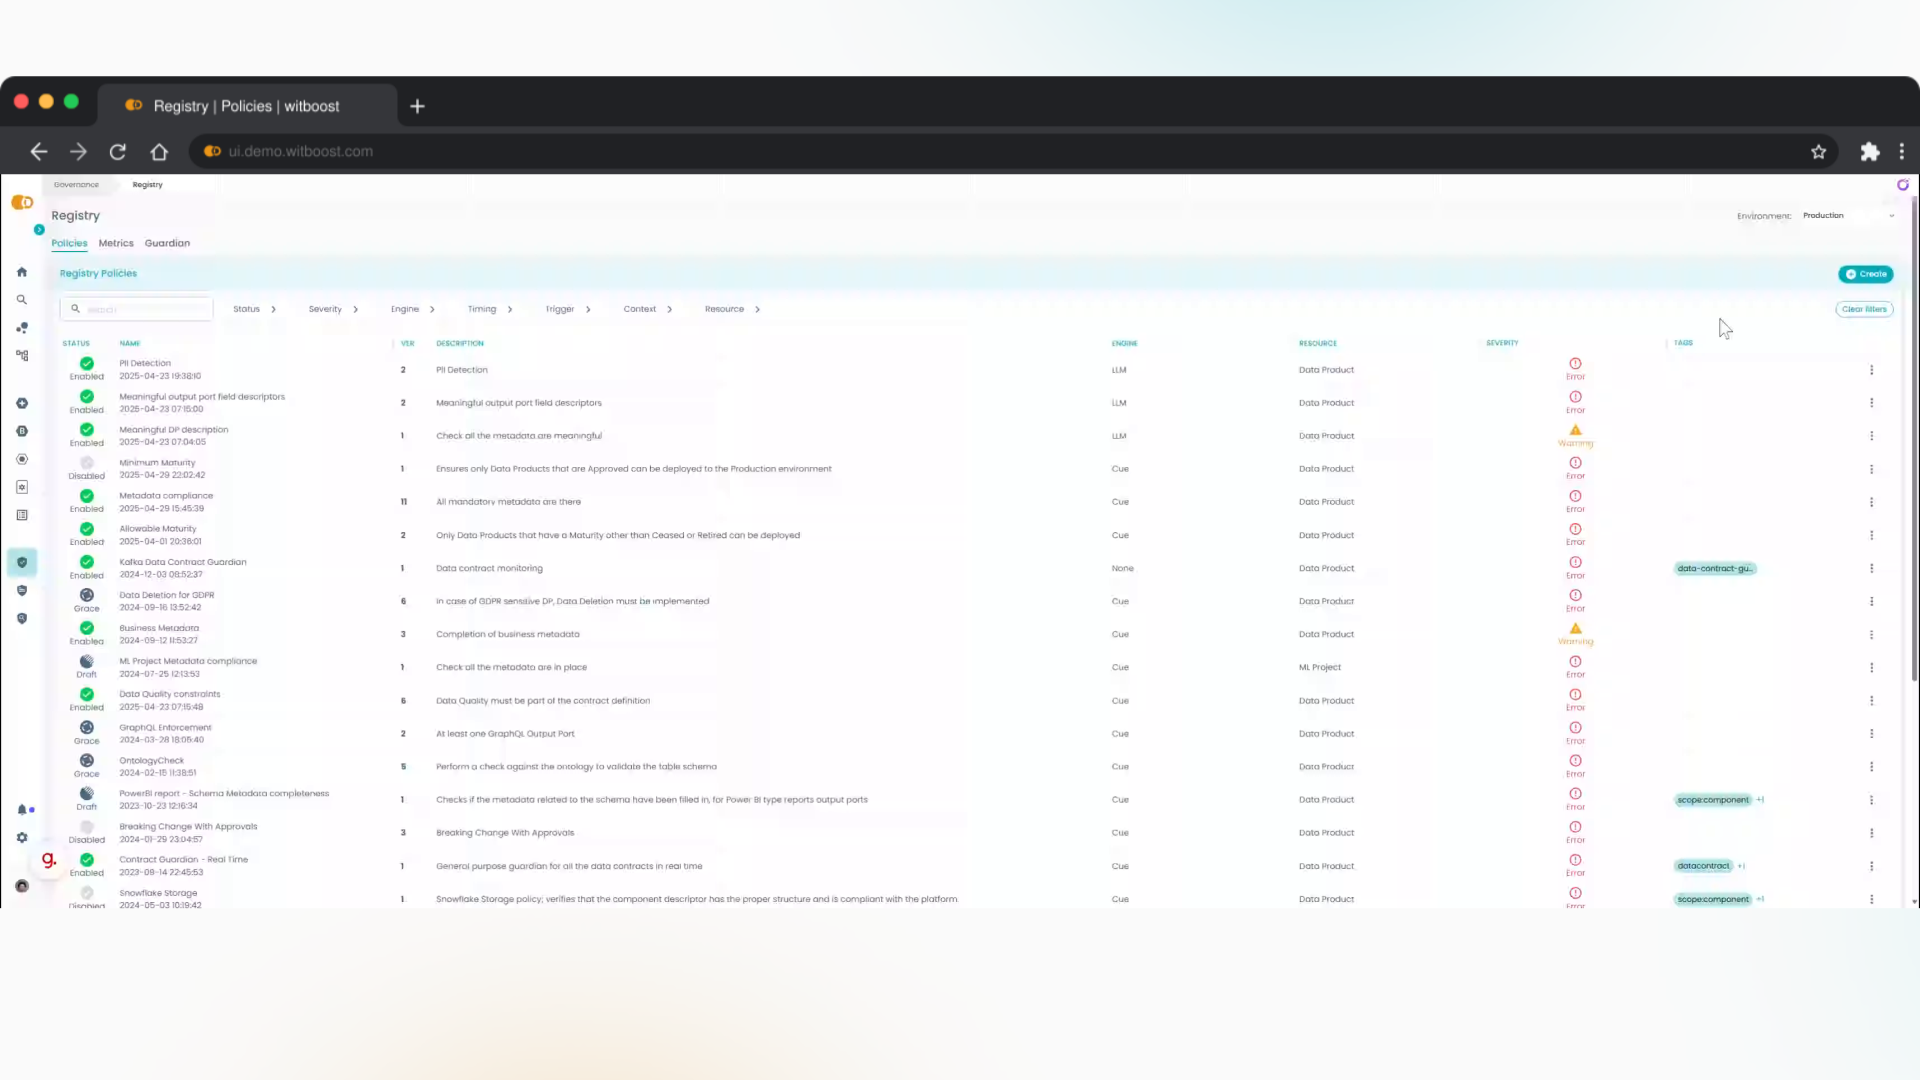
2. Create a new Policy
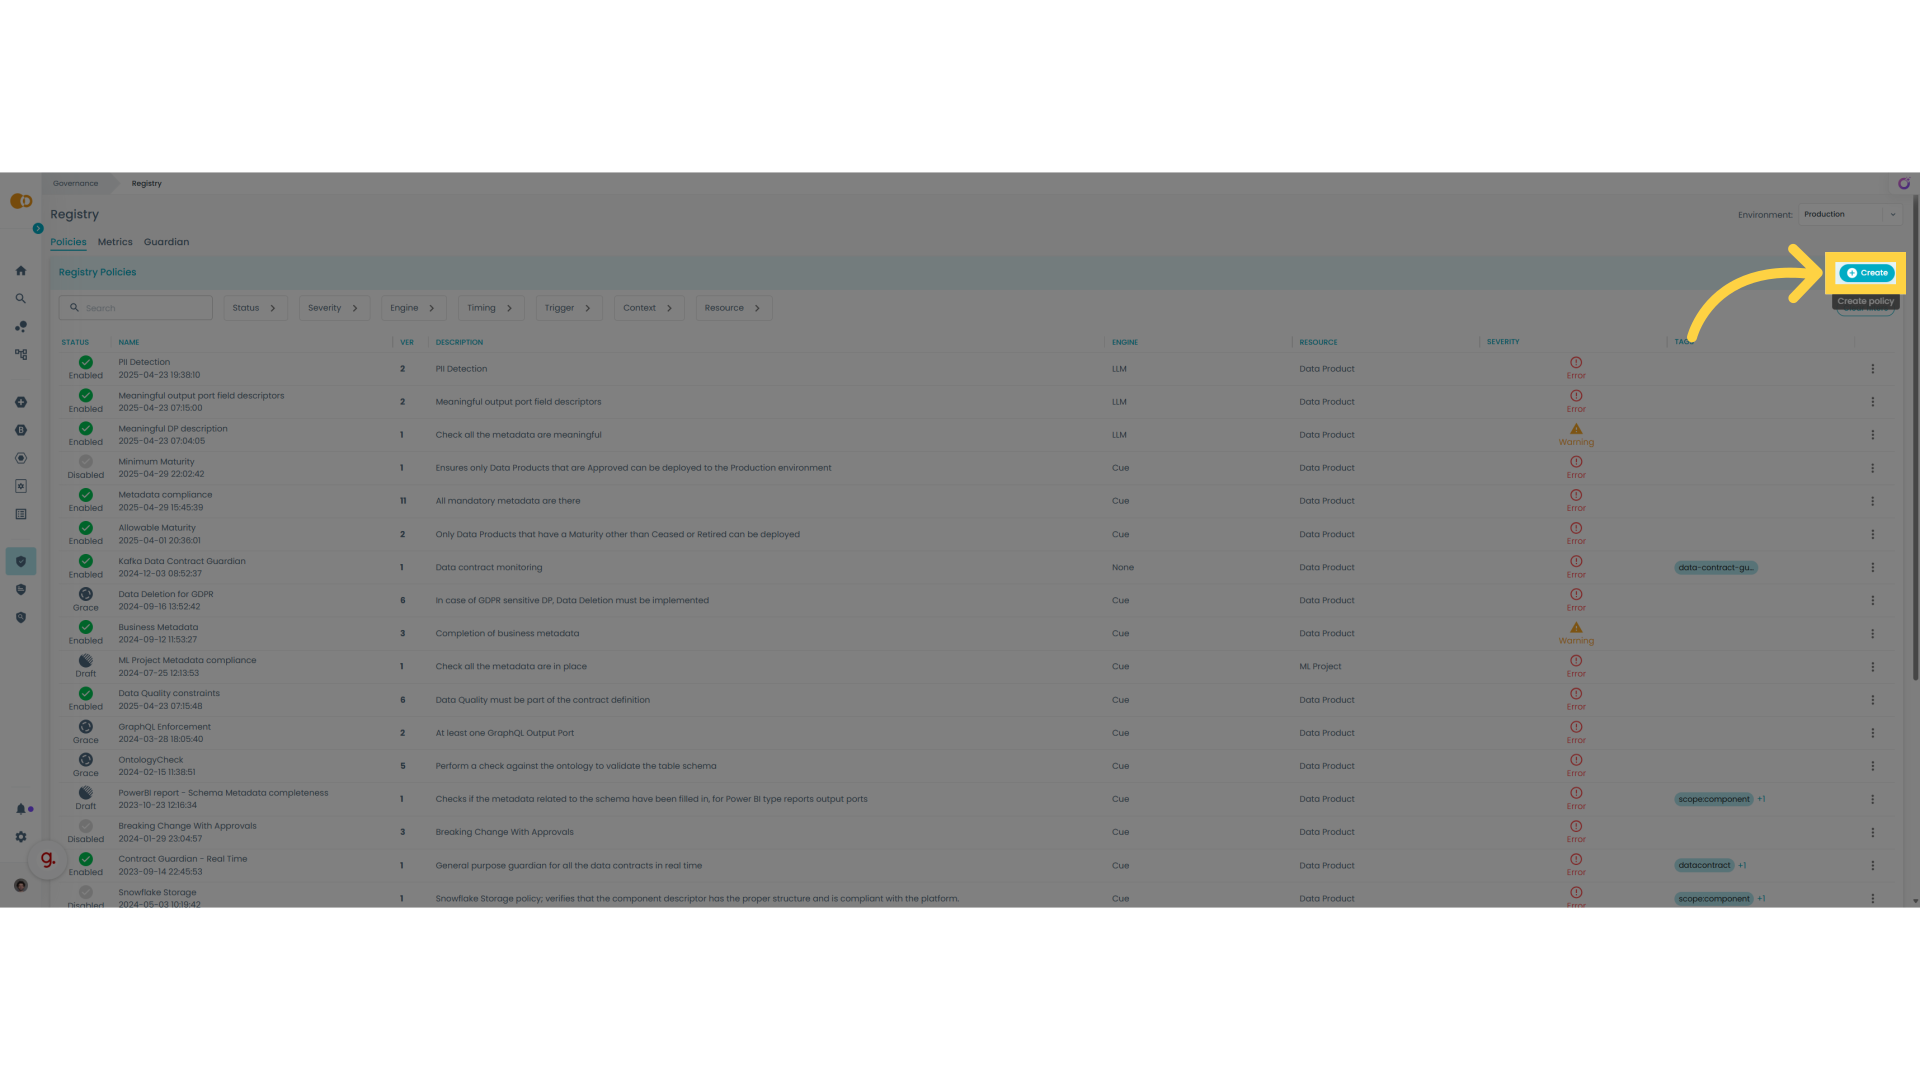
We start the policy creation process clicking on create button
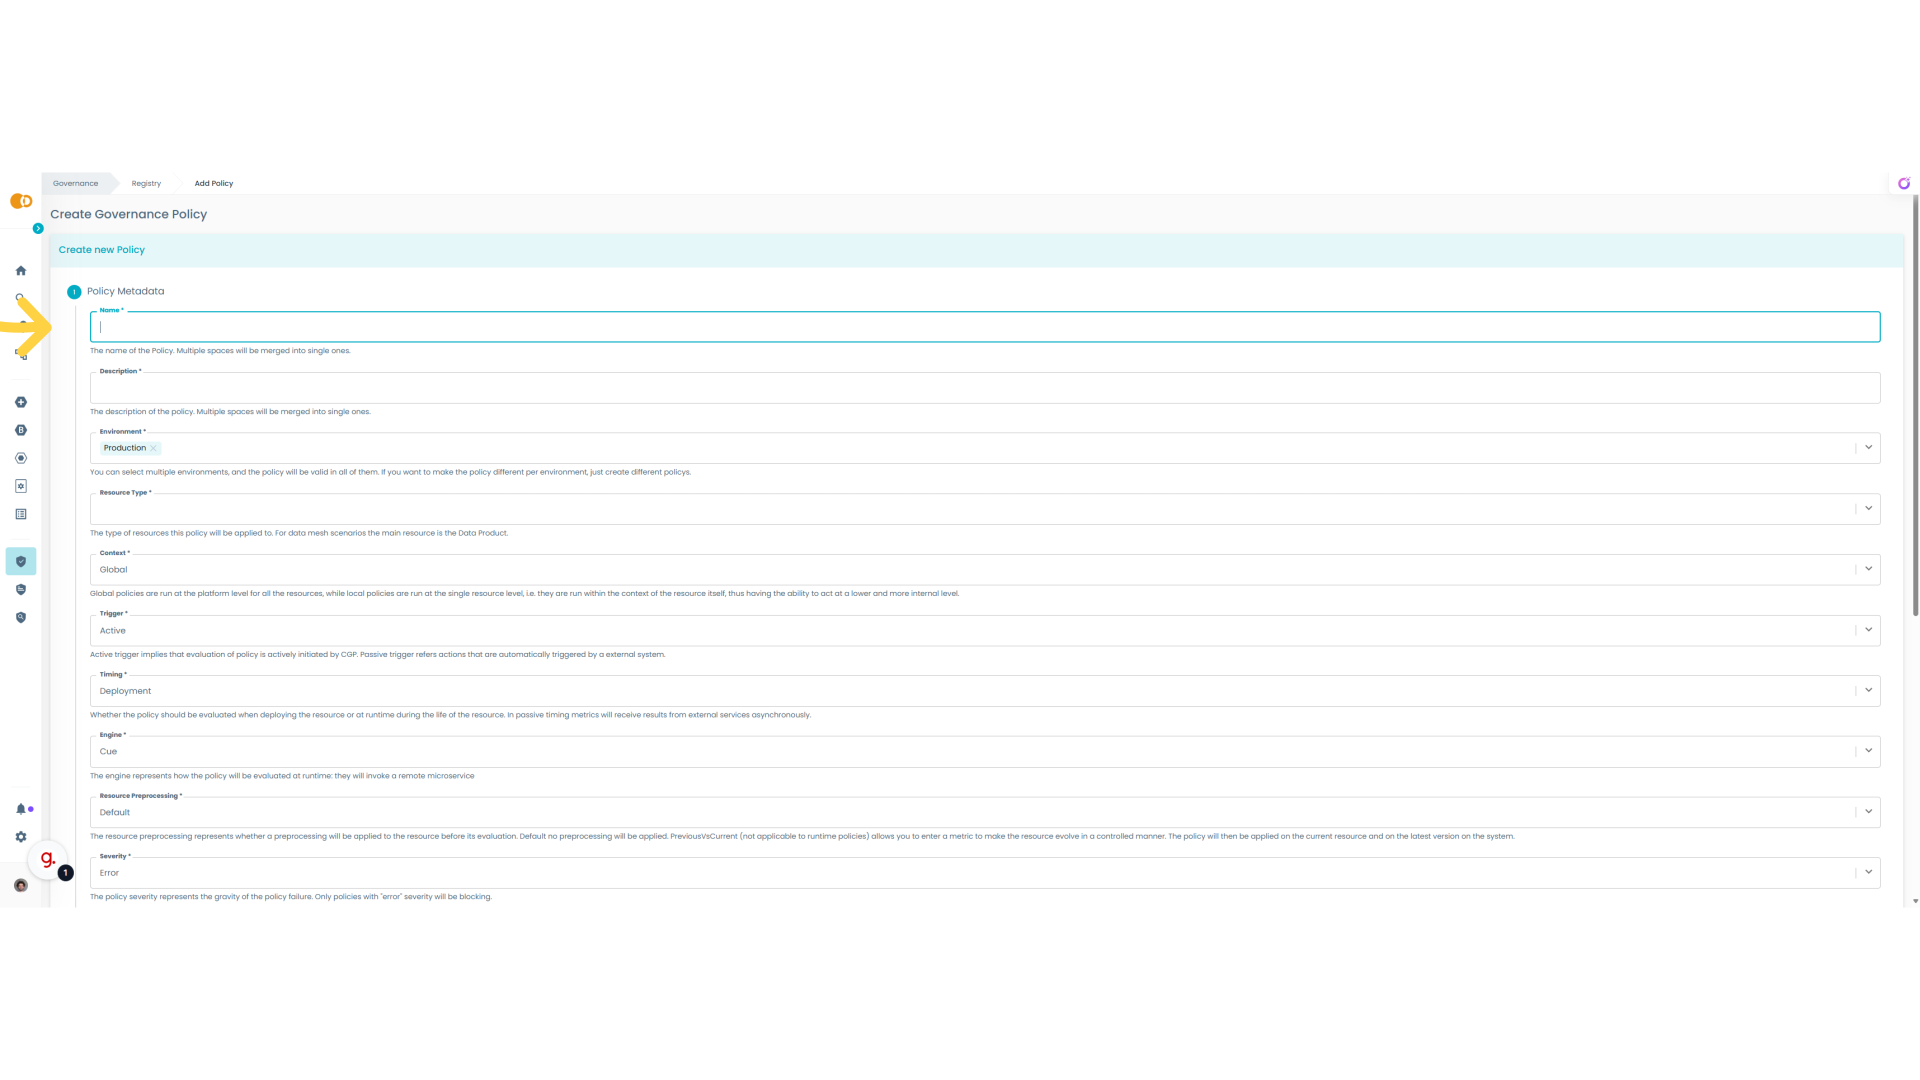
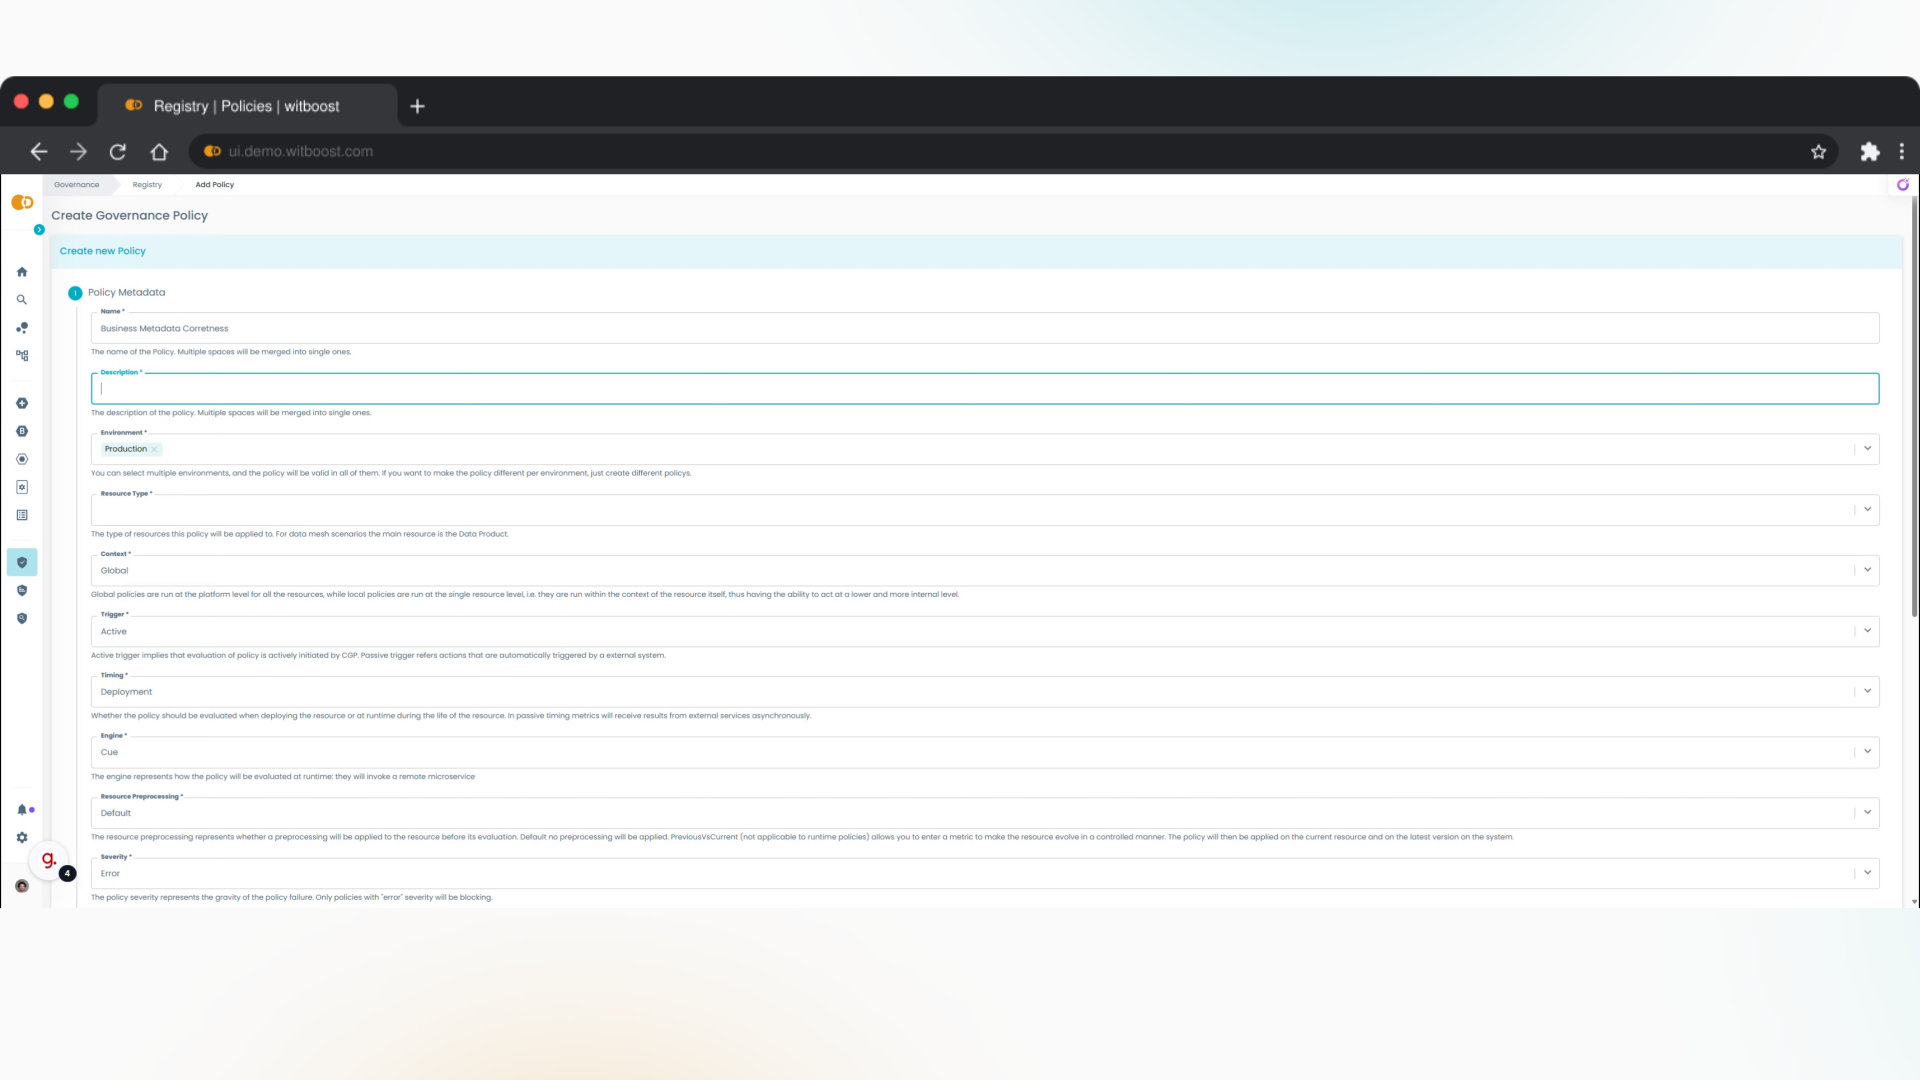
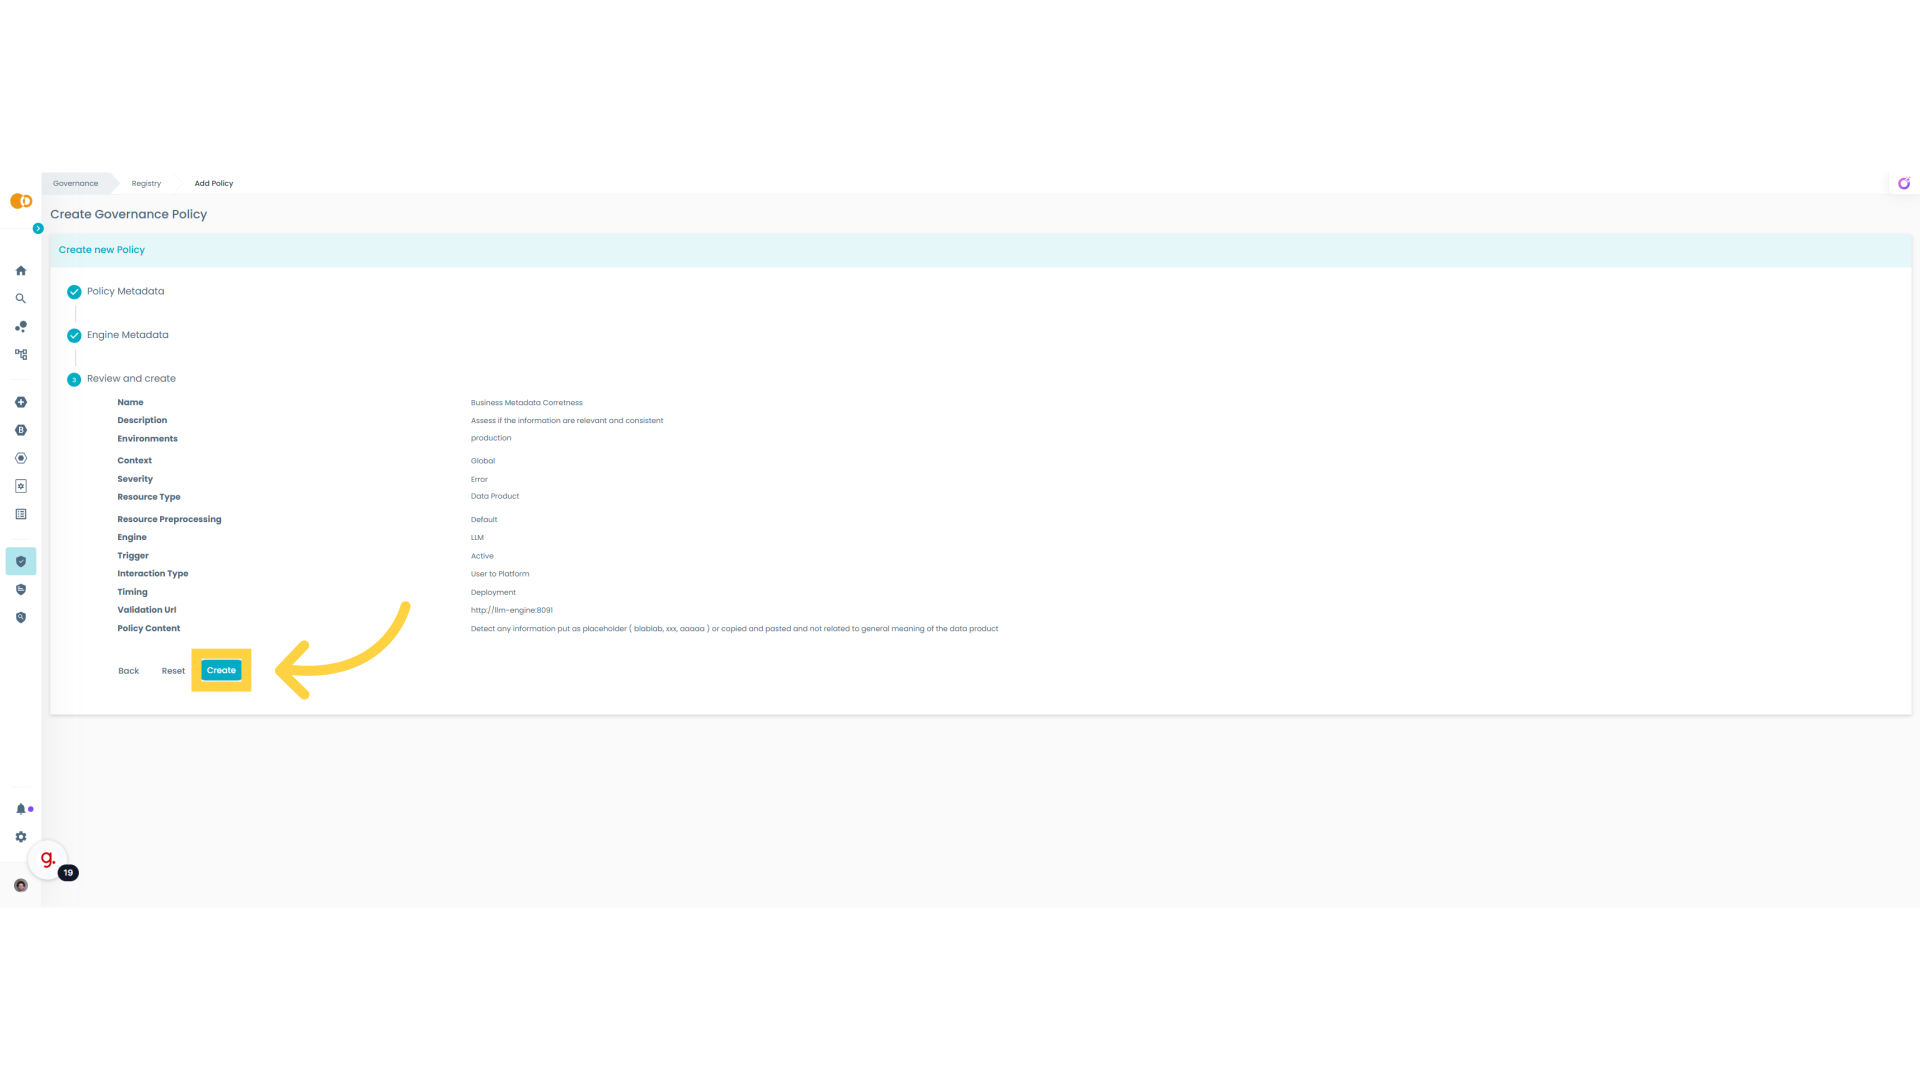
3. Policy Metadata
We start by inserting basic metadata for the new policy
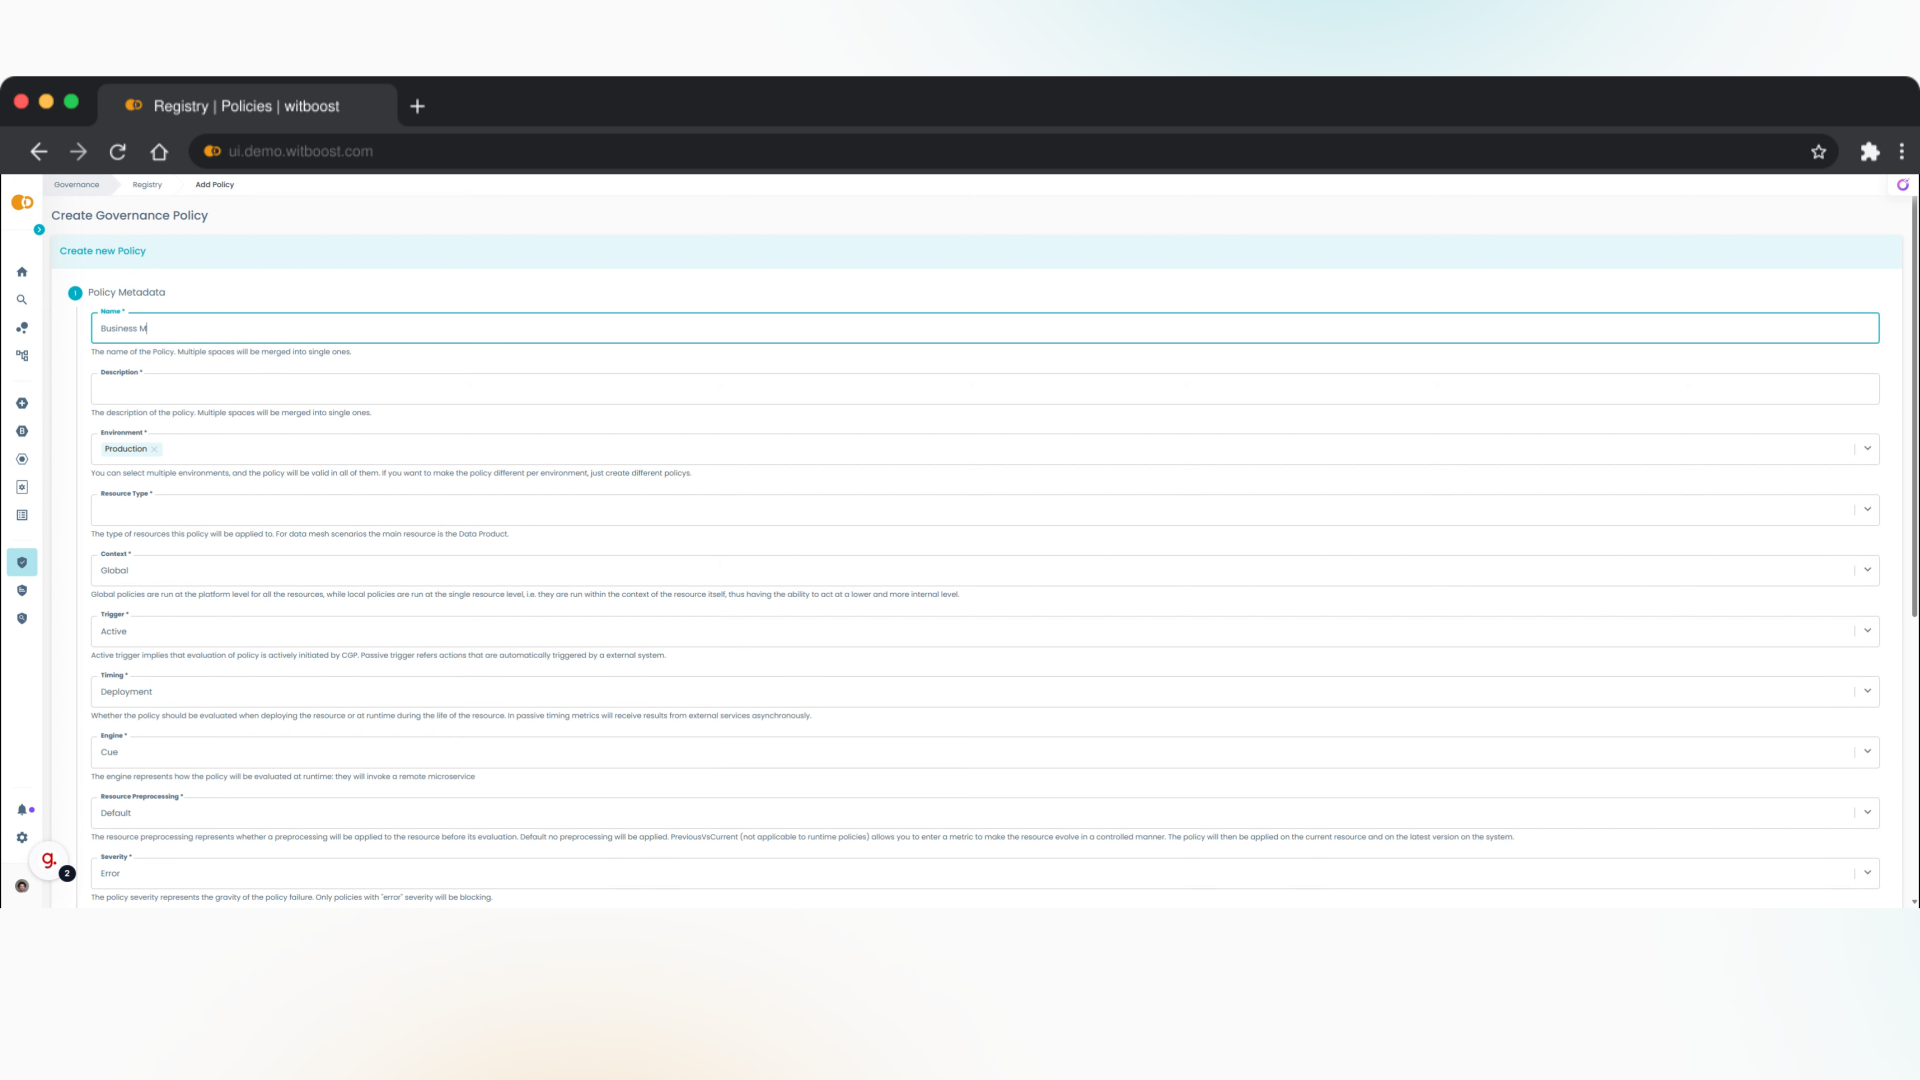
4. Business Metadata Correctness
We are going to create a policy to assess the correctness of business metadata that is a crucial step to make the data intelligible and discoverable
5. Description
Let's provide a meaningful description for the policy so people will understand why is important
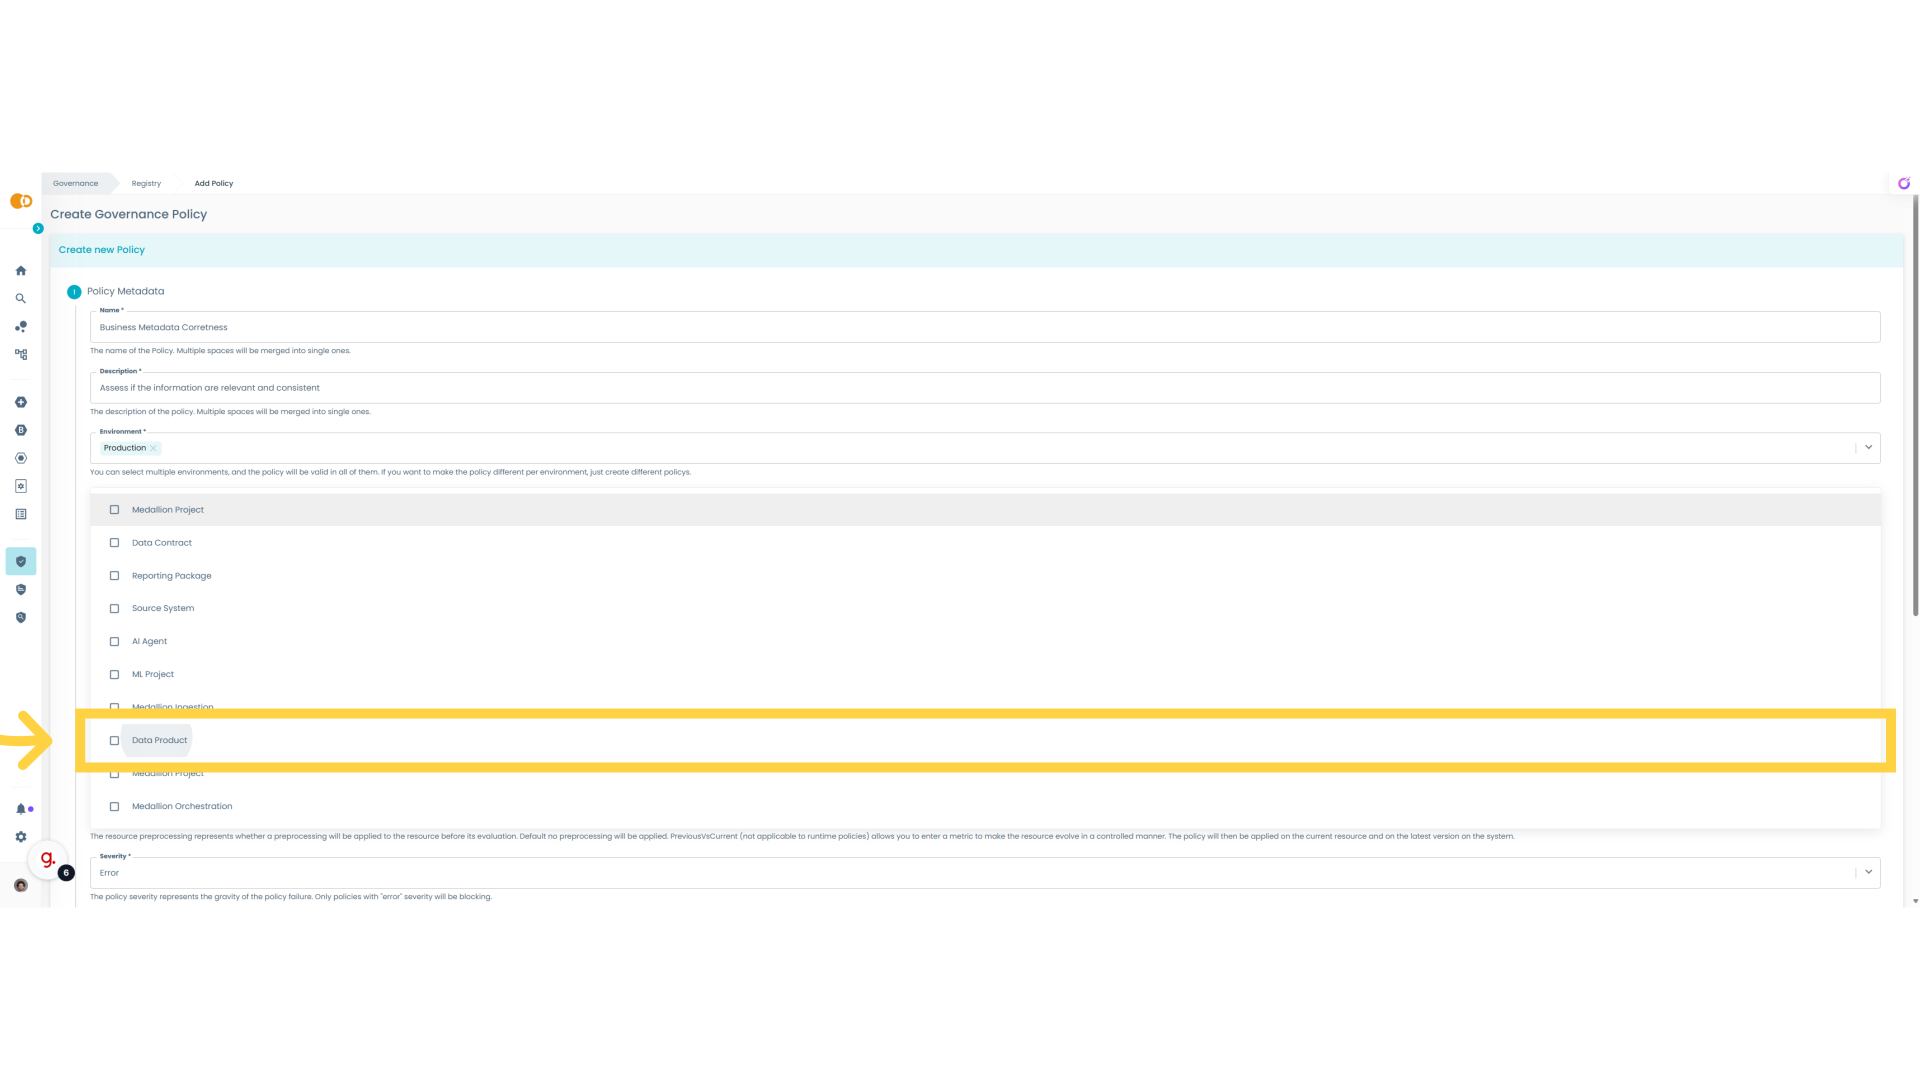
6. Select the resource type for this policy
In Witboost is possible to create different policies for different systems defined in the practice shaper. In this case we want to apply this policy to Data Products
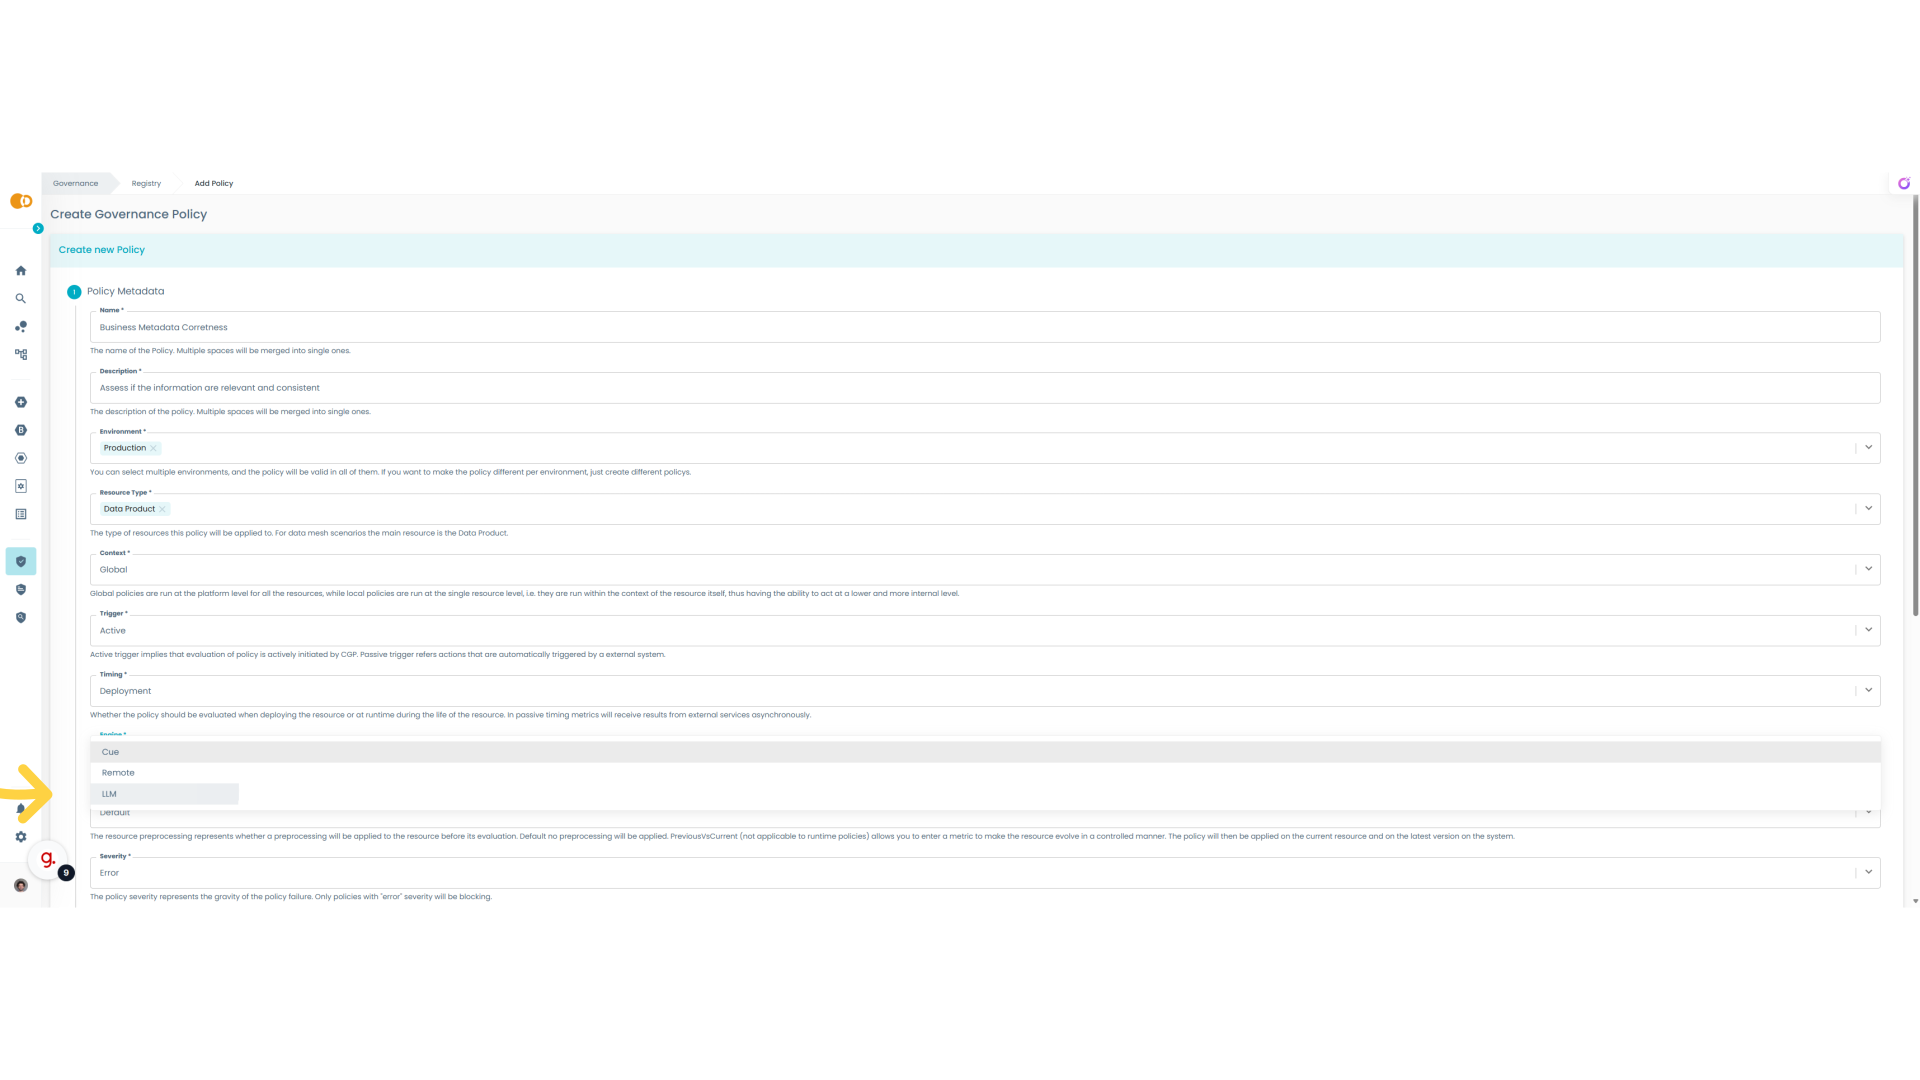
7. Select LLM
We want to create an LLM policy so we need to select this engine for the computation of the policy
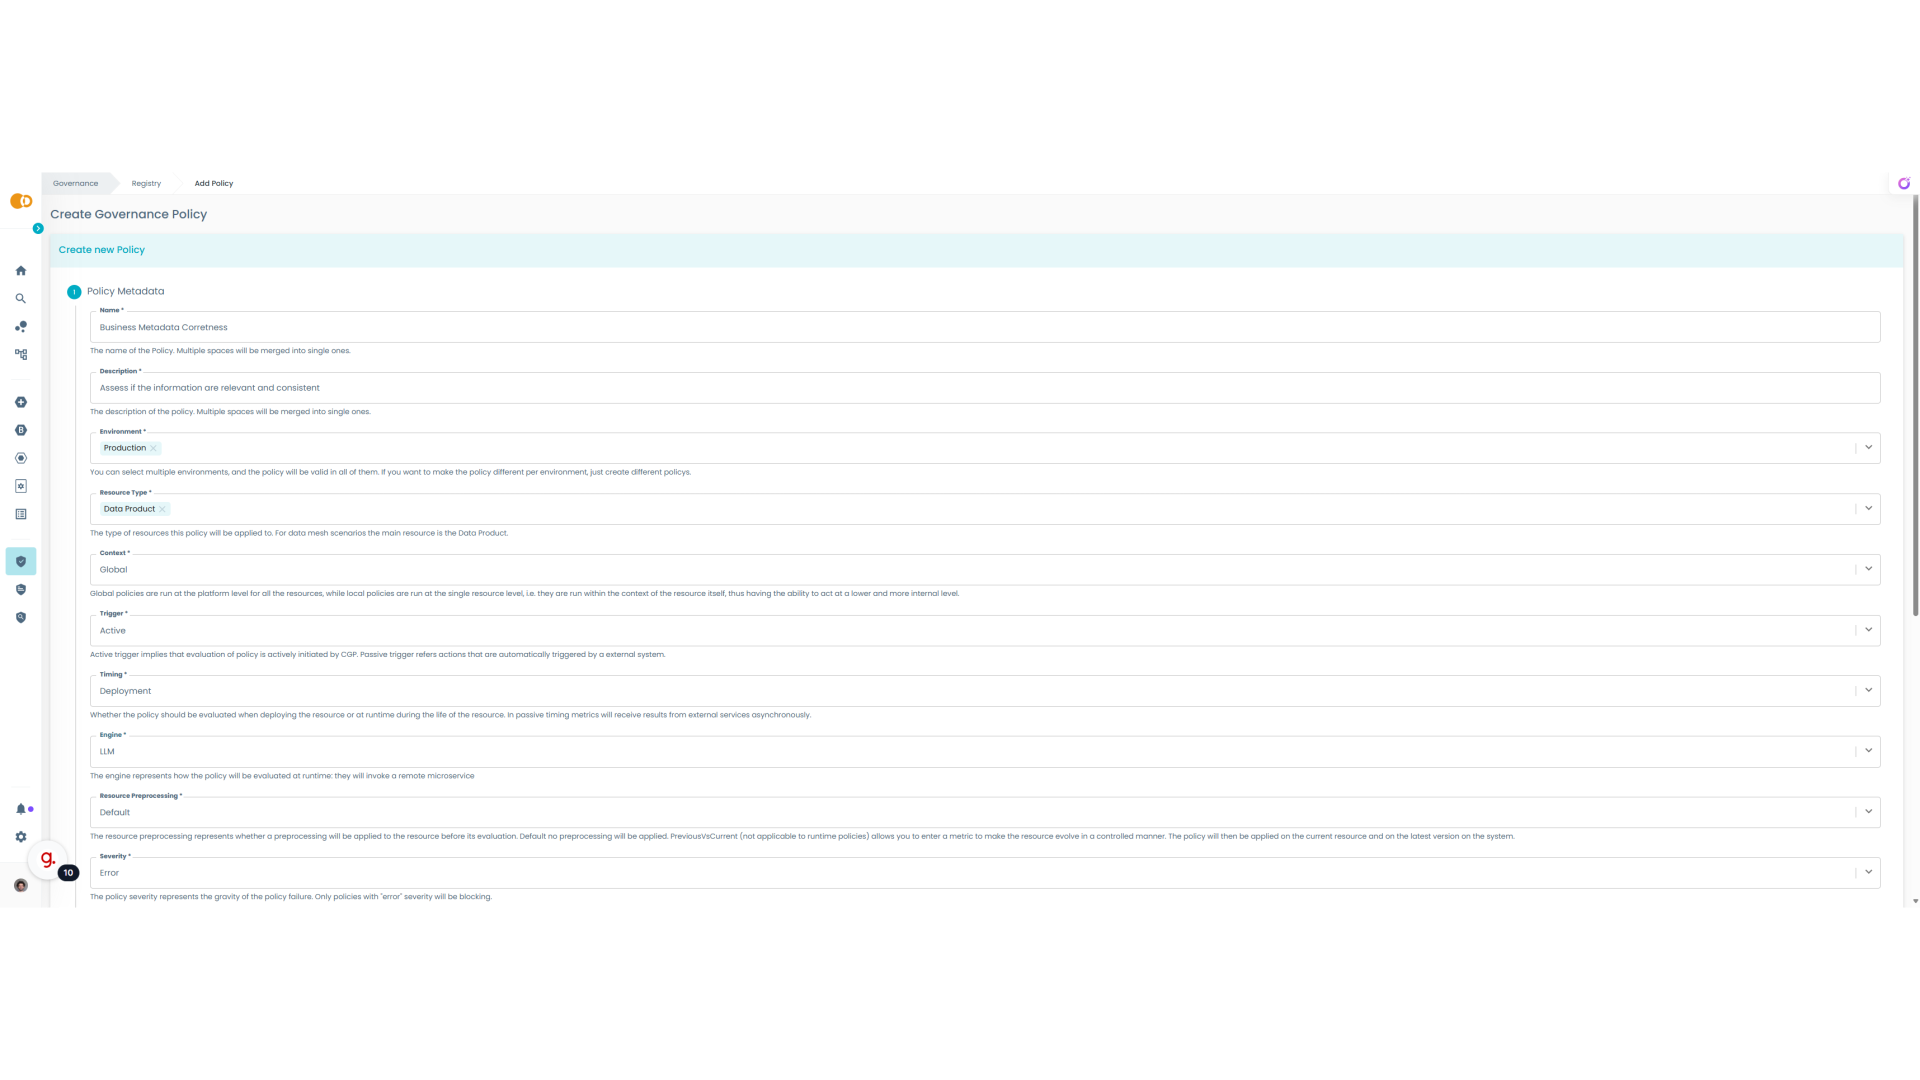
8. Policy metadata completed
The other parameters in this case are already fine because we want to create a policy that will act at deploy time and it will be actively triggered by Witboost when a Data Product will be deployed or tested.
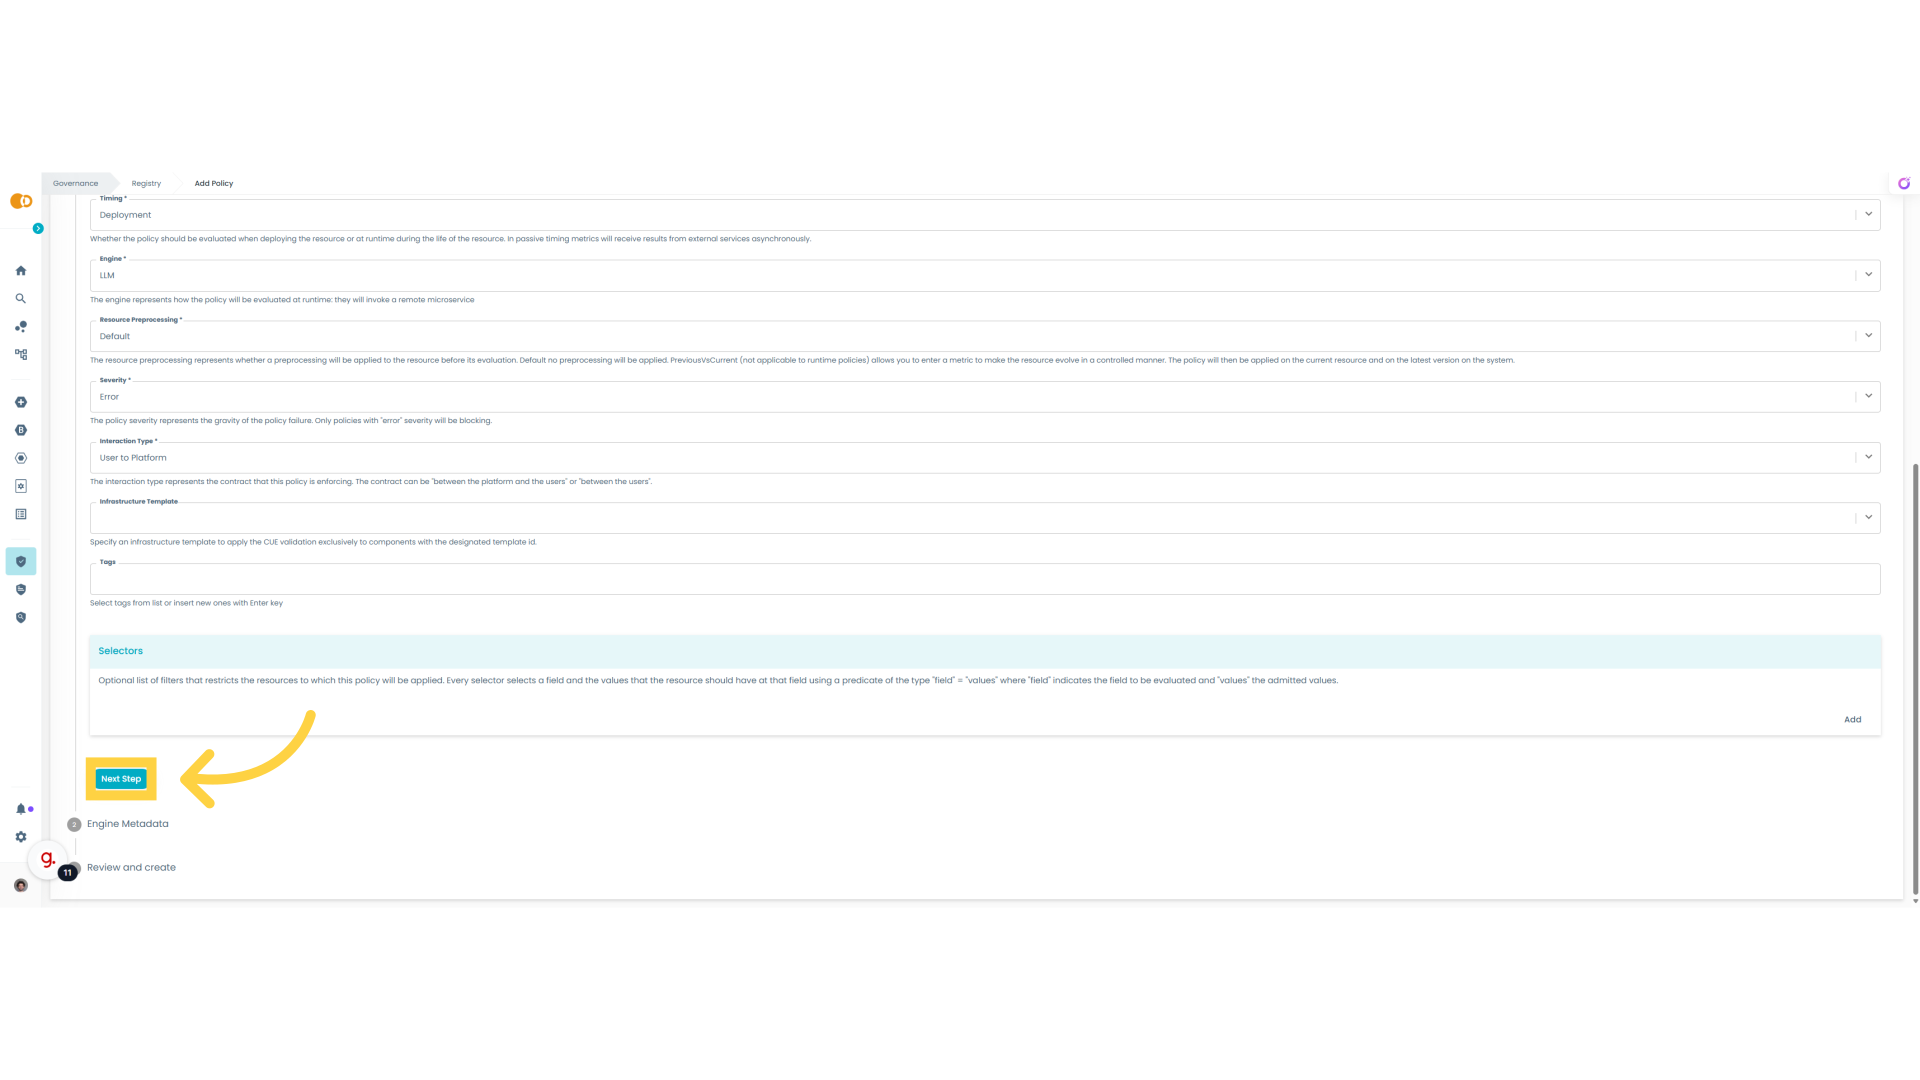
9. Next Step
So now we are completed with the policy general metadata and we can proceed to the next stage.
10. Define the prompt
The LLM policy needs to be instructed to perform its goal through a prompt
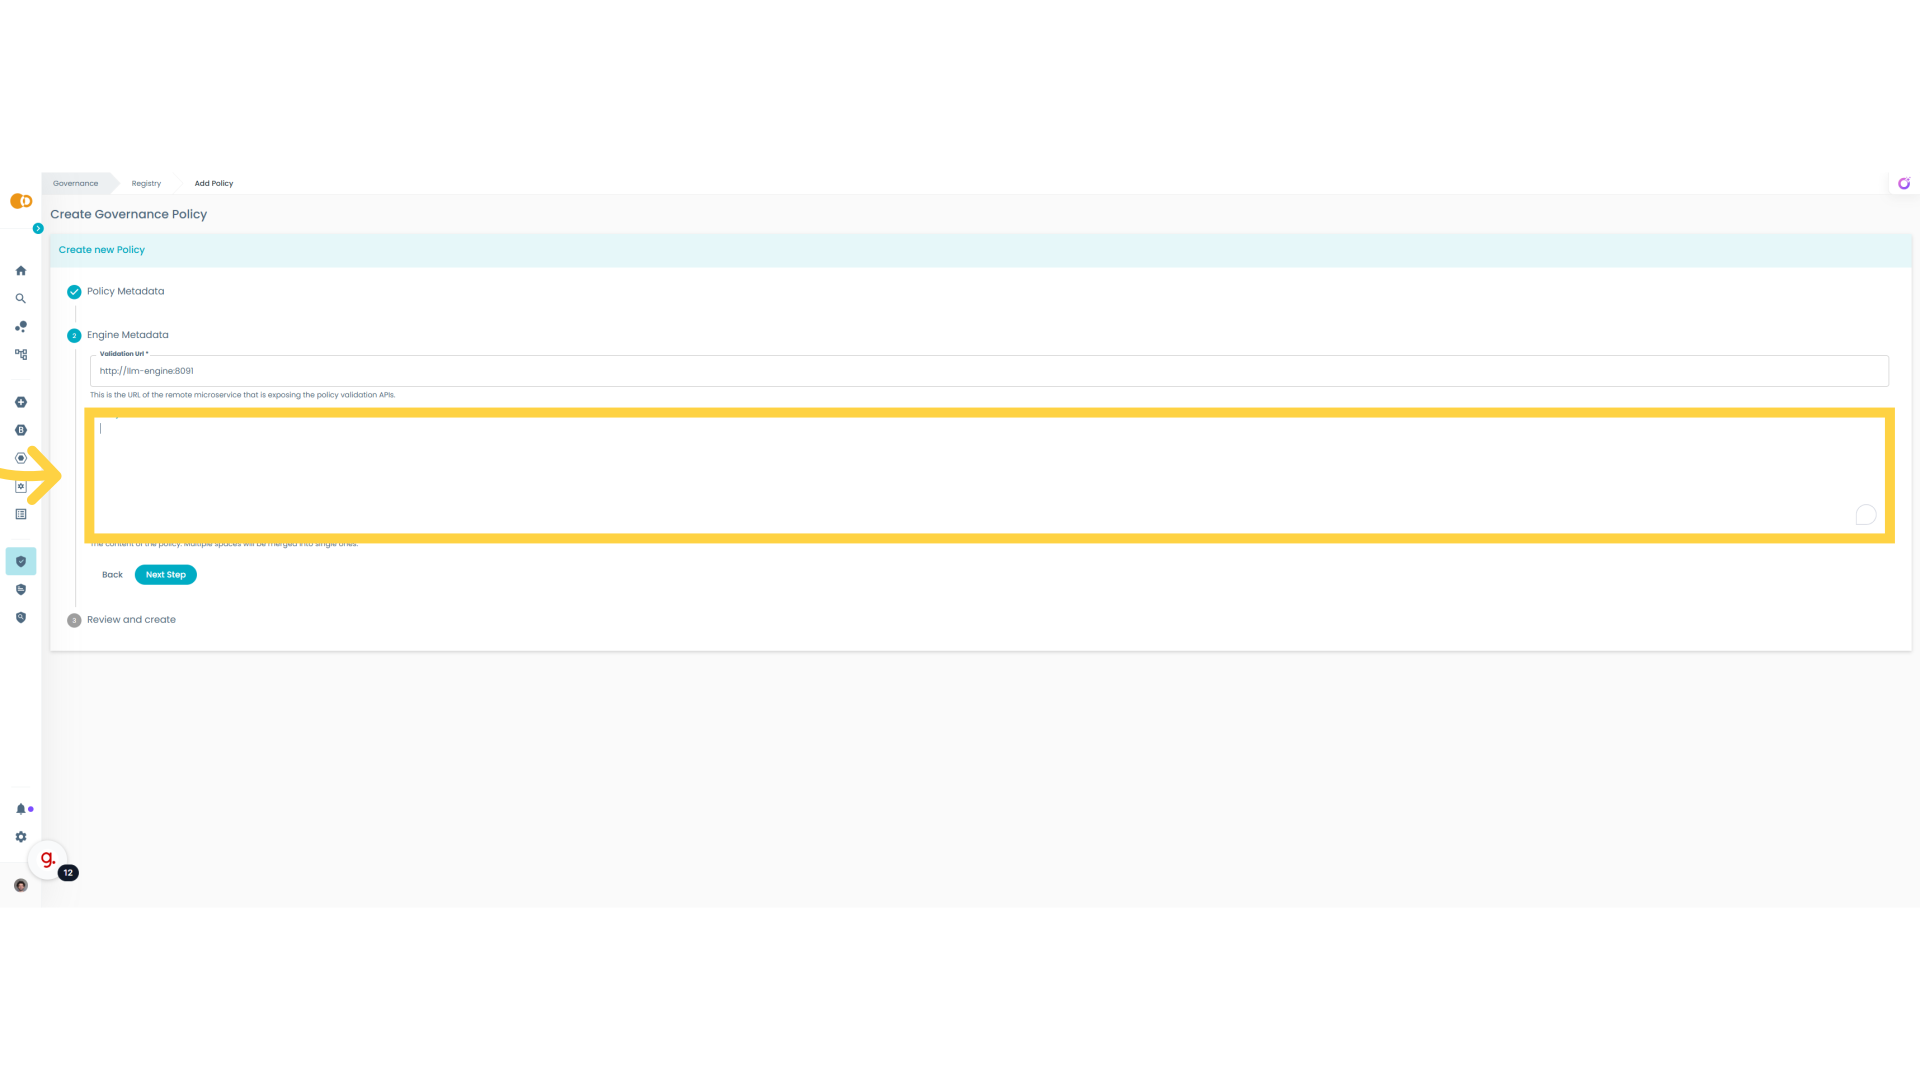
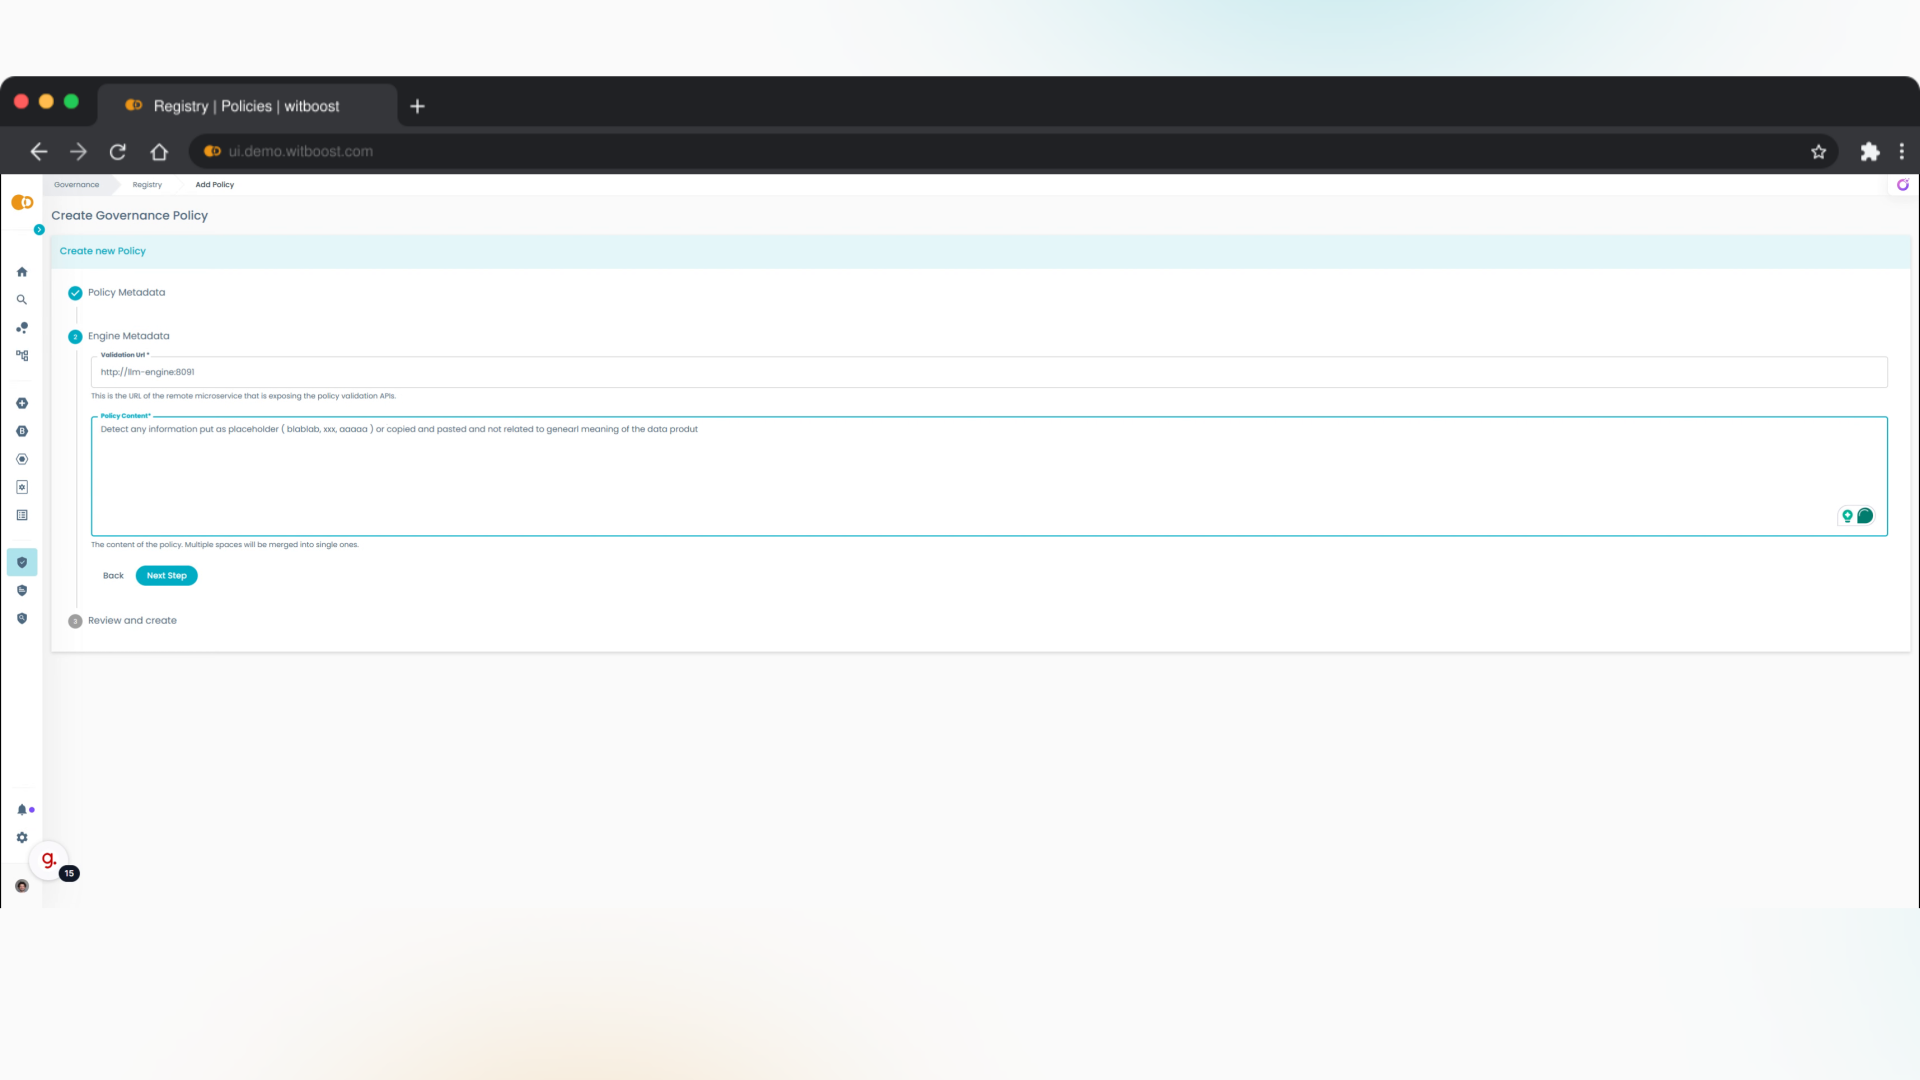
11. Insert the Prompt
Let's type Detect any information put as placeholder or copied and pasted and not related to the general meaning of the data product. With this prompt we want to avoid people putting placeholders or repeating information just because they don't have time to properly fill the business metadata. Because this will impact deeply the discoverability and intelligibility of the data, we want to avoid it.
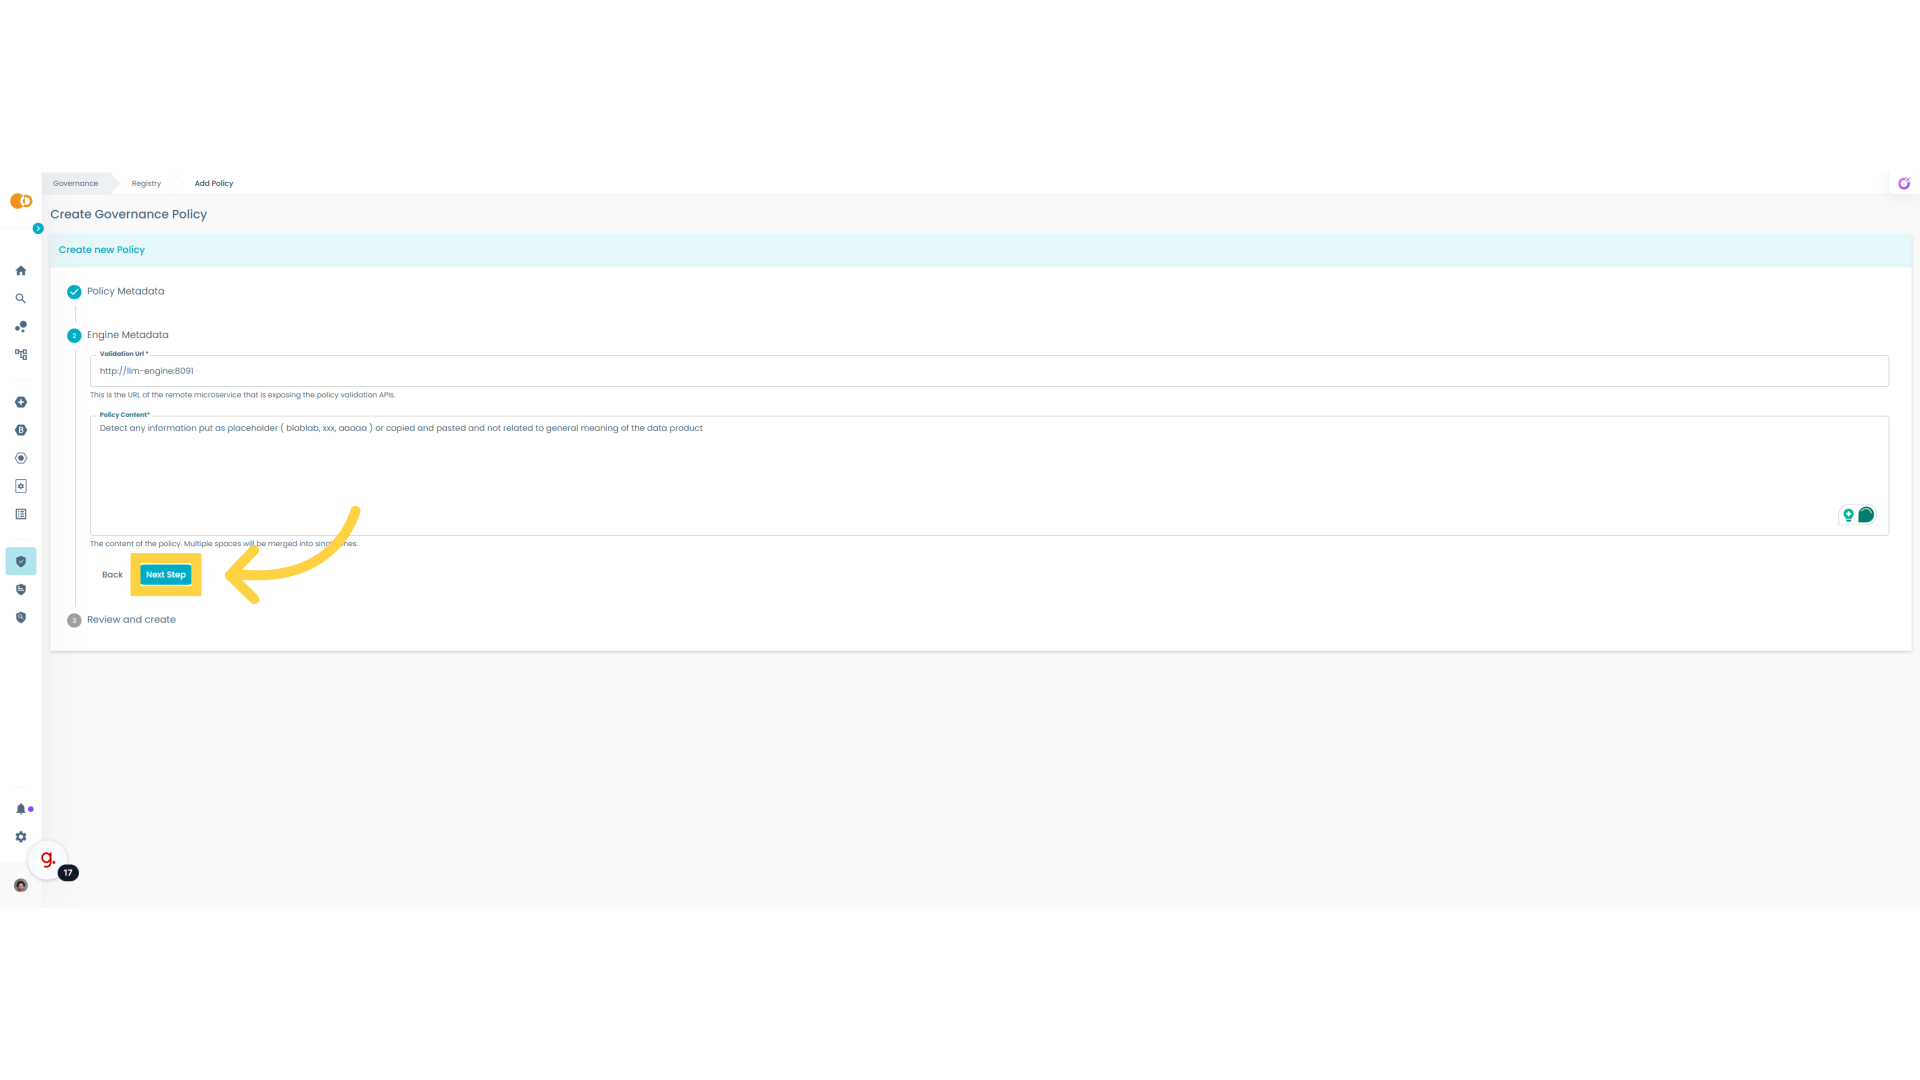
12. Move on
Move into the next section
13. Save
Now let's save this policy and see how it works
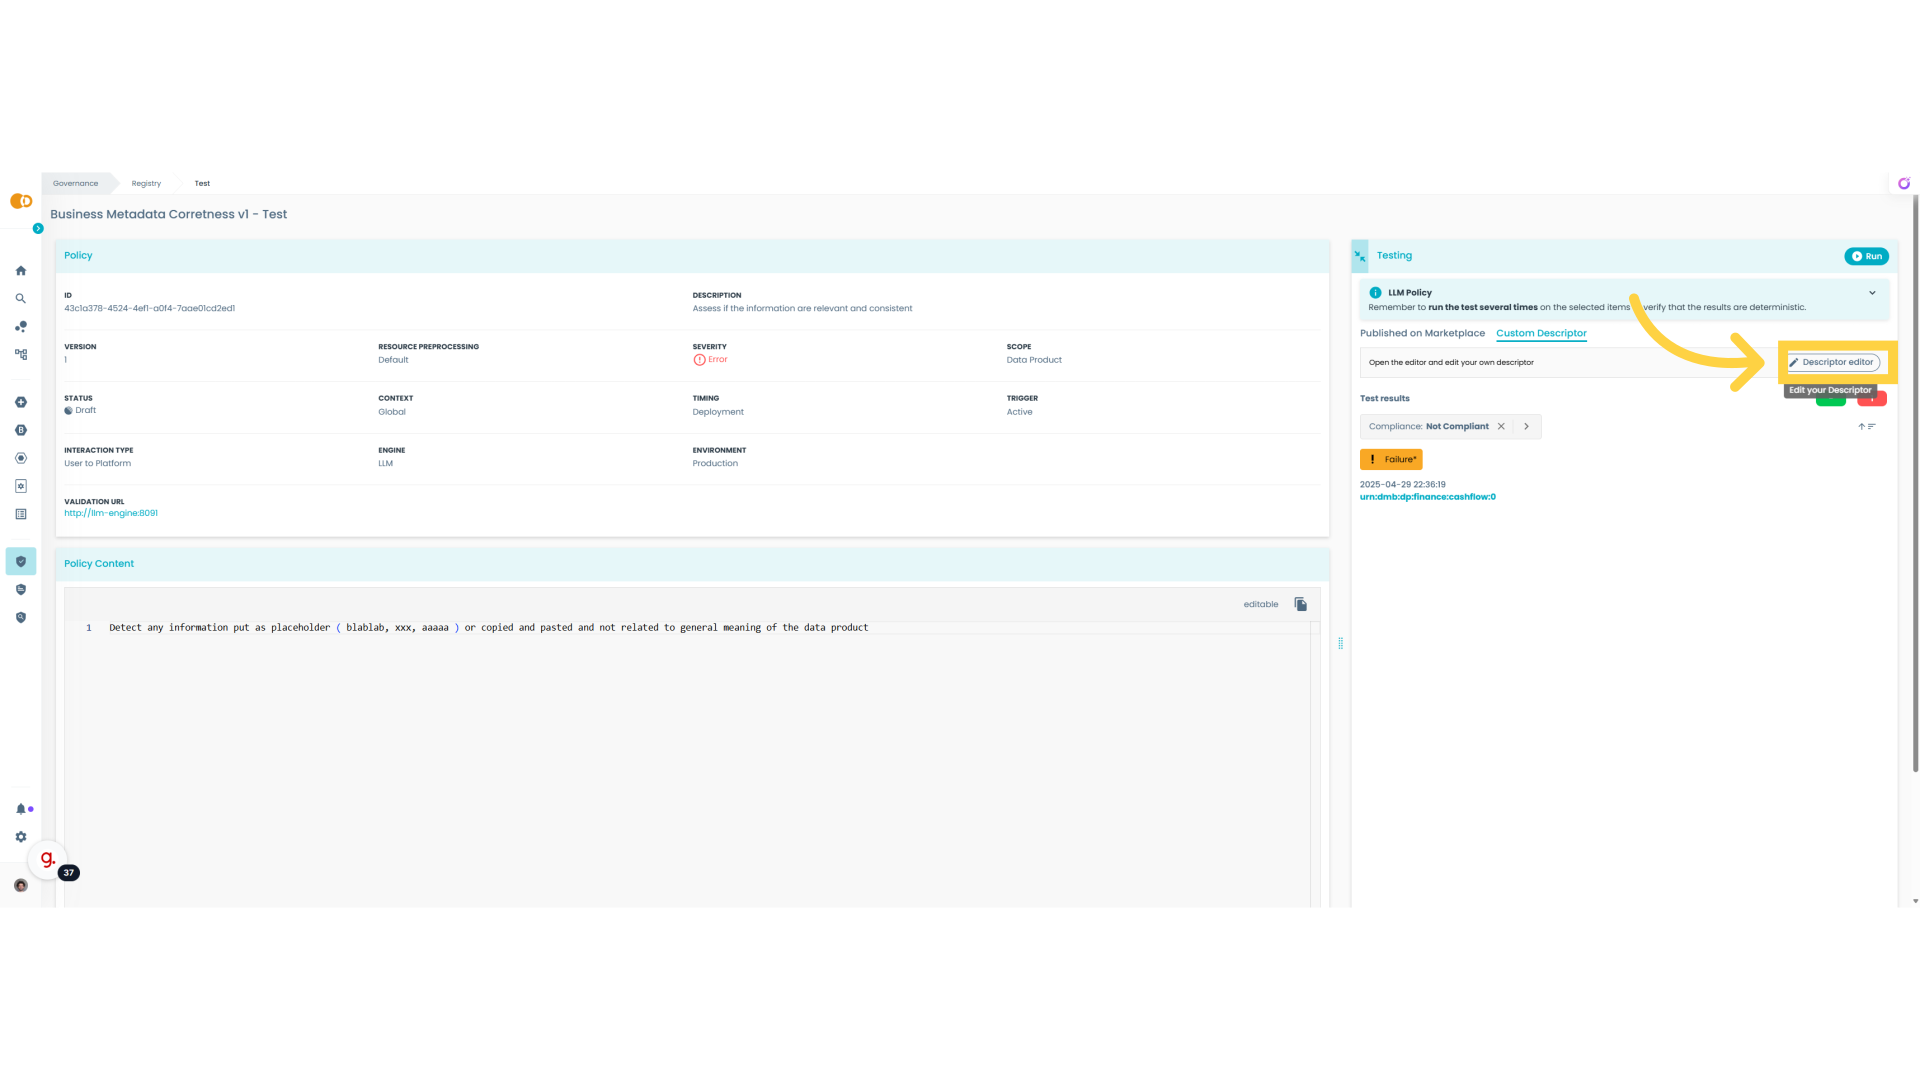
14. Custom Descriptor
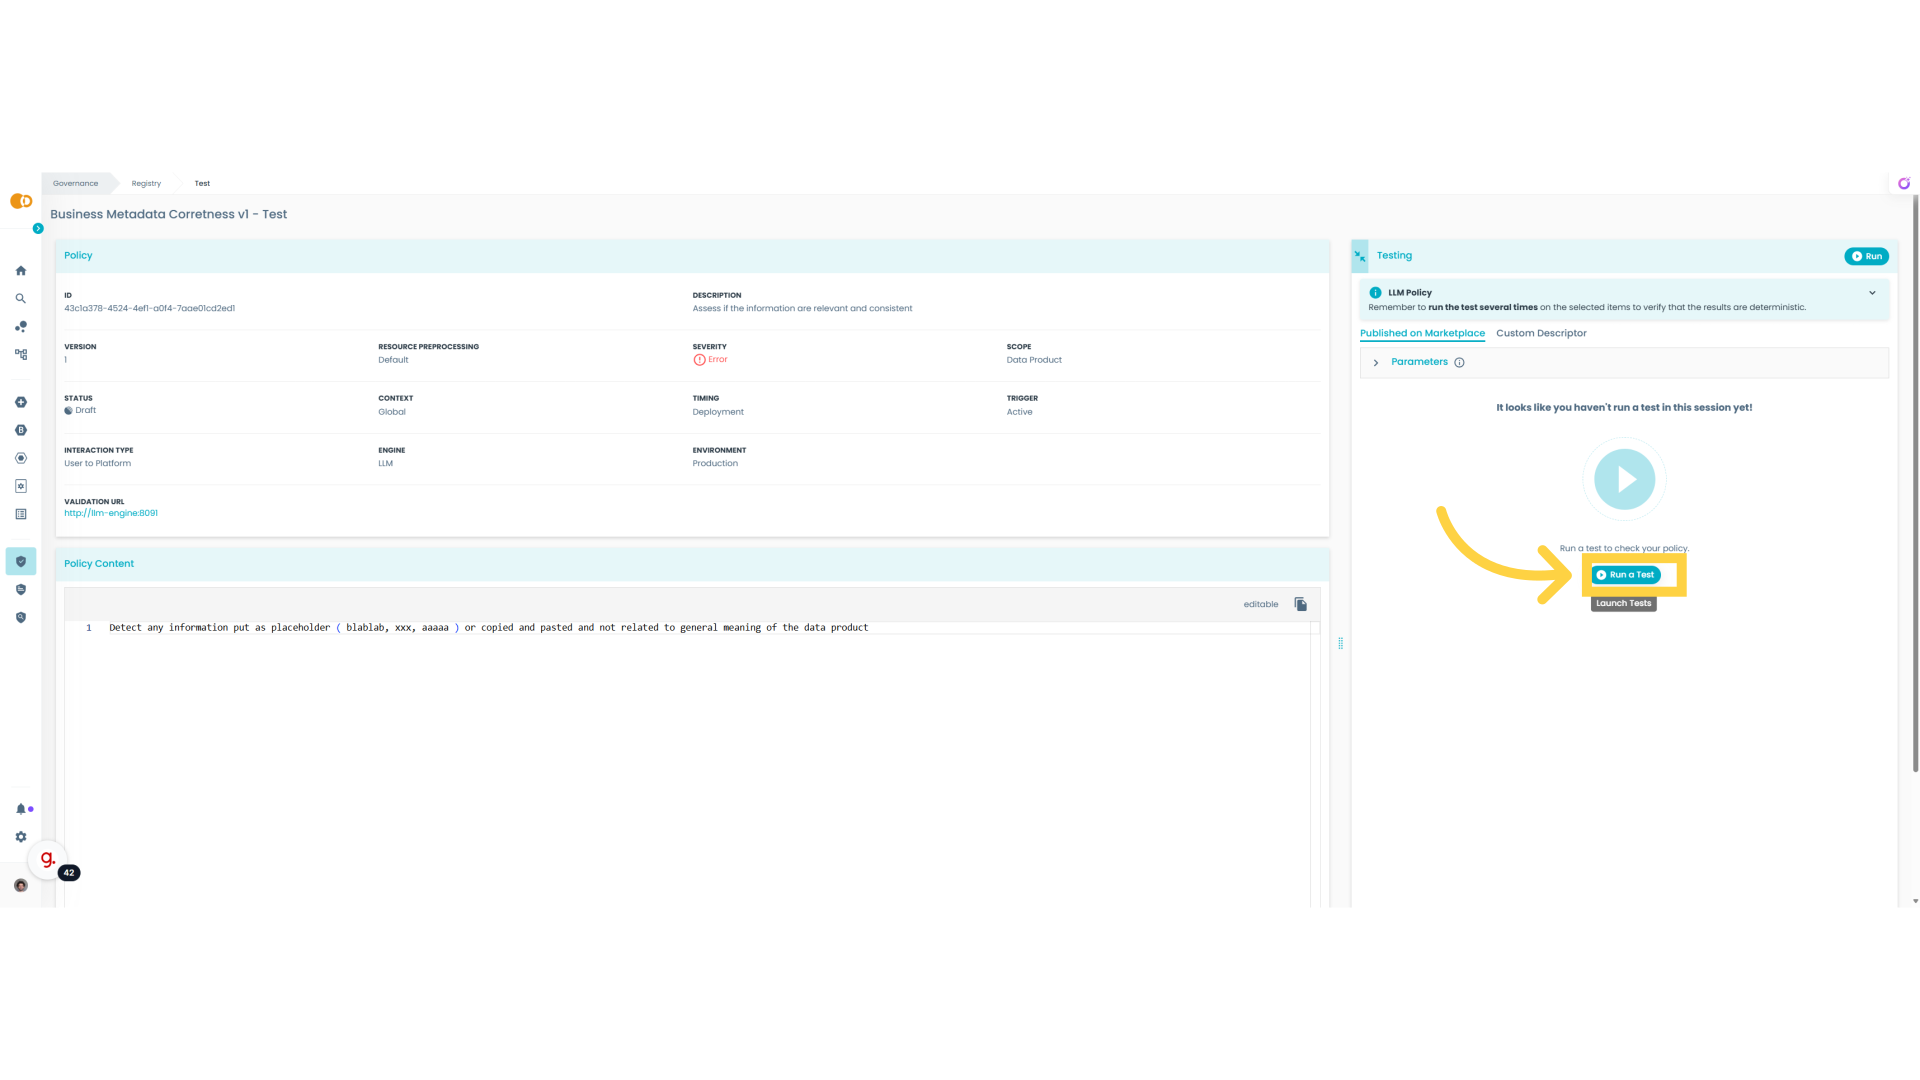
The policy has been created, and it is now possible to test it. The best way to test an LLM policy is to leverage a custom data product descriptor. This way, we can easily iterate on testing new prompts and descriptors. It is recommended to test LLM policies extensively to check their deterministic capability.
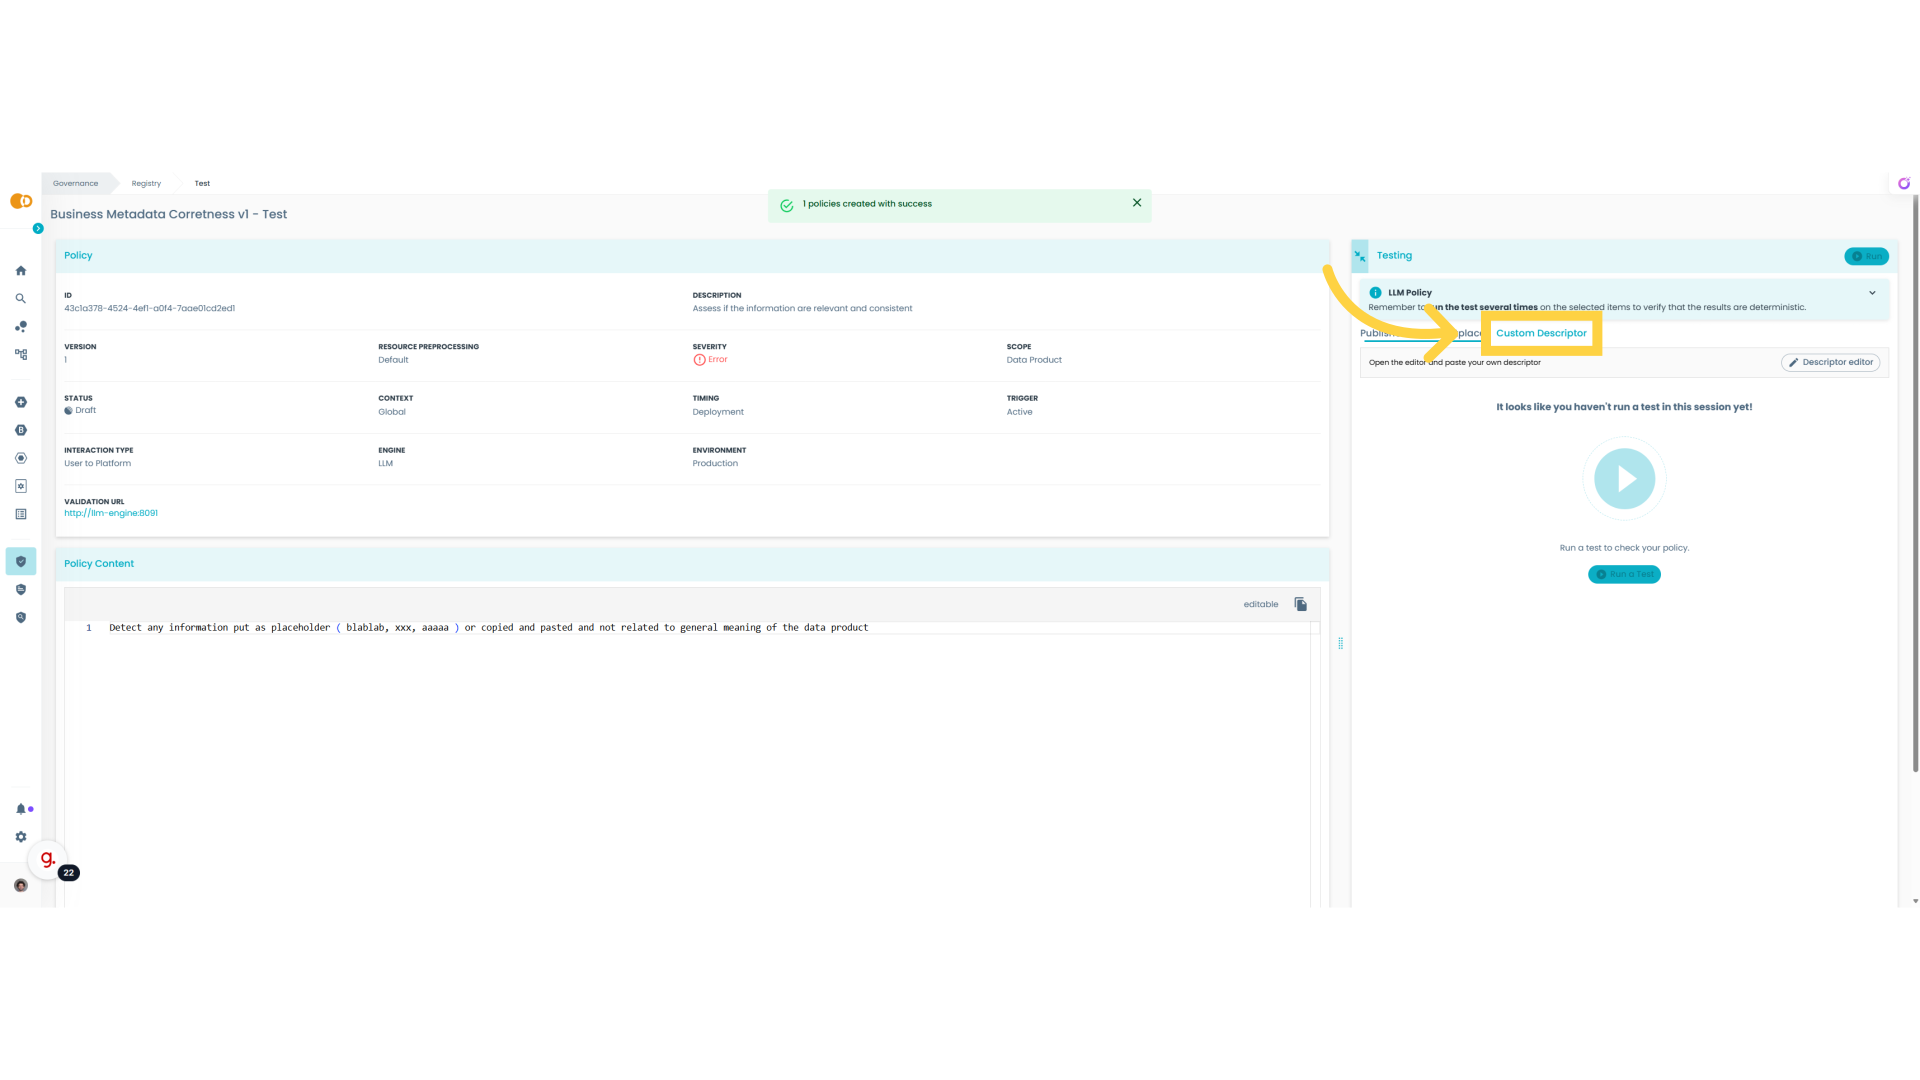
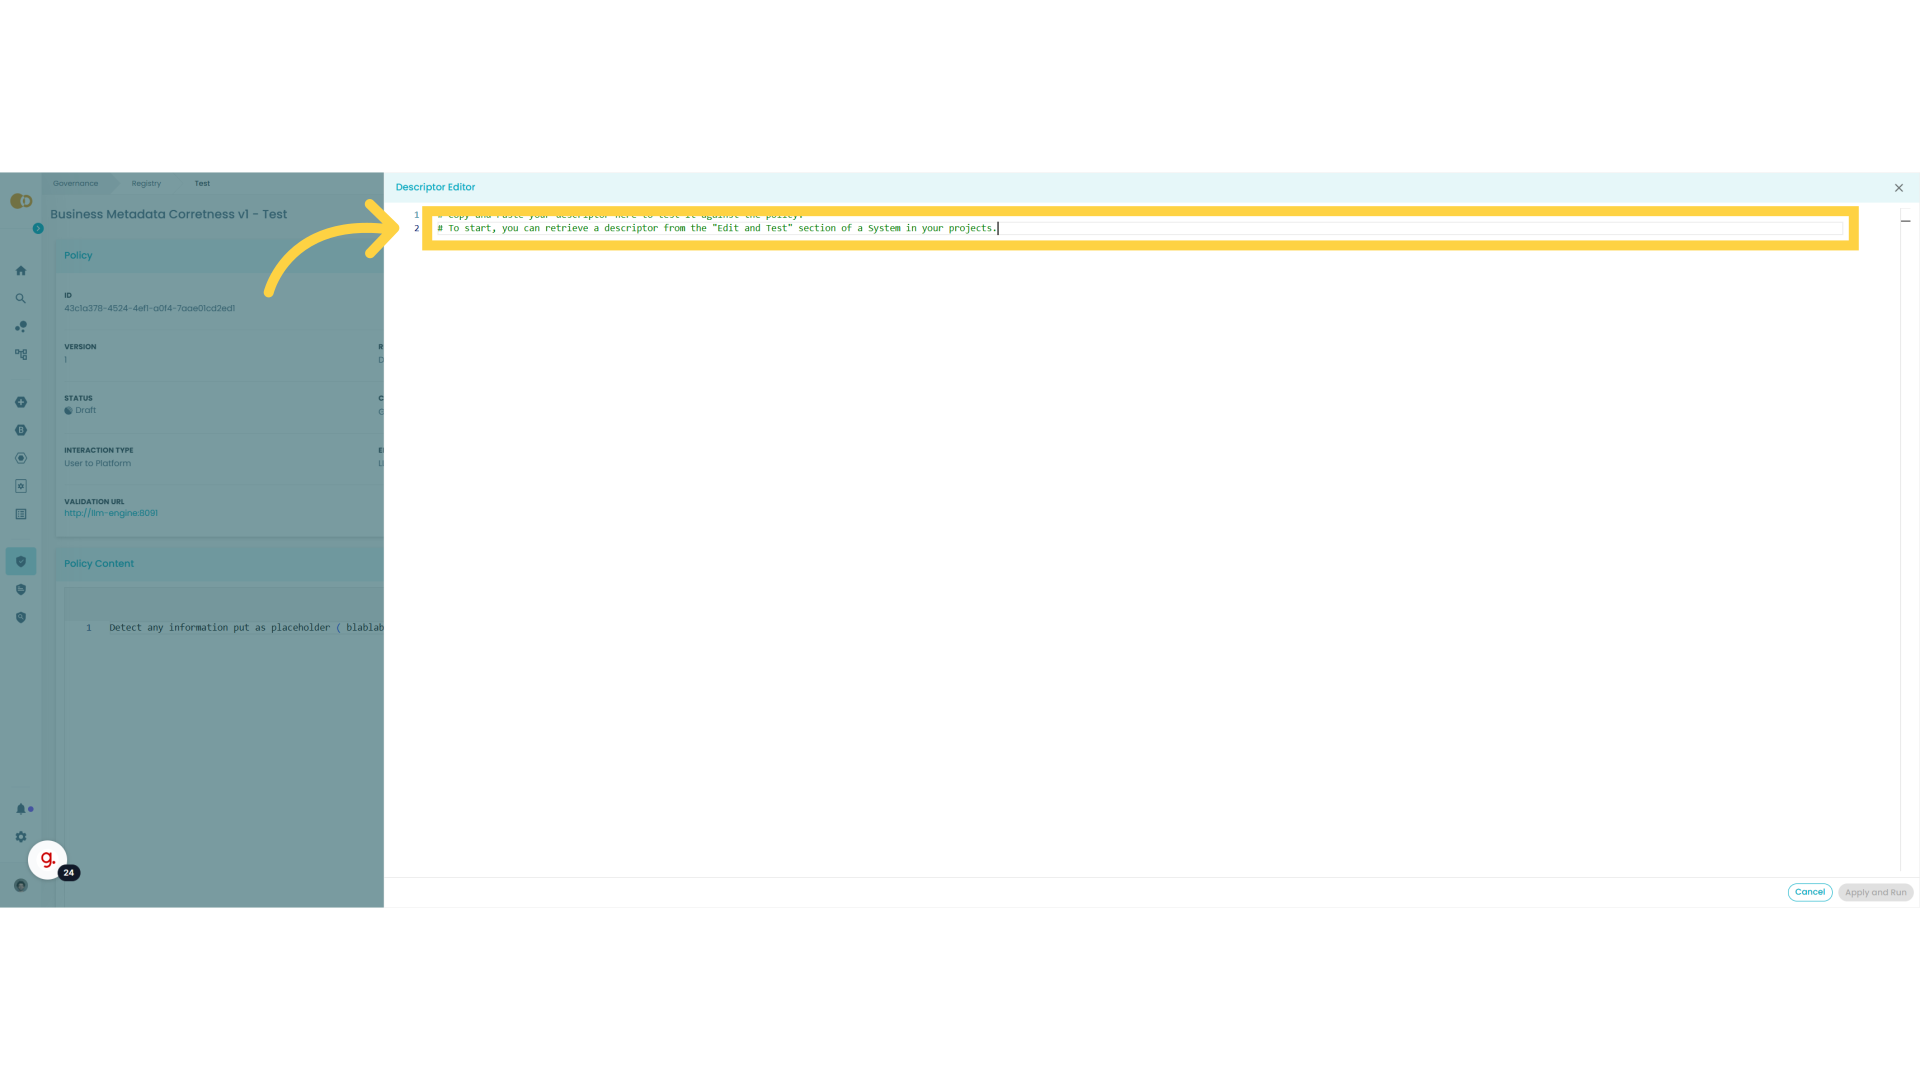
15. Open Descriptor editor
Open the Descriptor editor.

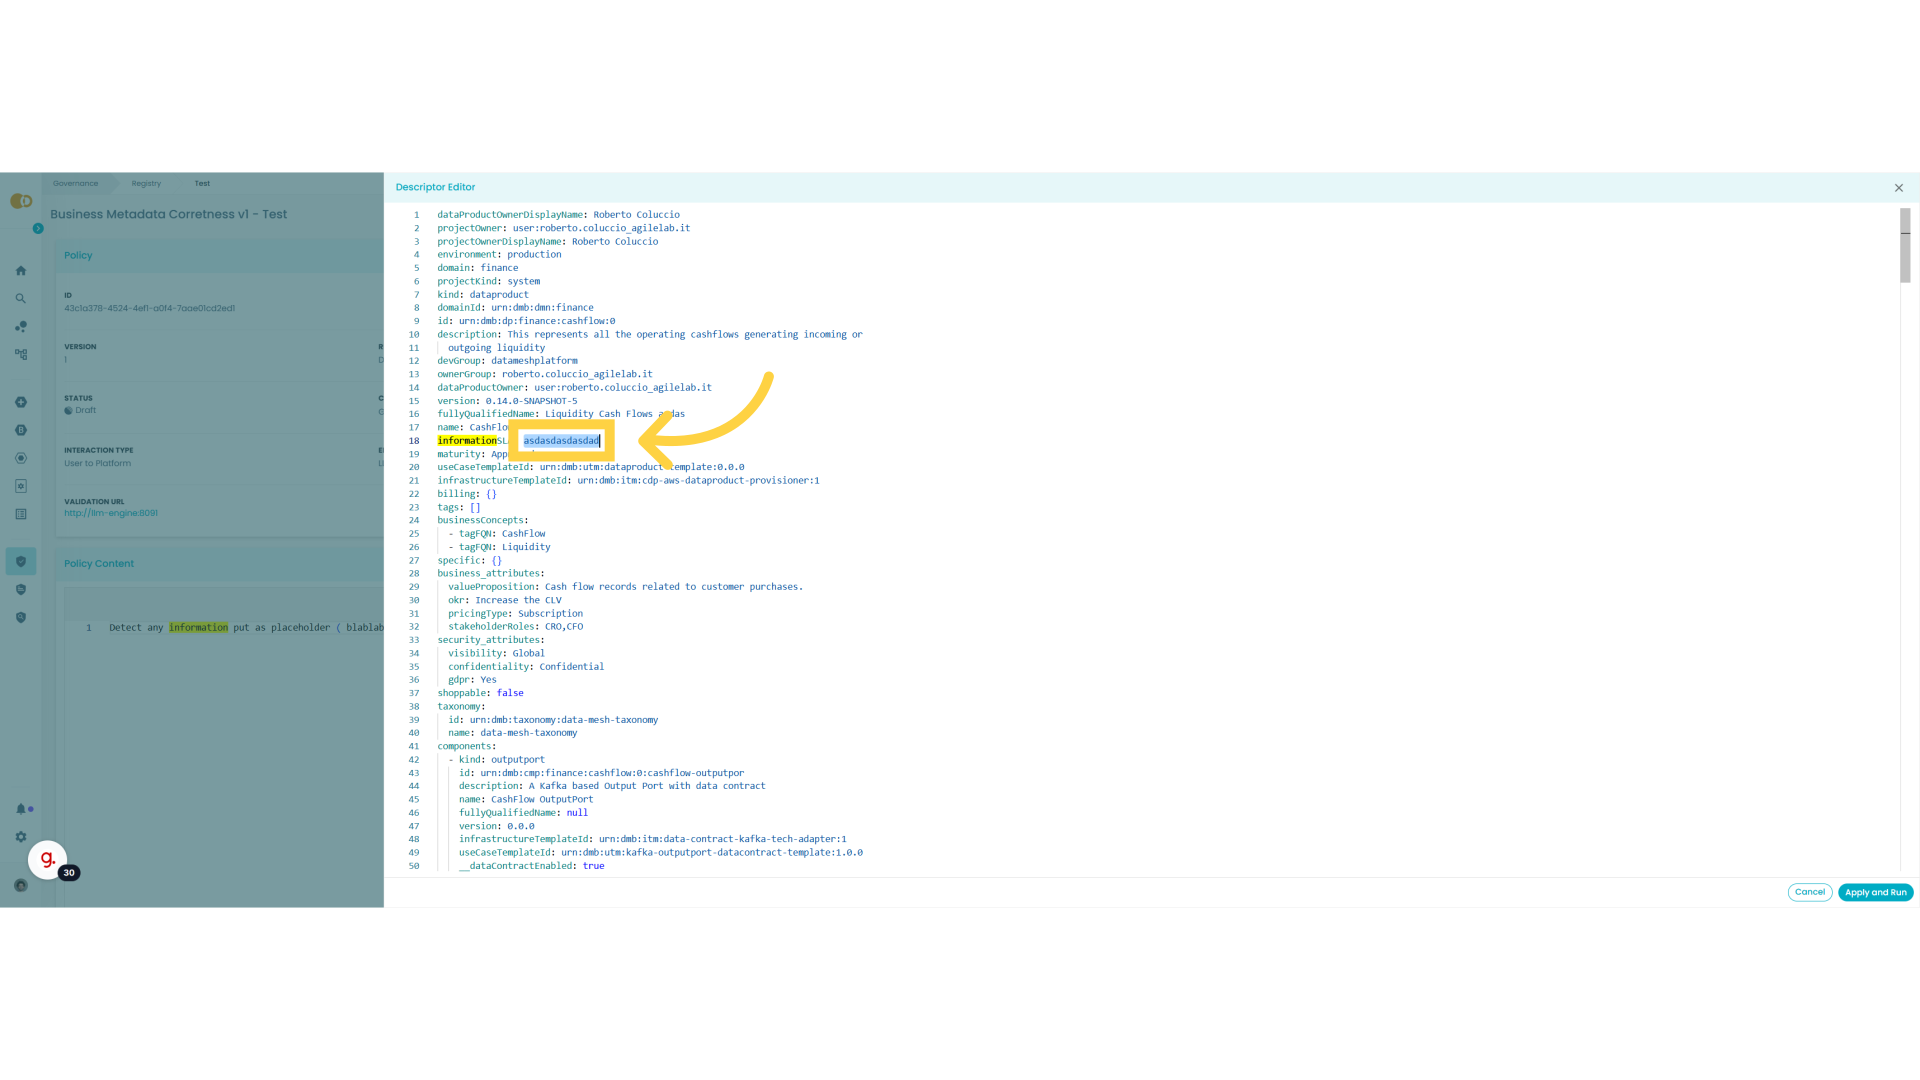
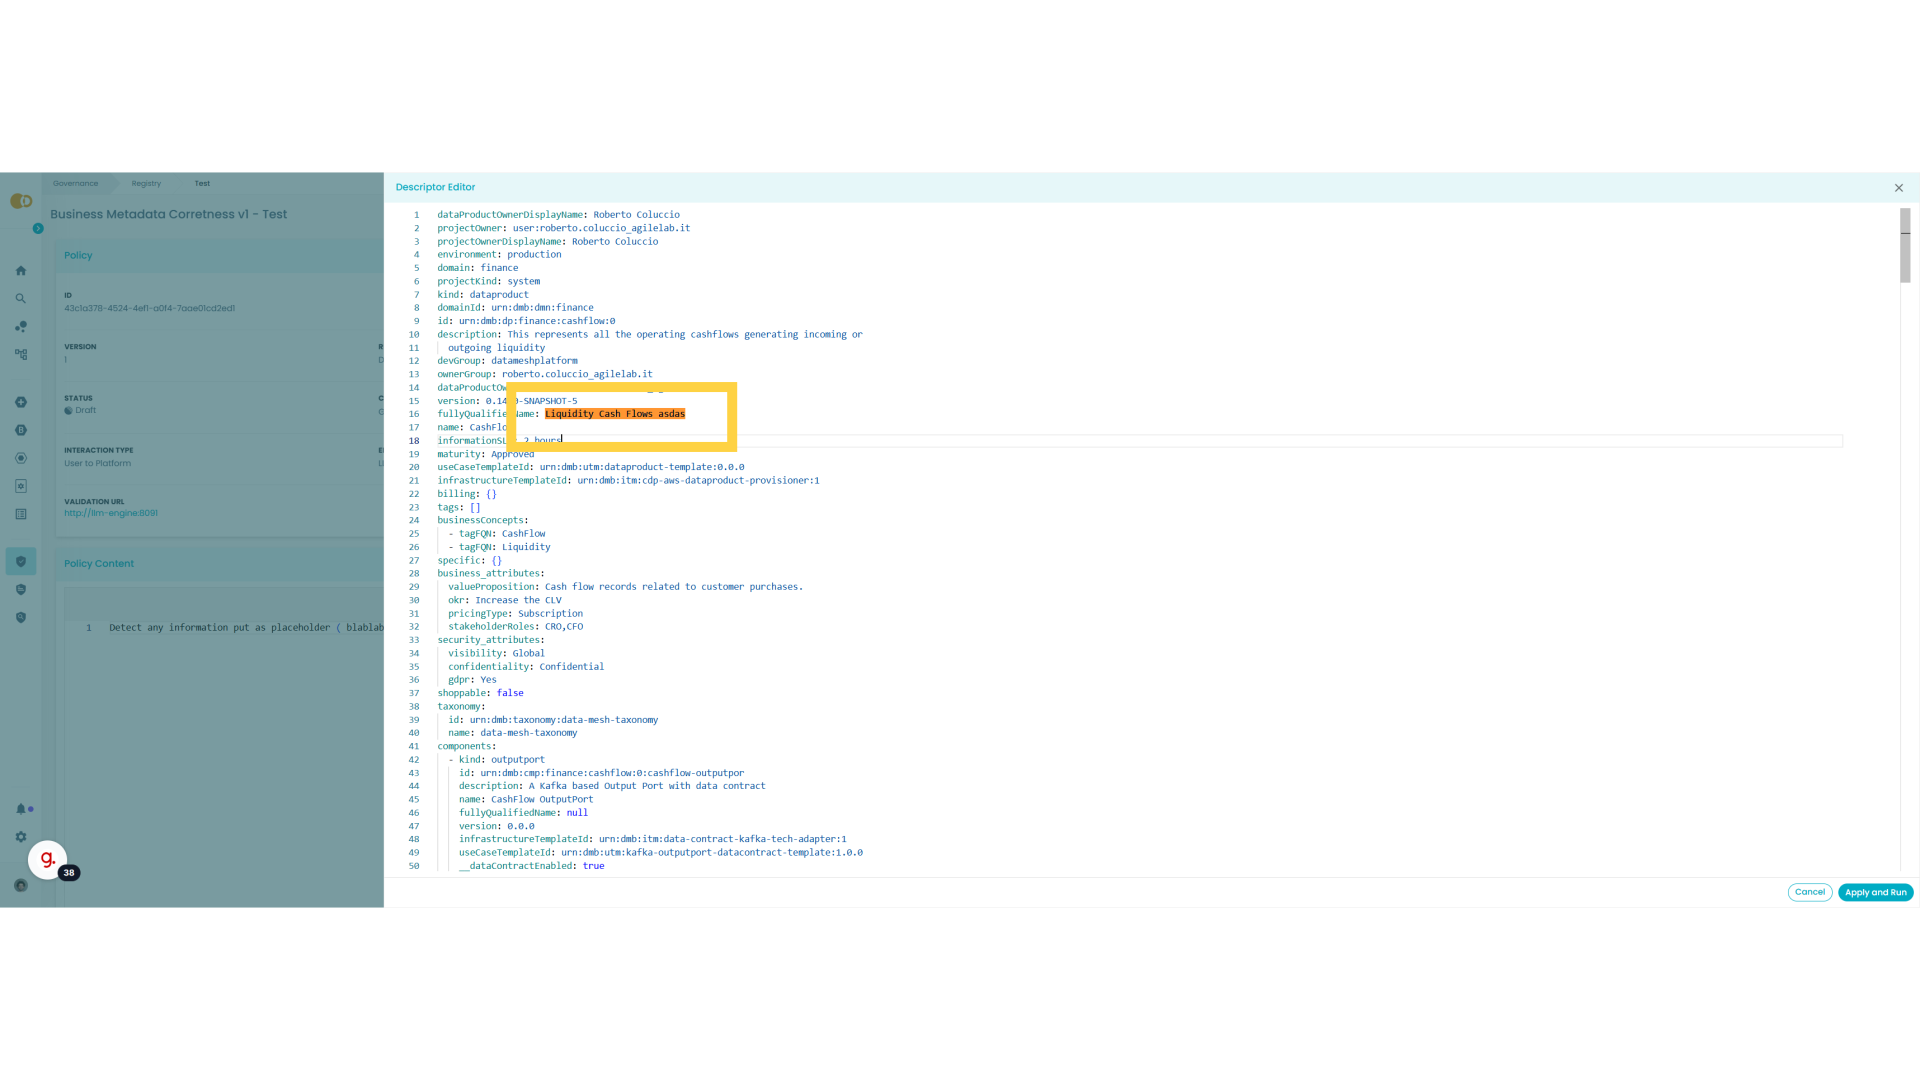
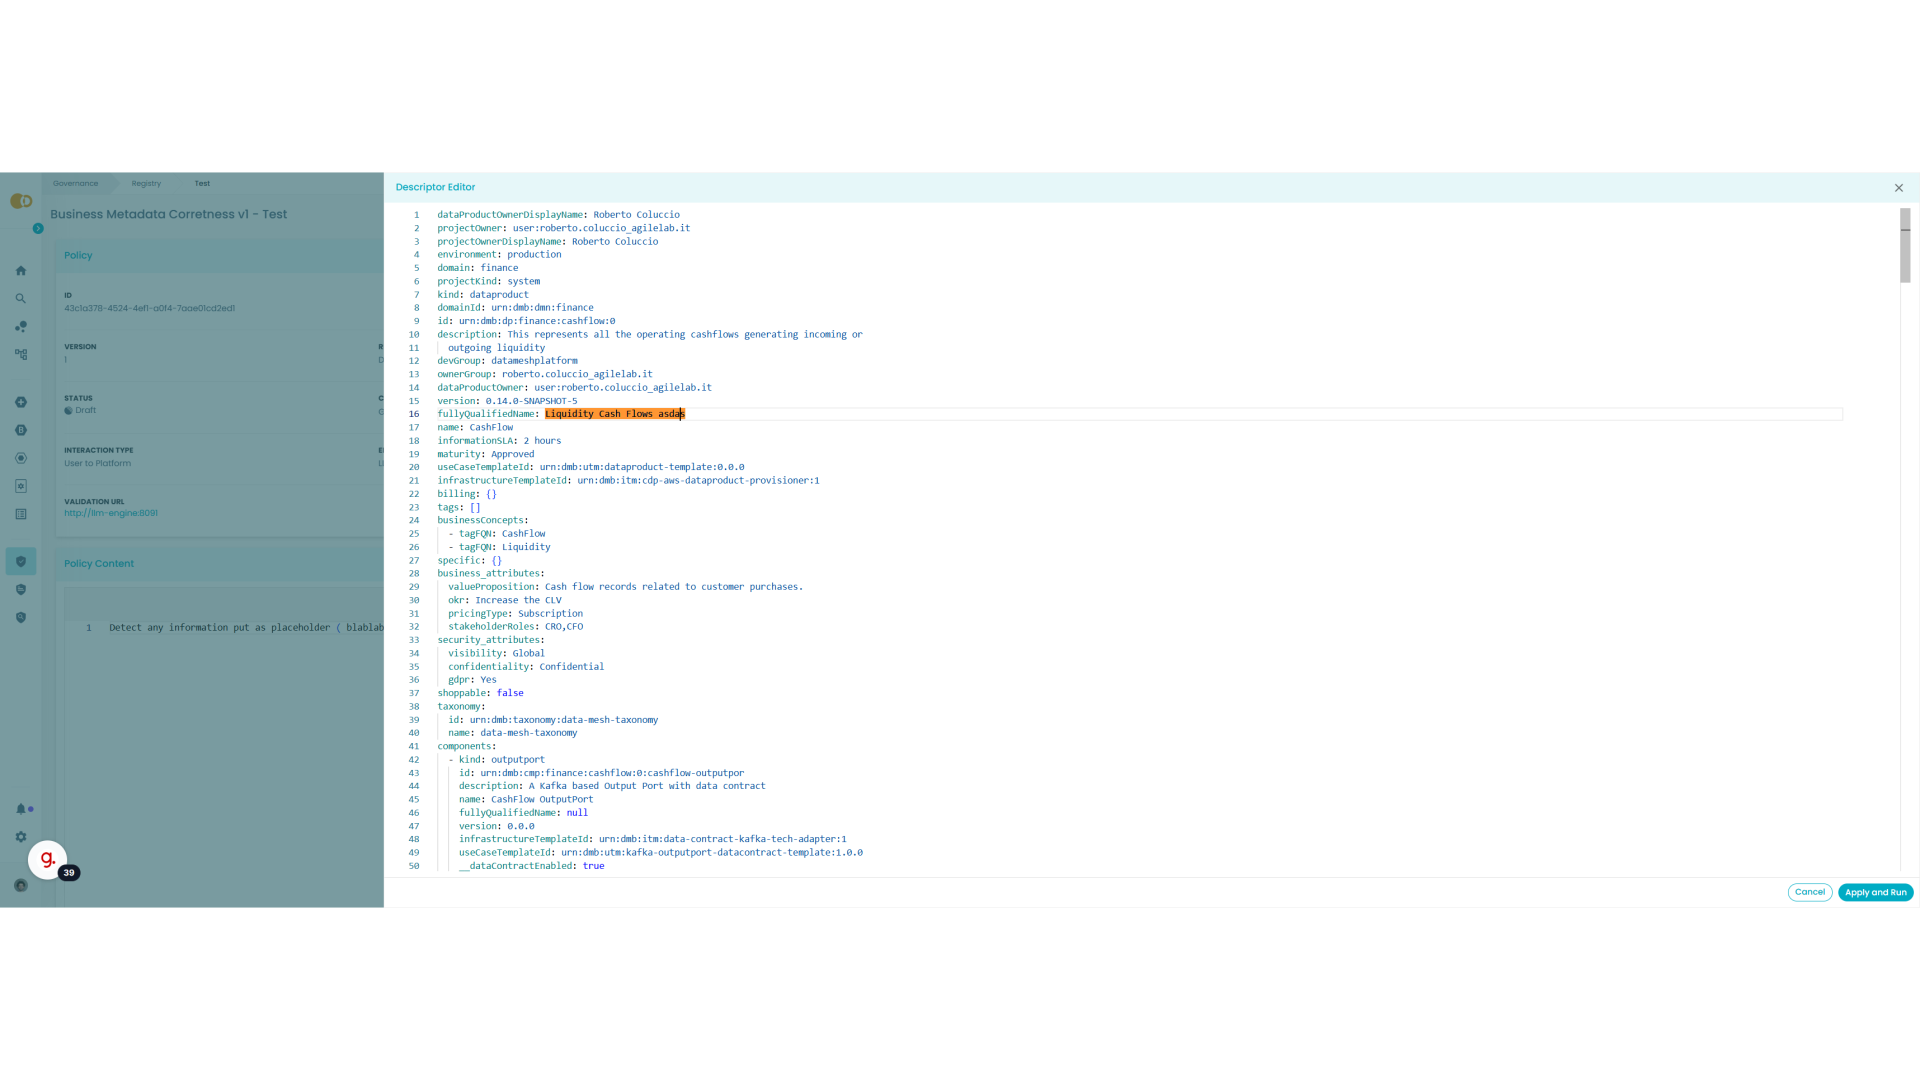
16. Paste your descriptor
In this editor is possible to paste and edit the descriptor
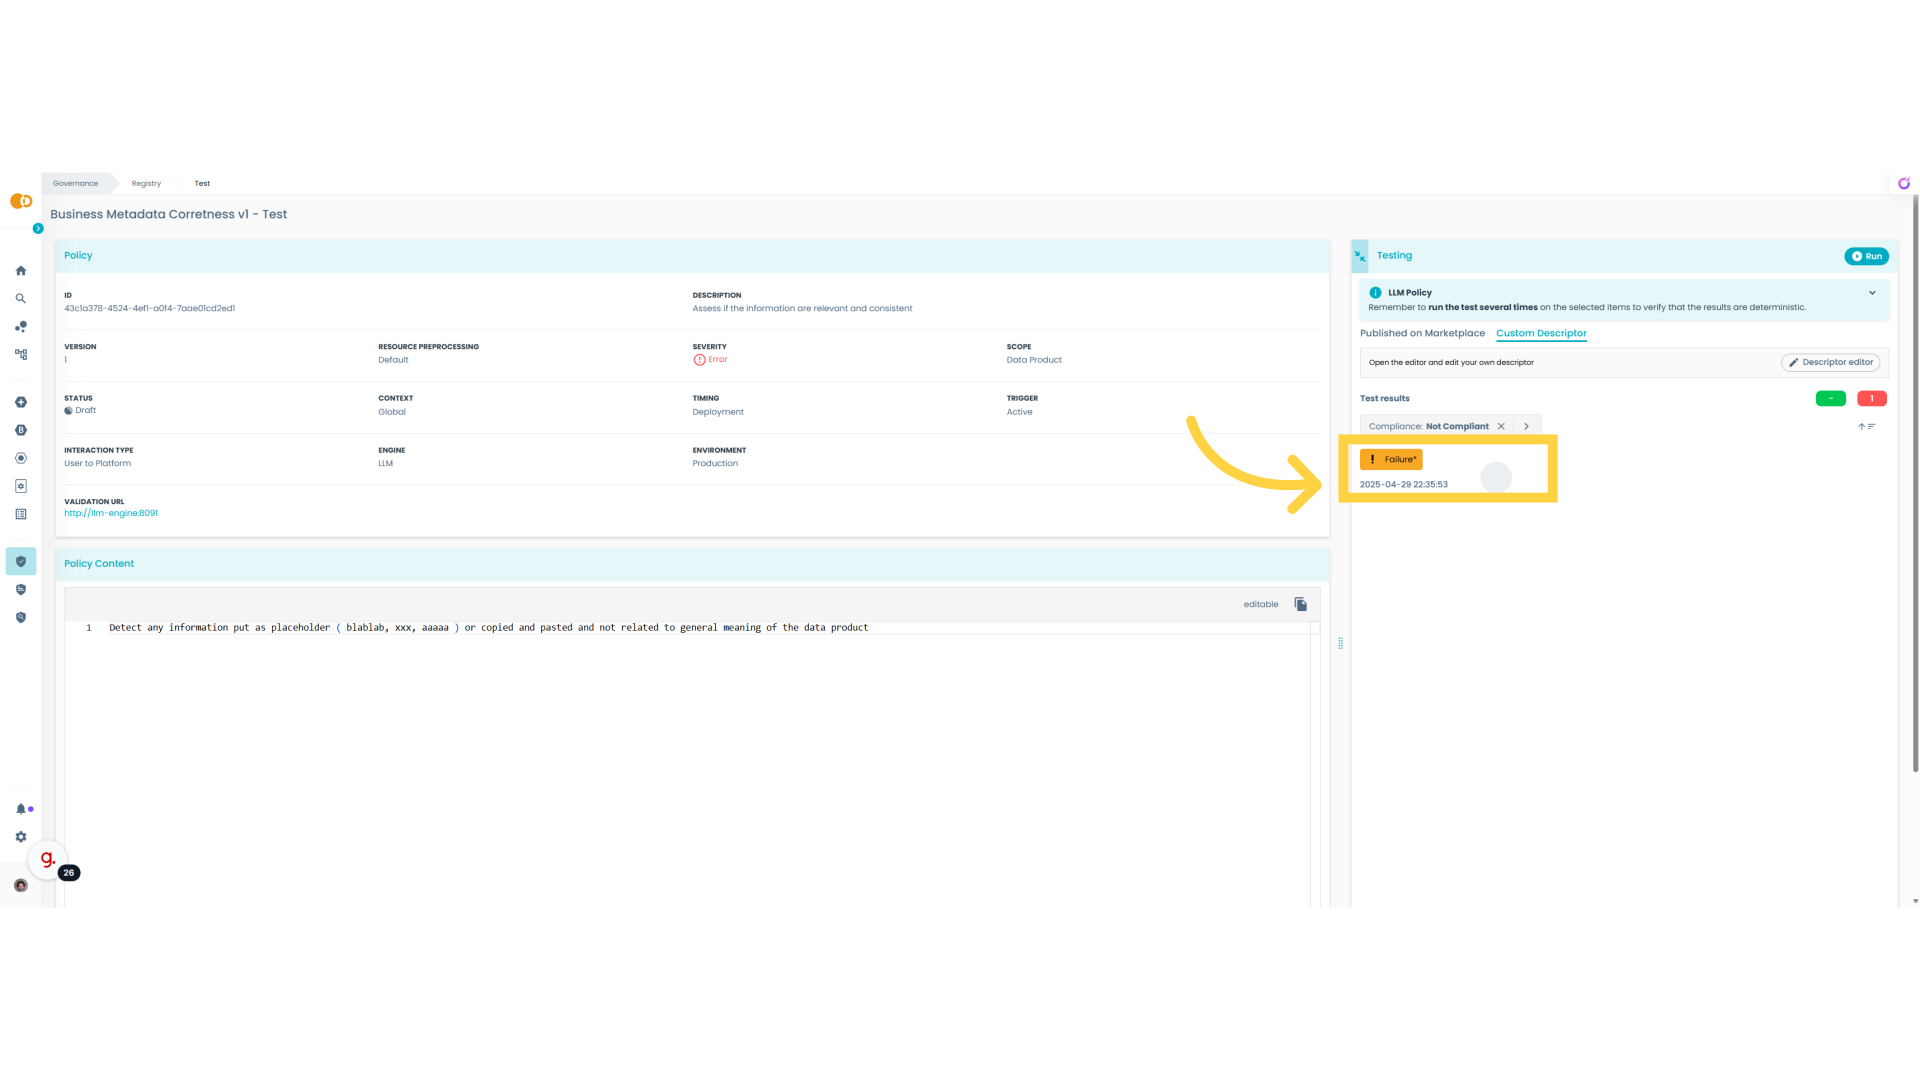
17. Apply and Run
Now we paste the descriptor of a data product exposing cash flow information in a banking context. this data product has a couple of output ports with related schemas and business metadata. Now let's see what the policy is capable to detect

18. Test Results
So in this first run it seems the policy is detecting problems in the descriptor we pasted, let's see what kind of problems
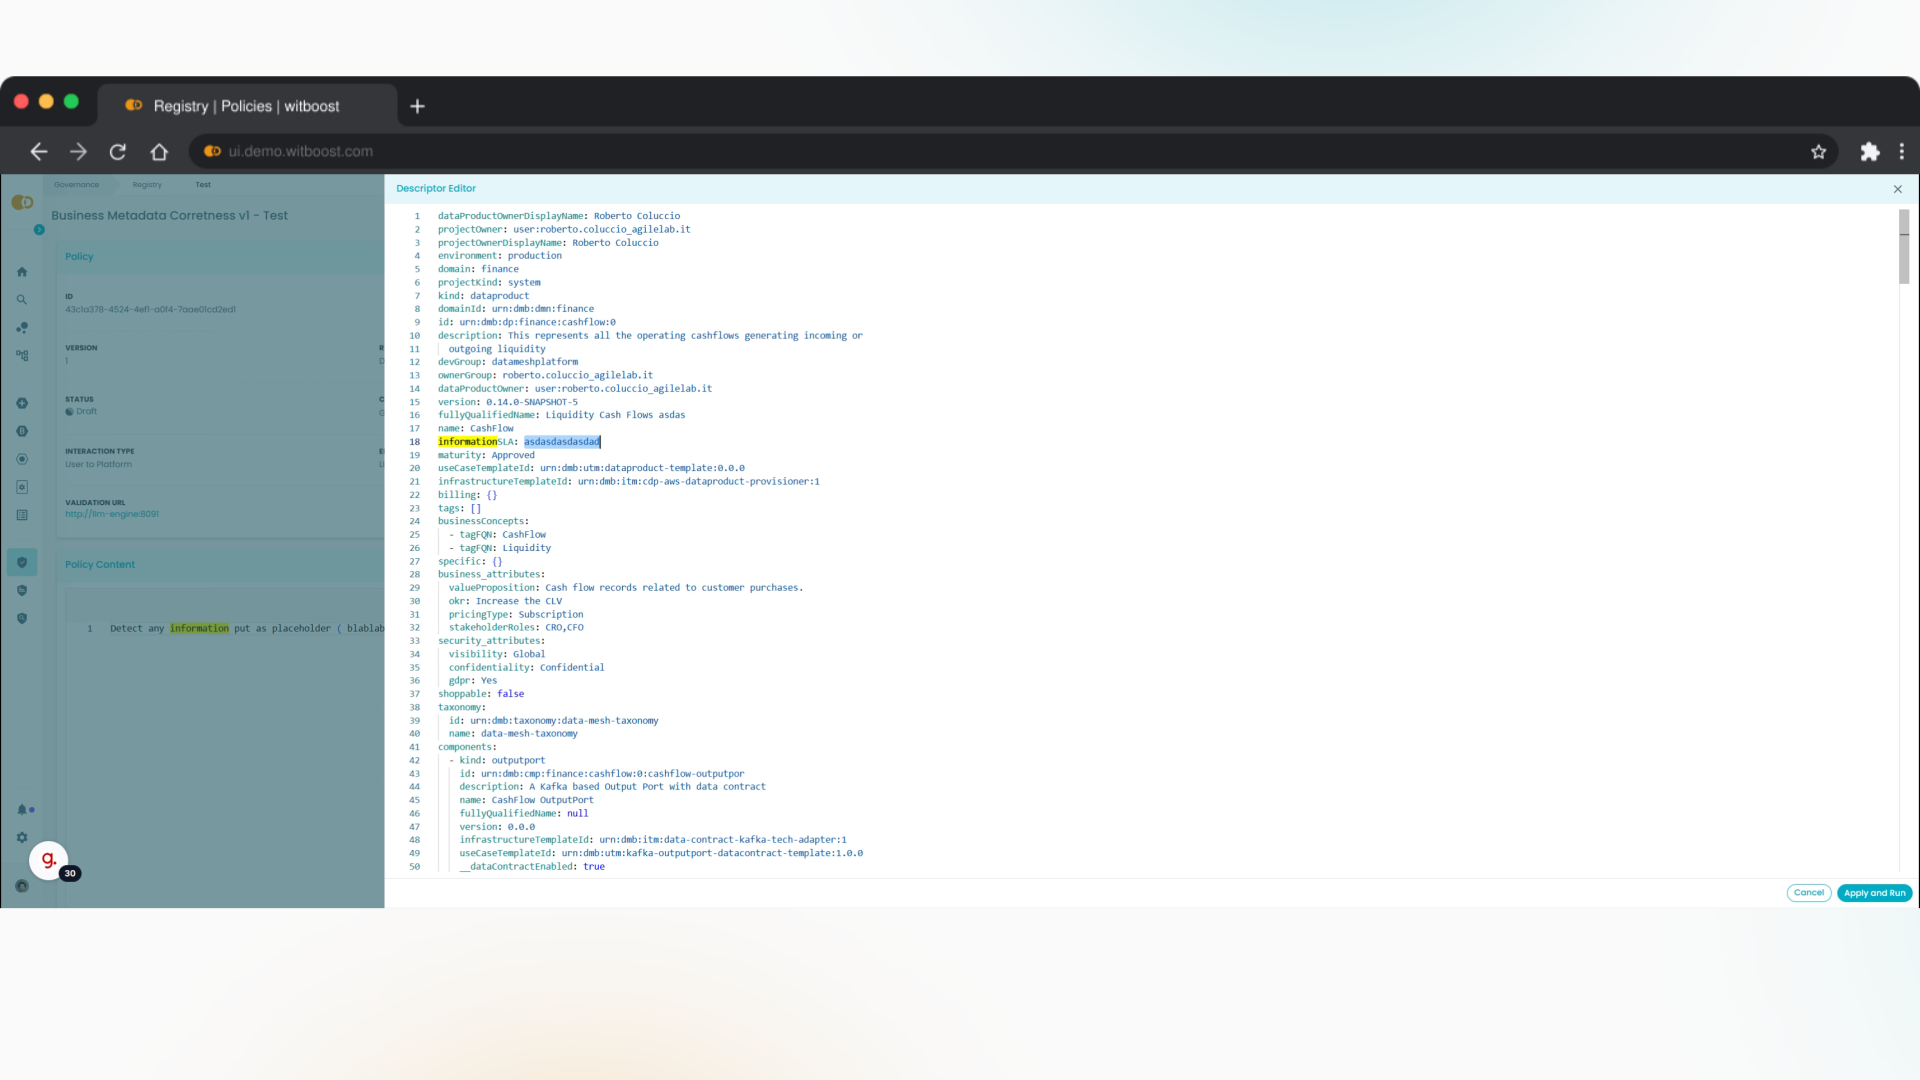
19. Check errors
As you can see in this case the policy detected that information SLA field has been populated with a placeholder

20. Return to policy
Let's return to the policy

21. Click "Descriptor editor"
Access the Descriptor editor.

22. Fix the descriptor
Now we simulate how an user will react to this policy result: he will go to the descriptor and will fix it. In this case the policy correctly detected that a placeholder has been put into the Information SLA field.
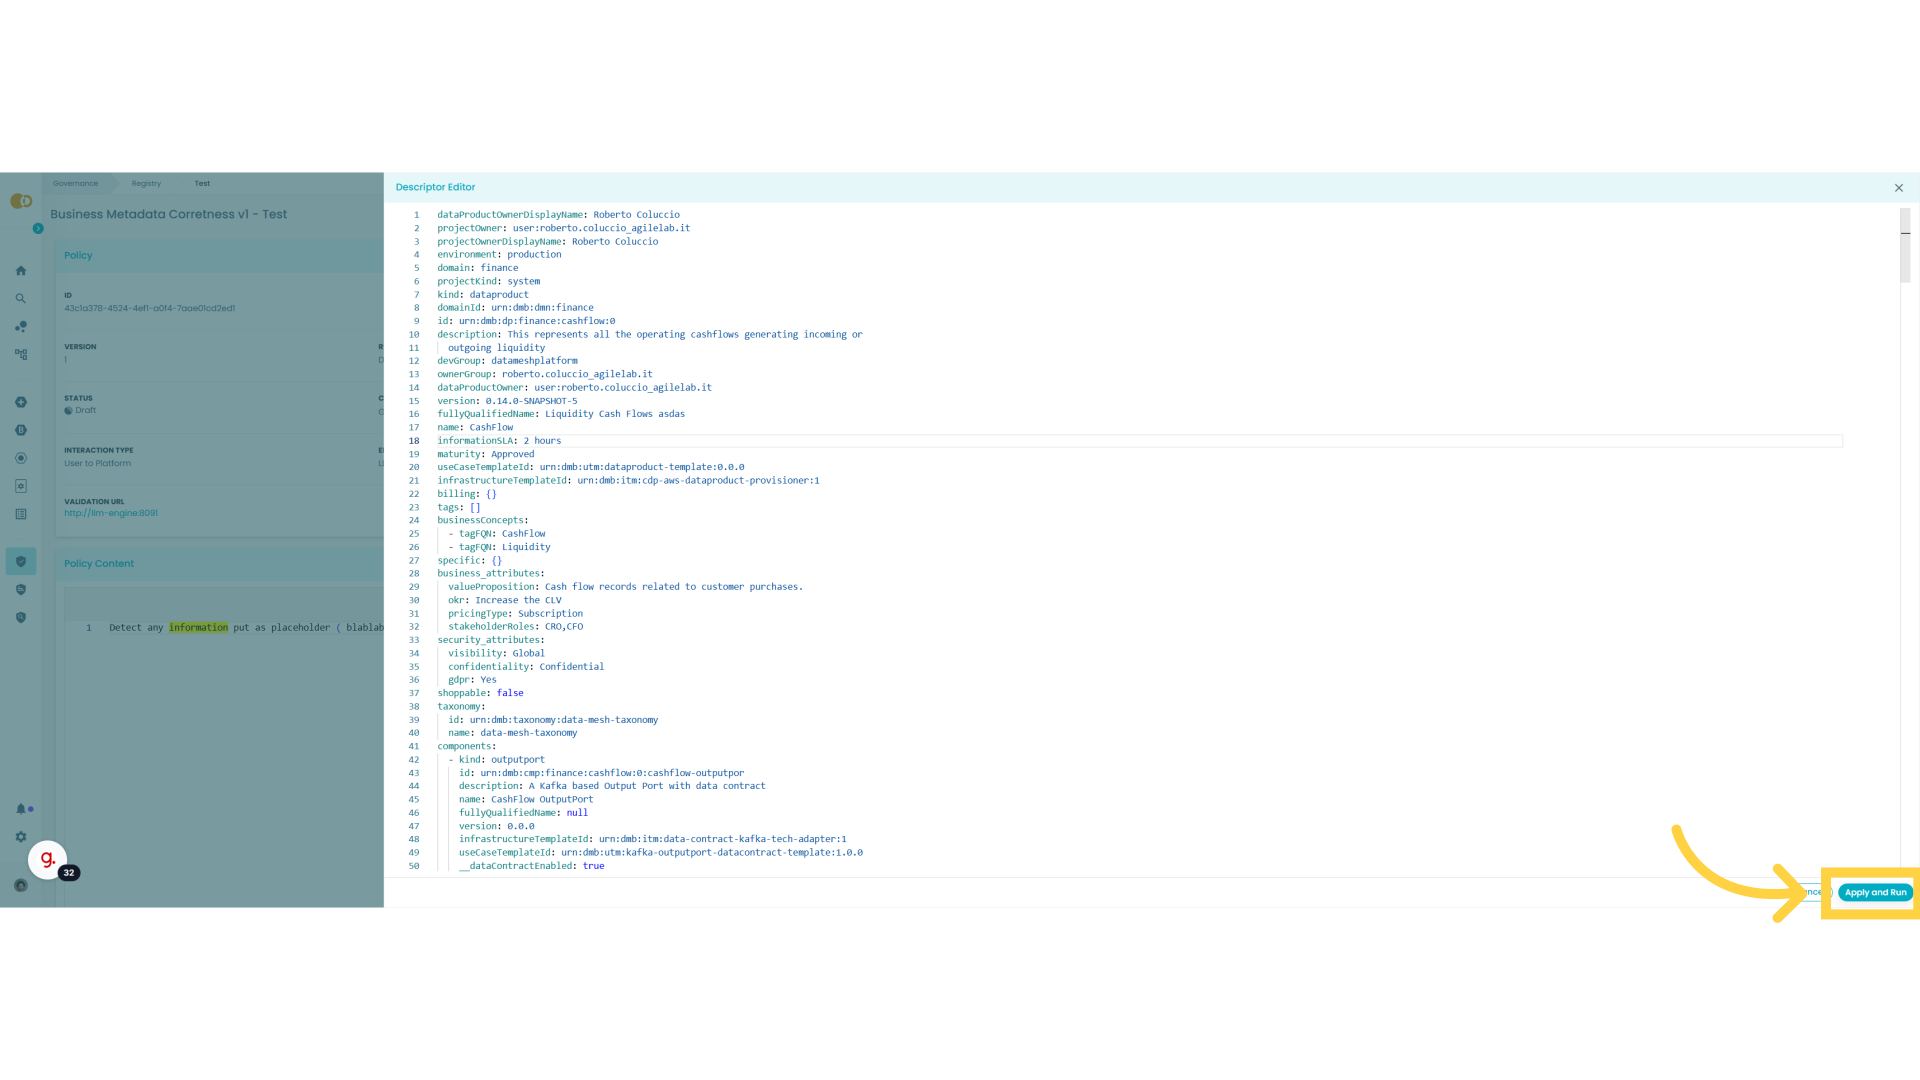
23. Let's fix it
We now remove the placeholder so we an further test the policy
24. Test Again
Let's test again the policy
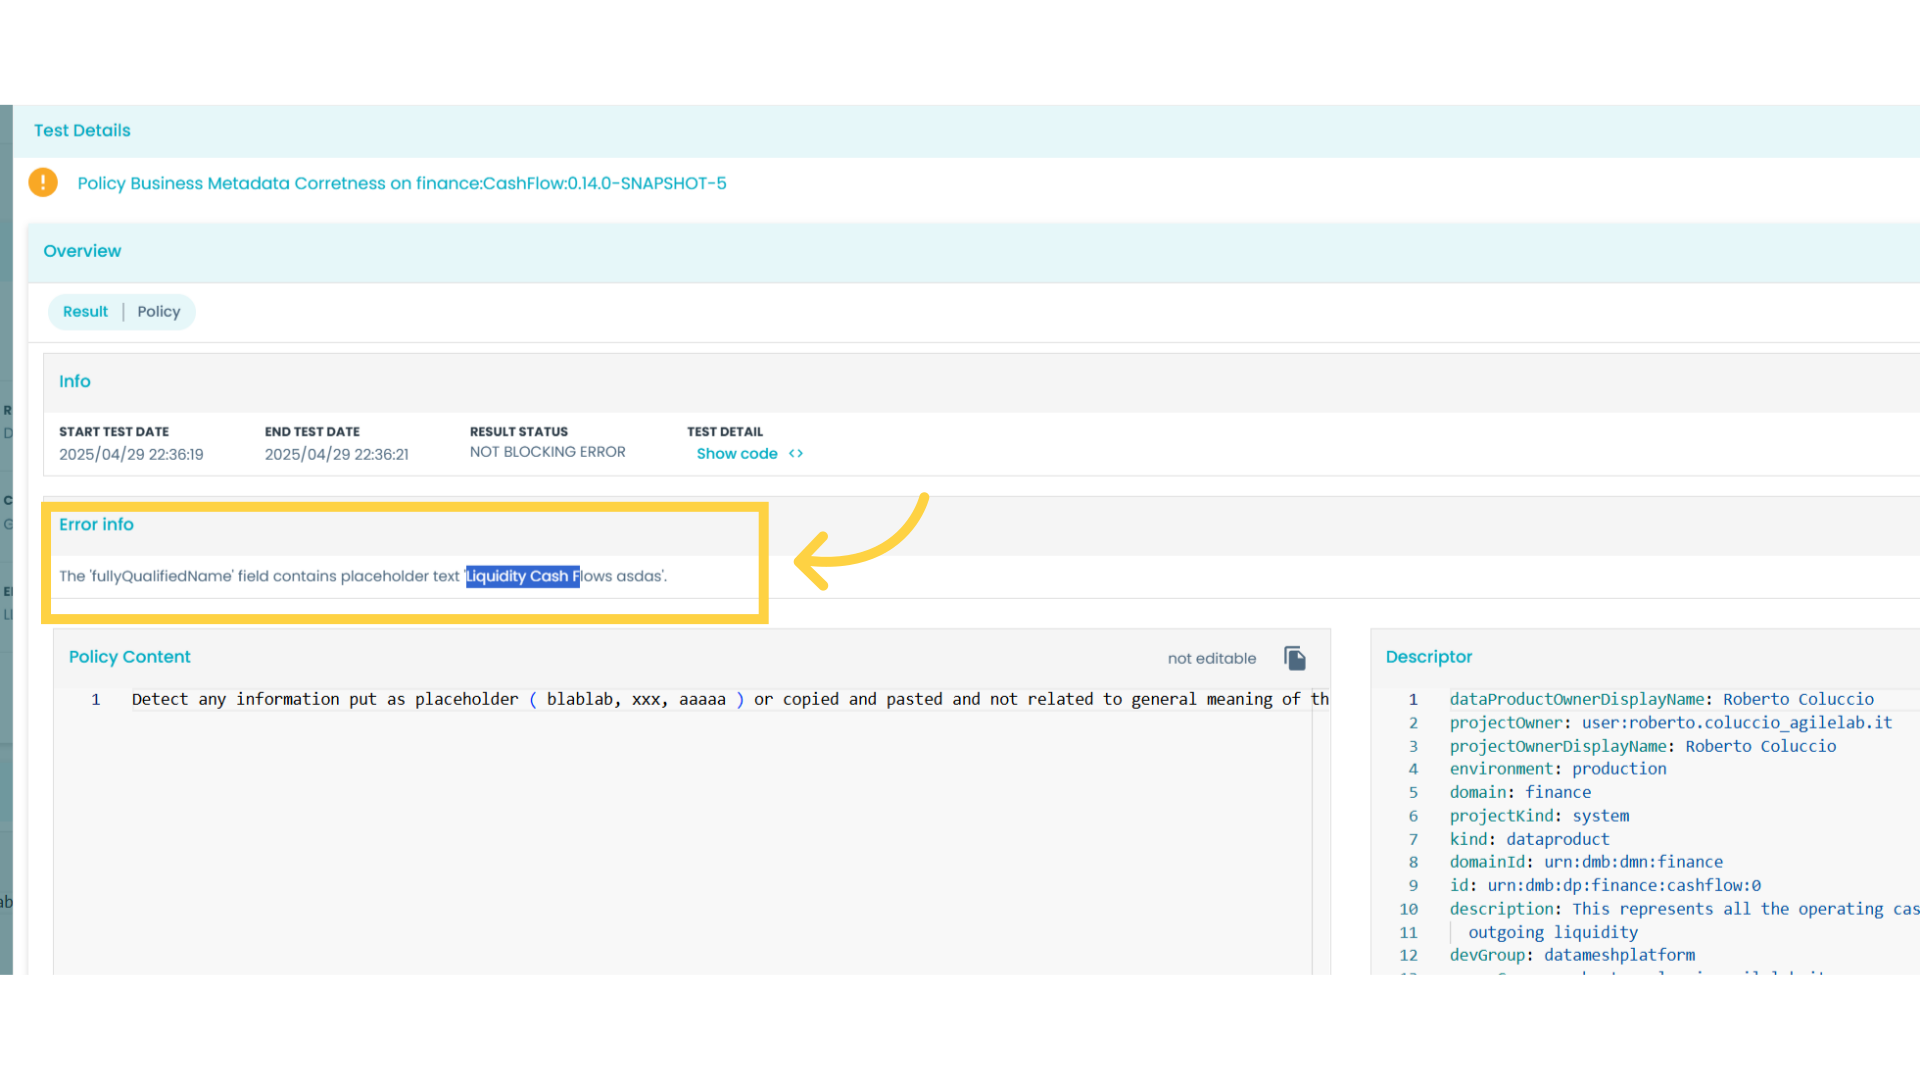
25. Still errors
There is another error to check, now we jump in and we investigate

26. Another placeholder
Also in this case seems that in the descriptor, specifically in the fully qualified name field we have another placeholder
27. Click "Descriptor editor"
Access the Descriptor editor.
28. Fix also this
Also in this case we see how the policy is helping us to clean up the descriptor. We now fi also this one to move forward.
29. Remove placeholder
So the policy seems to do its job
30. Test on Marketplace
So after this preliminary test with a custom descriptor, we can test this new policy all the data products already present in the marketplace
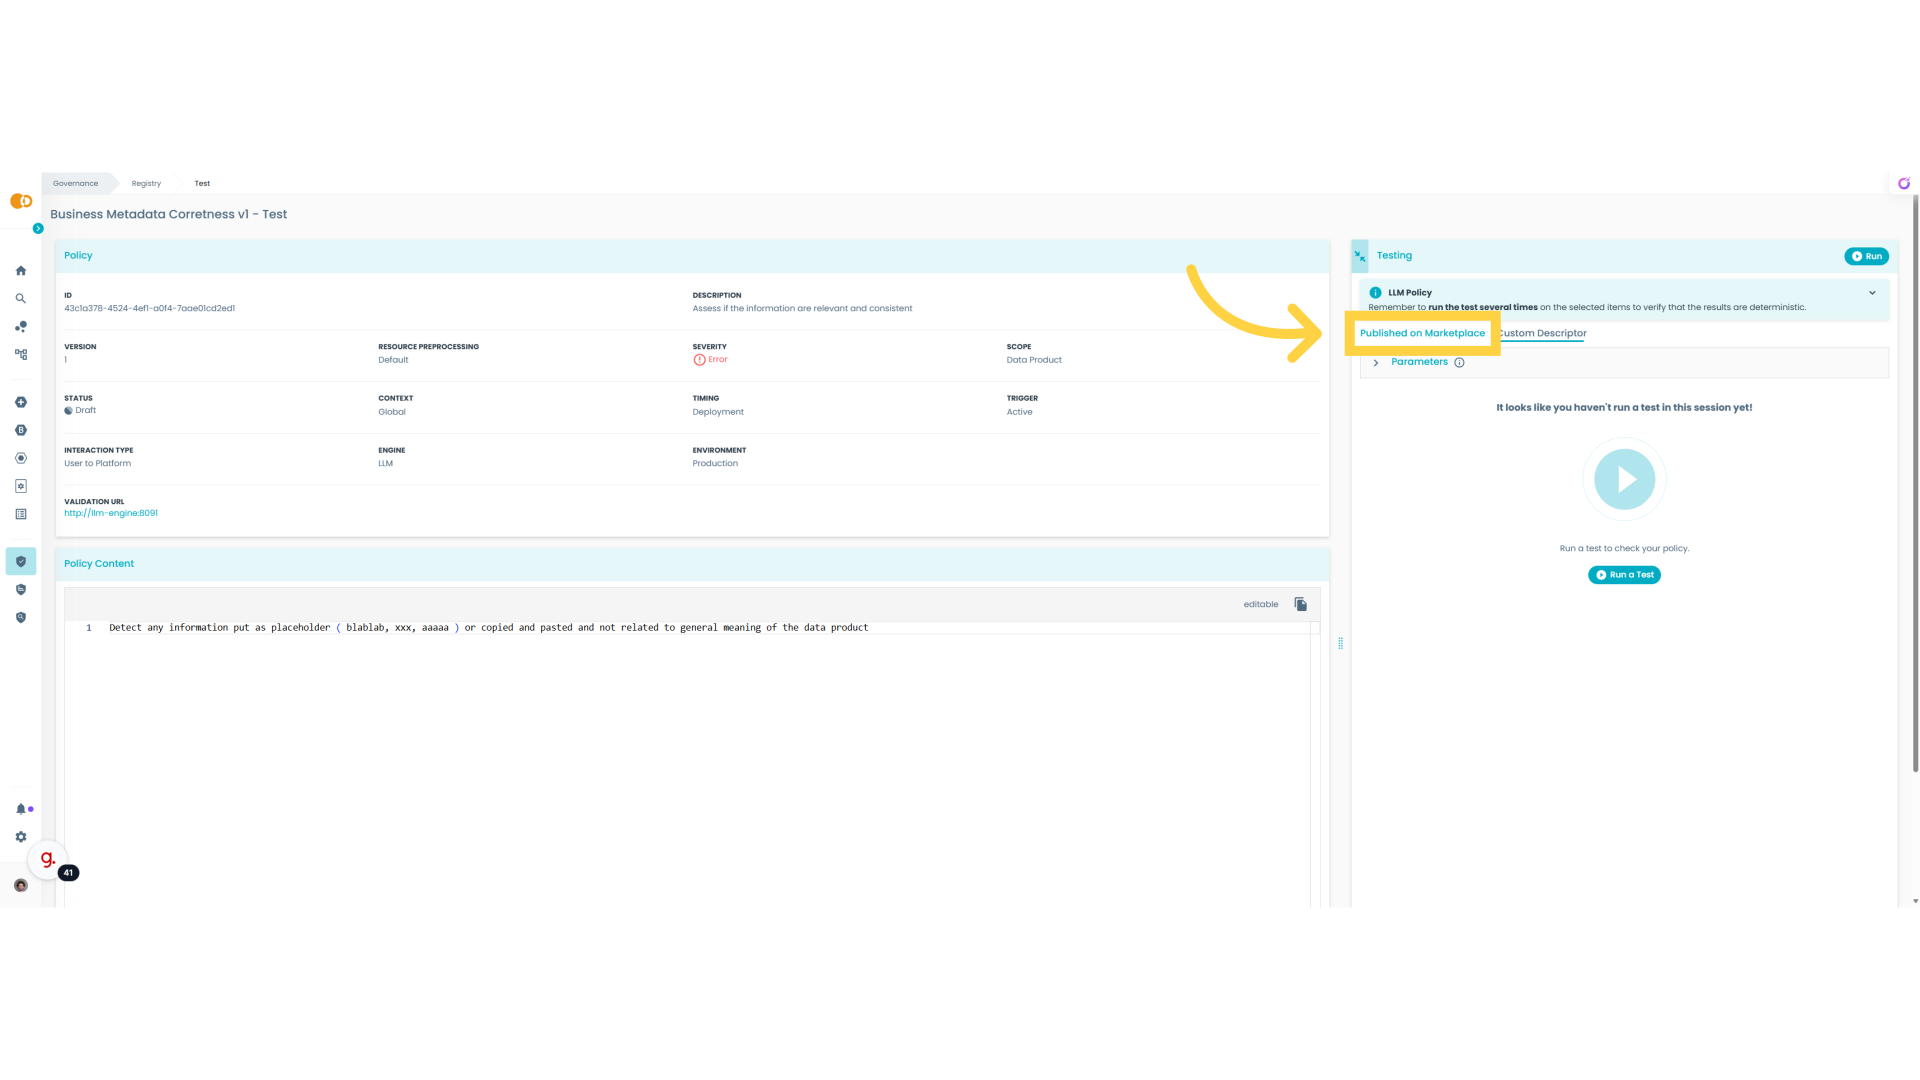
31. Click "Run a Test"
Let's start the test
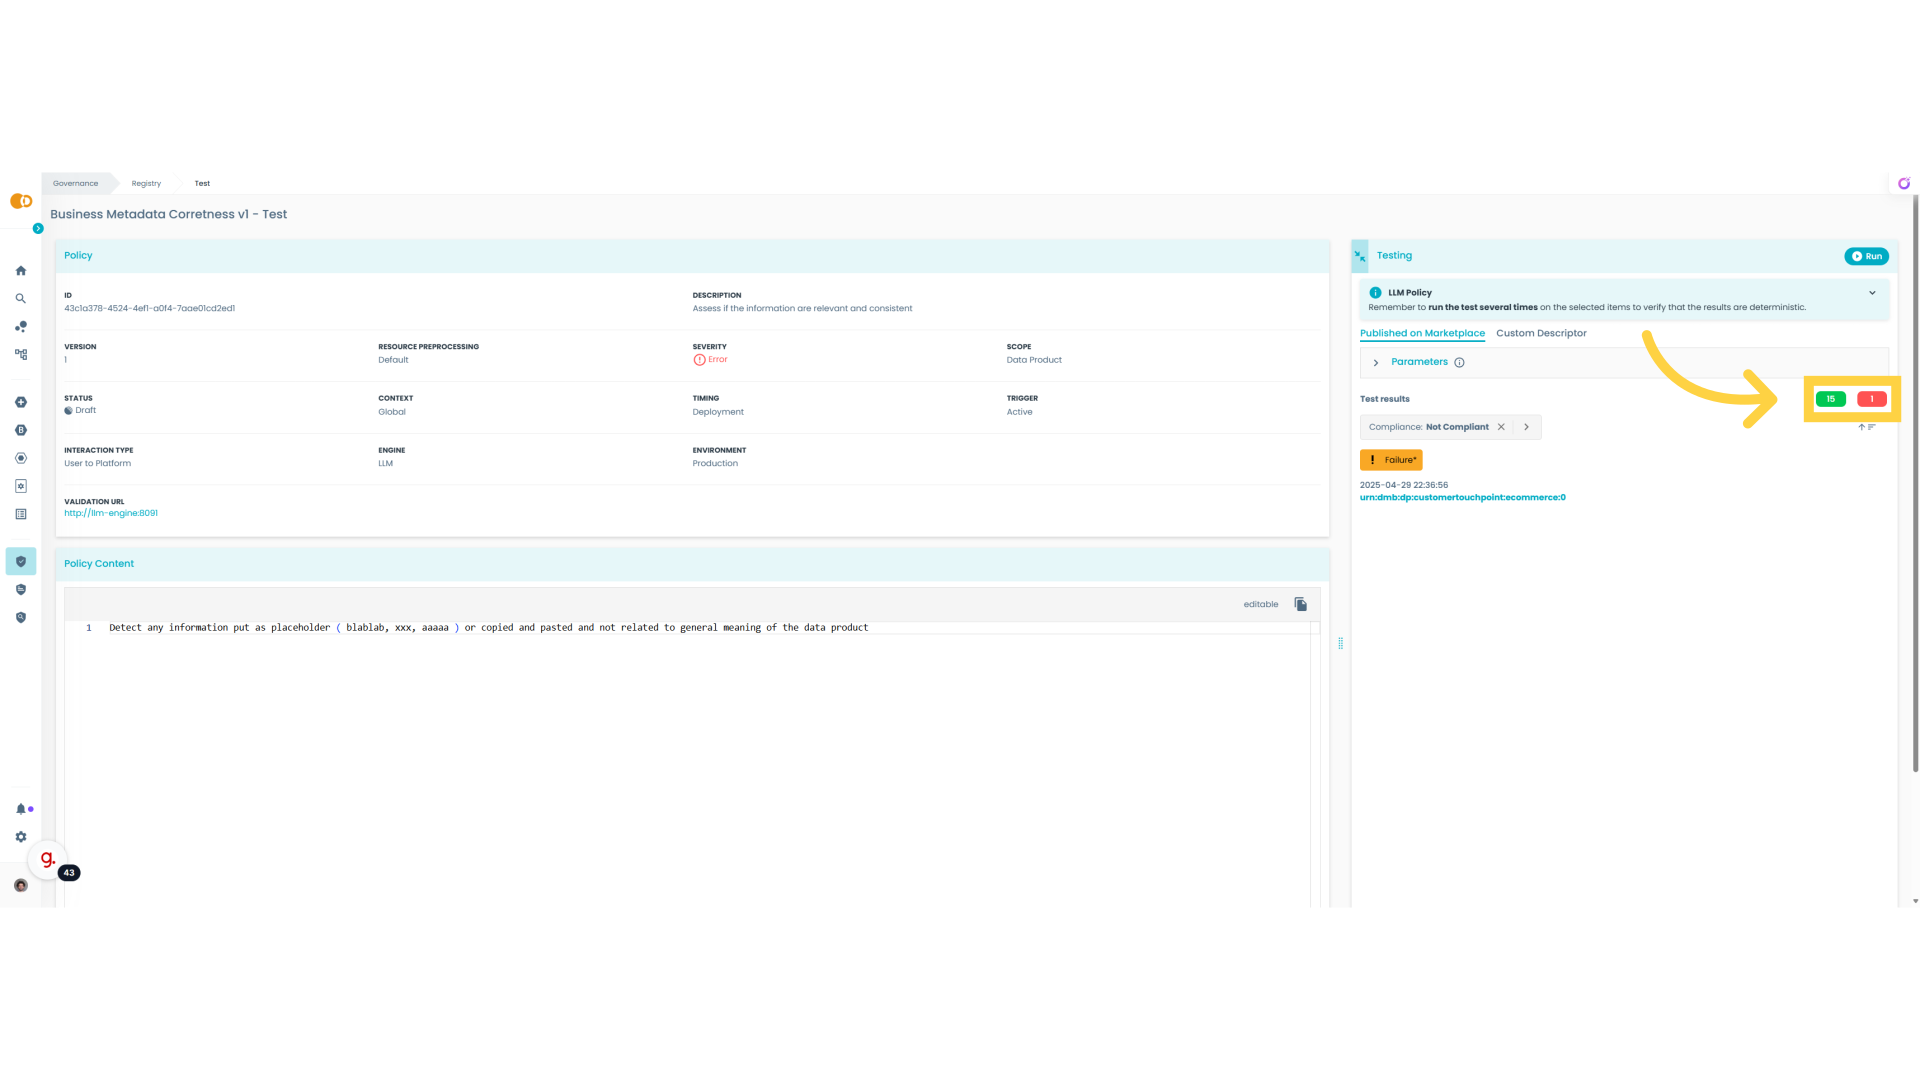
32. Marketplace test results
The results are good: the policy to detect placeholders detected only one data product with some issue among sixteen
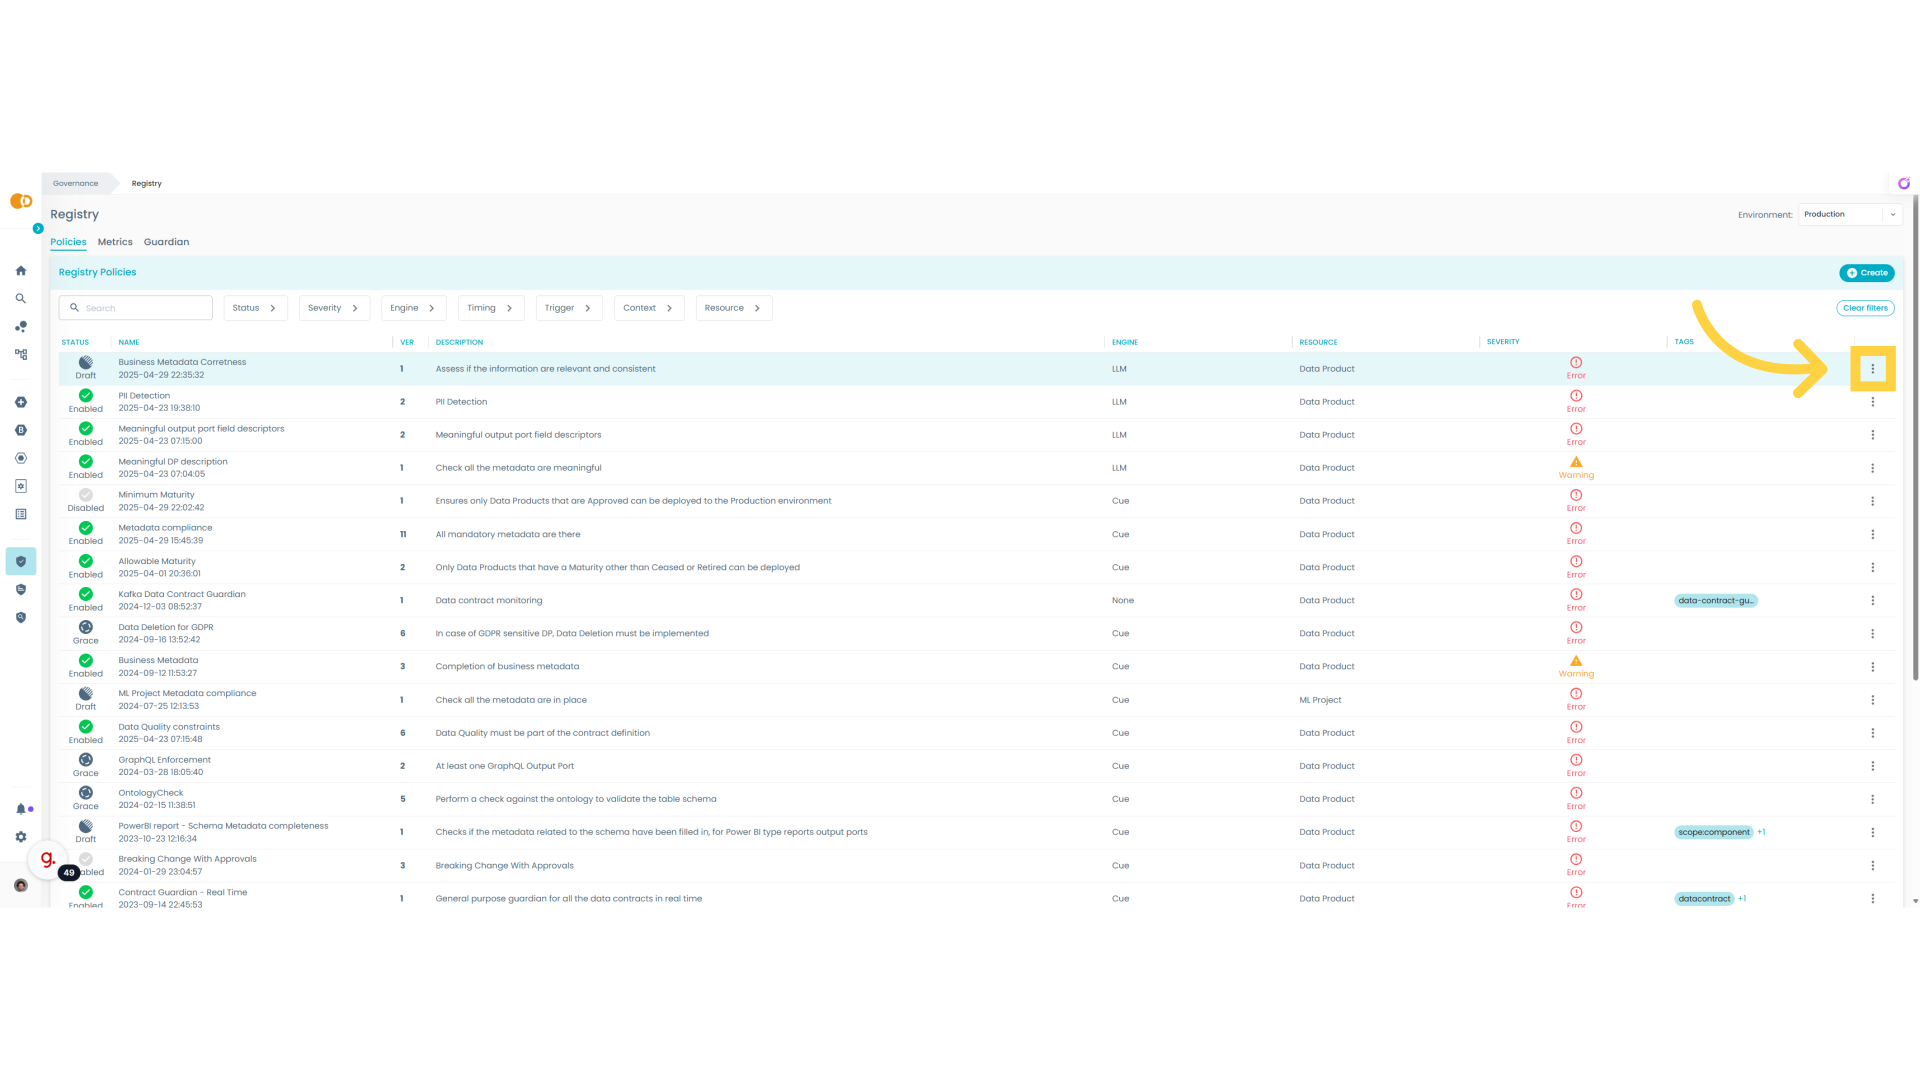
33. Policy Lifecycle
Now we can better understand how the policy life-cycle works
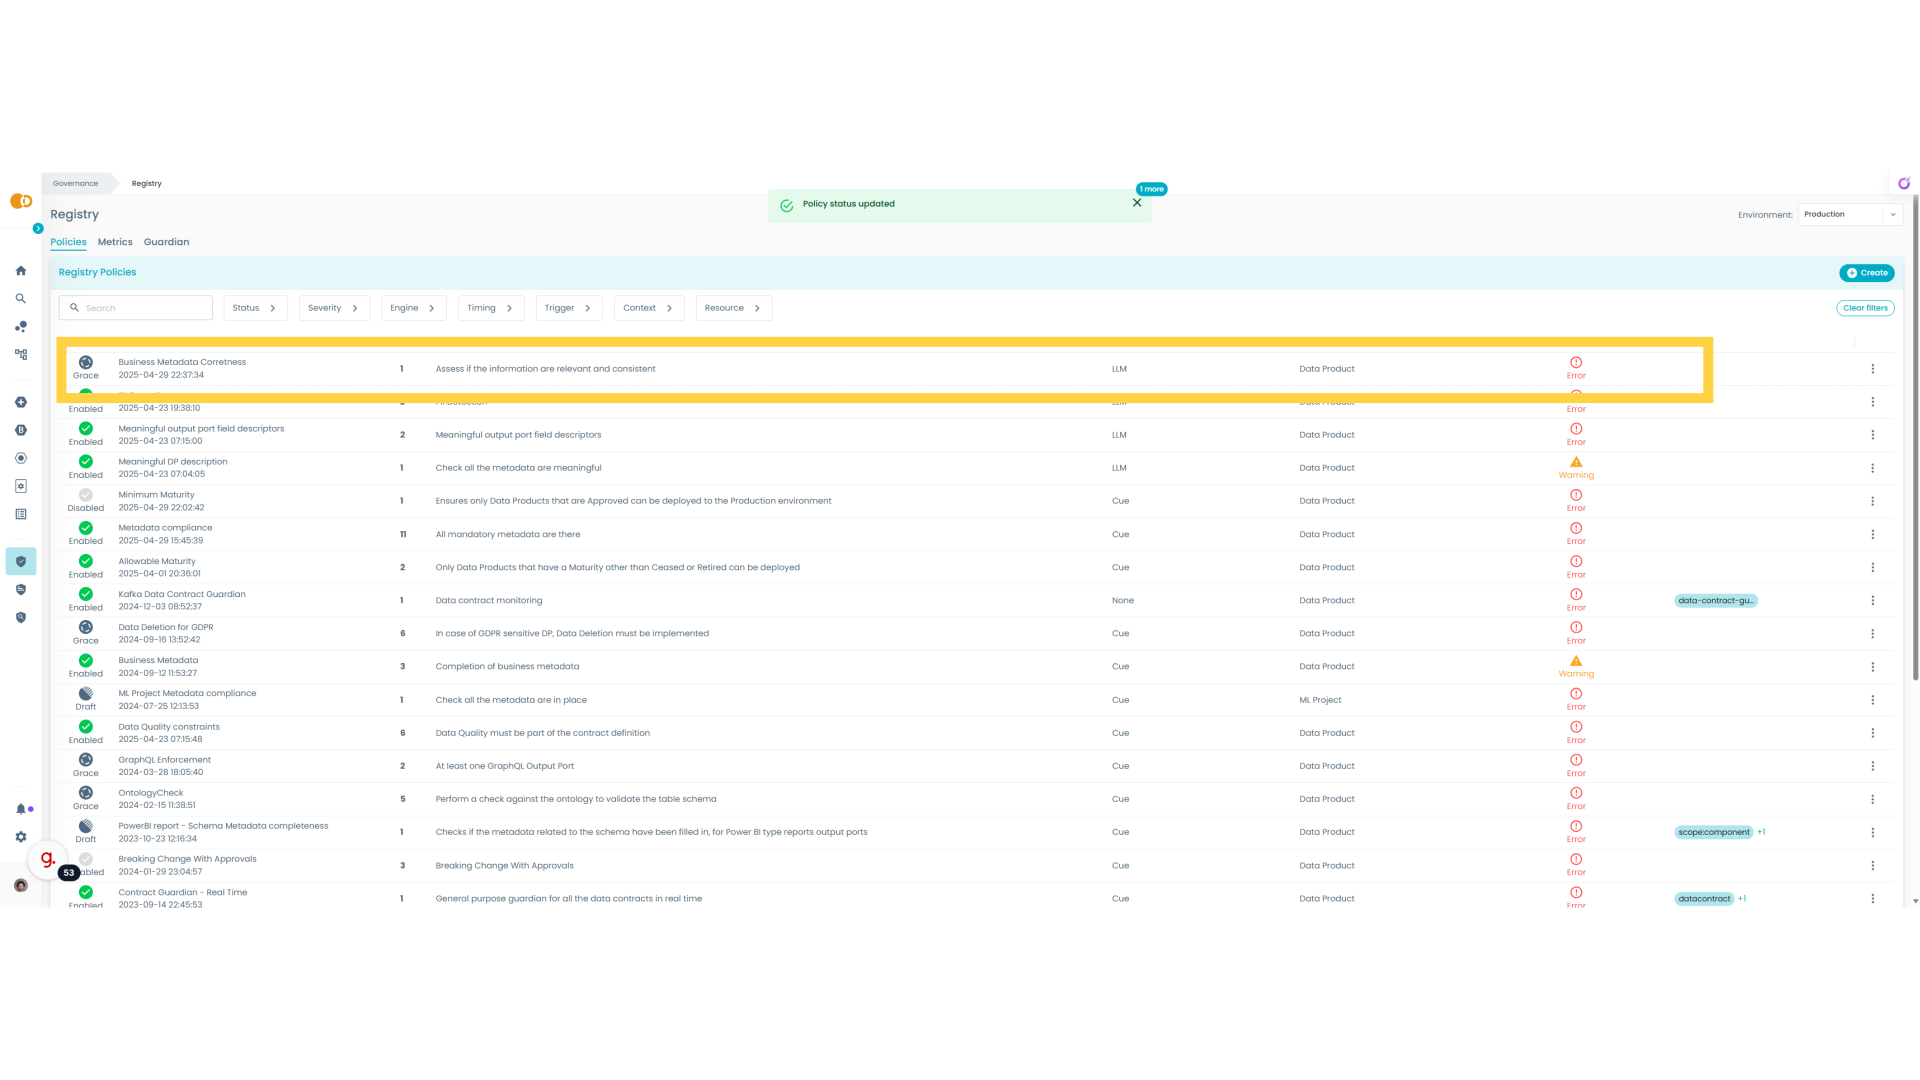
34. Grace
Grace is the first step to introduce a new policy, because limit the friction between platform team and data product teams. This policy will now become active but for a configurable grace period it will only raise warnings instead of blocking data product teams.

35. Grace On
So now the policy is officially active and in the grace period before becoming a mandatory quality gate.
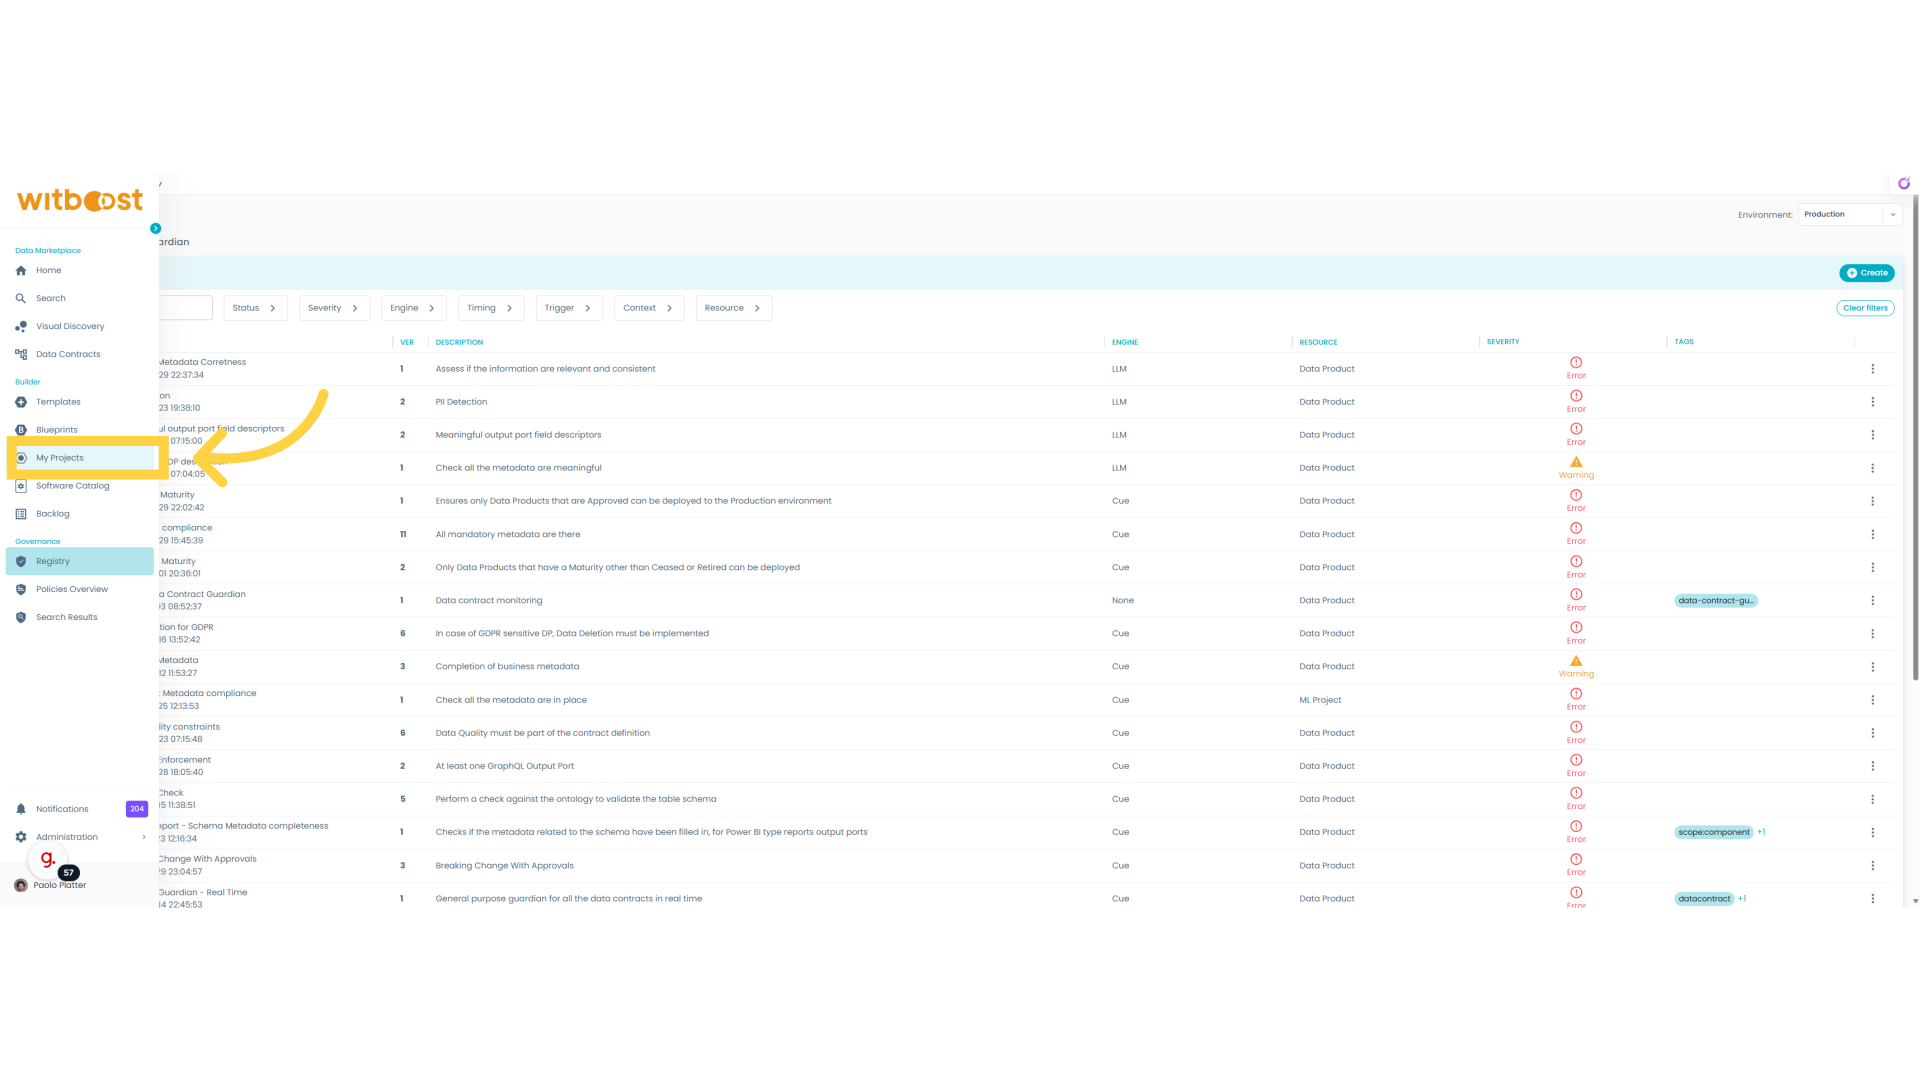
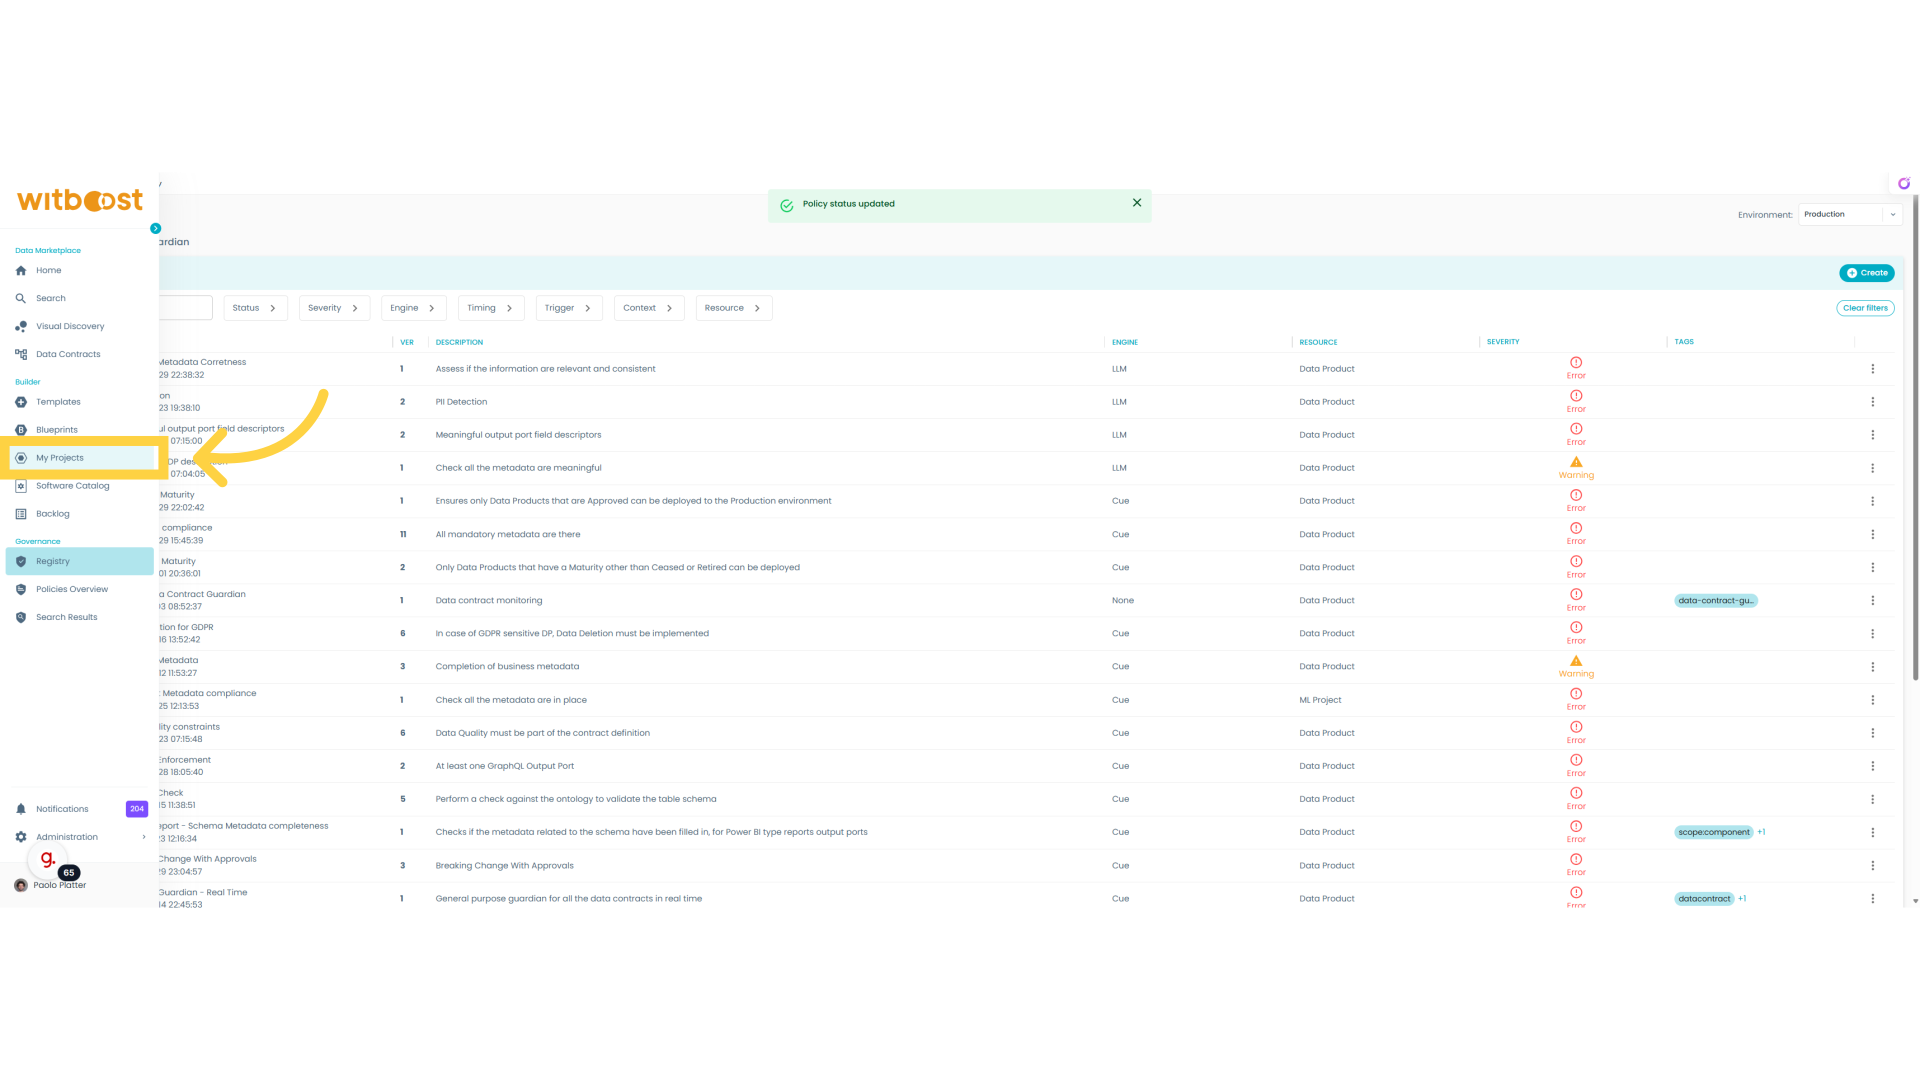
36. My Projects
Let's open our Data Products to test them and see if the policy is already visible to them.
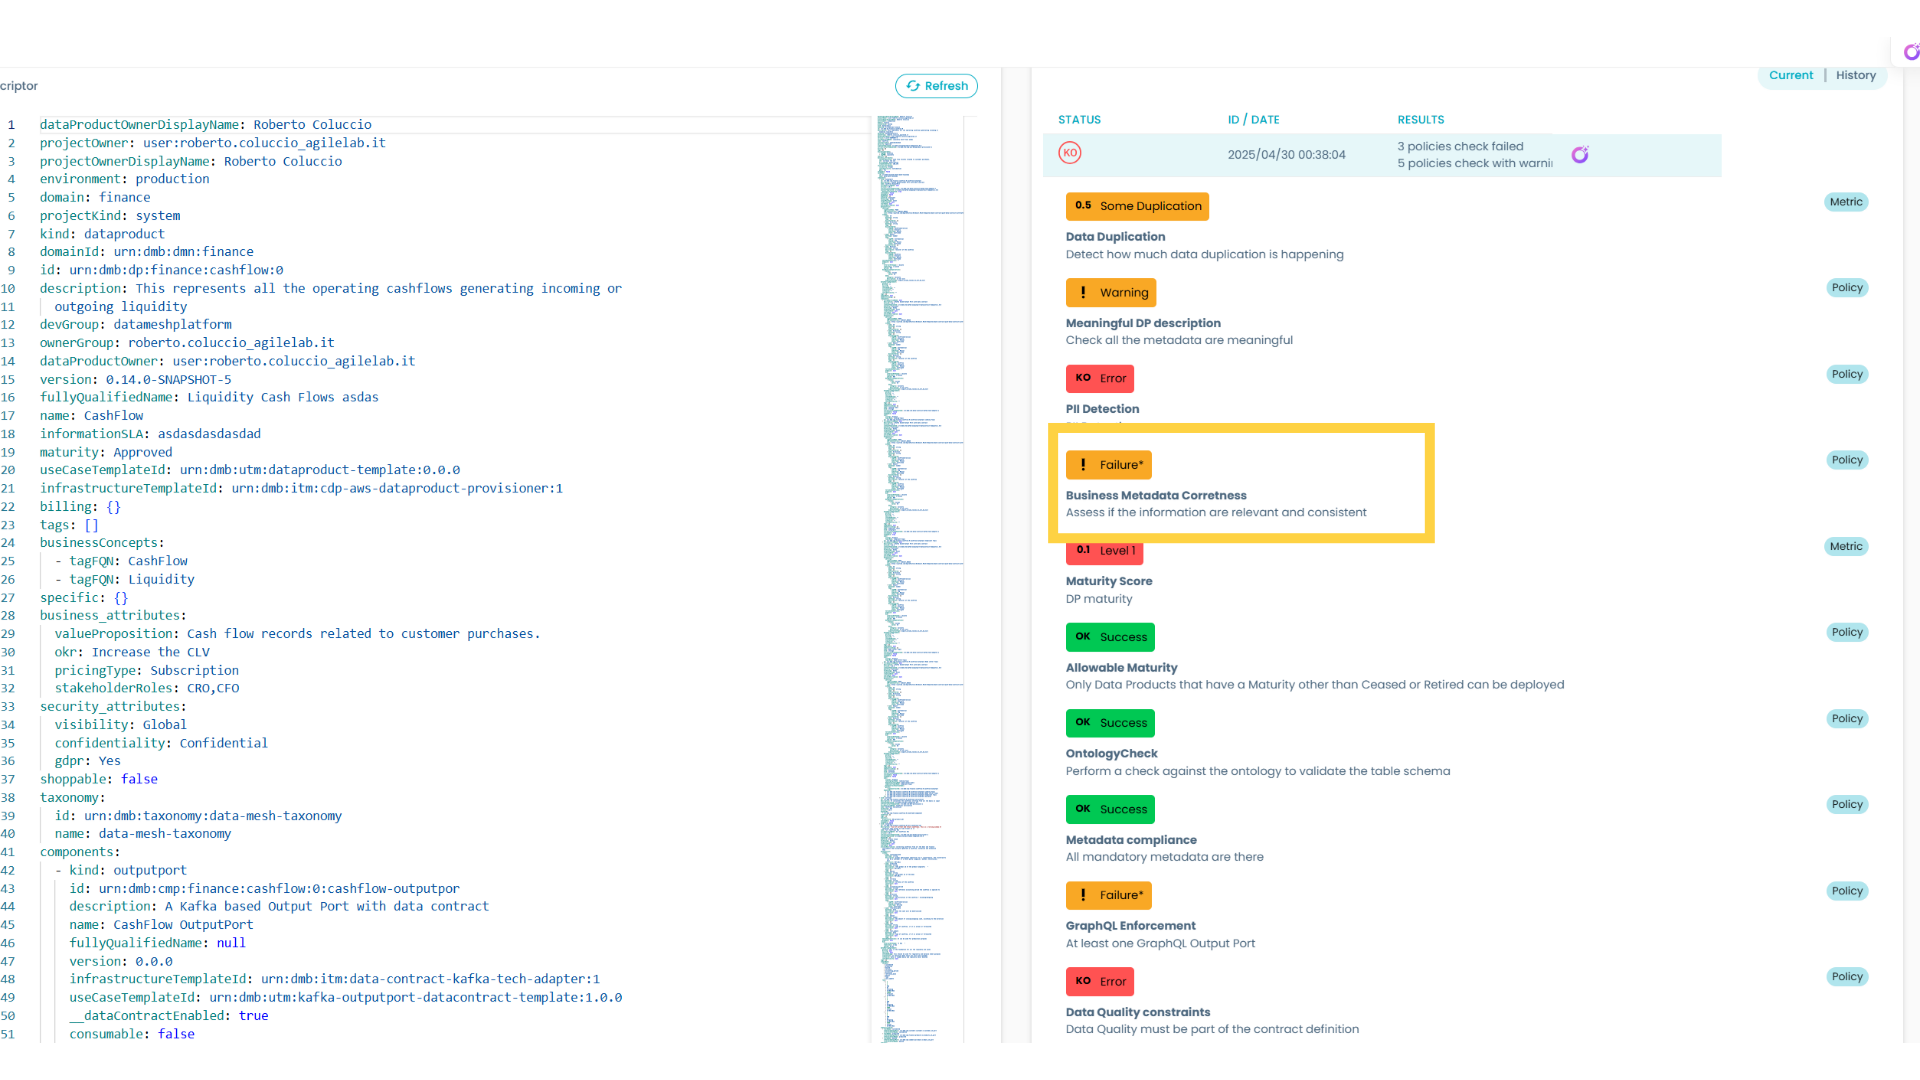
37. Data Product Test
Now I pickup again the Cash Flow Data Product that I now has some placeholder. Pay attention that before during the policy testing we didn't modify the real descriptor but just a volatile copy.

38. Test Results
As we can see the policy is immediately available and enabled. As expected is failing for this Data Product, but interestingly it is just raising a Warning because the policy is in Grace Period
39. Publish
Now we go back to the policy and we try to make it active without grace period

40. Click "Publish"
After this step it will not be possible to modify the policy, but it will be necessary to create a new version.

41. MyProjects
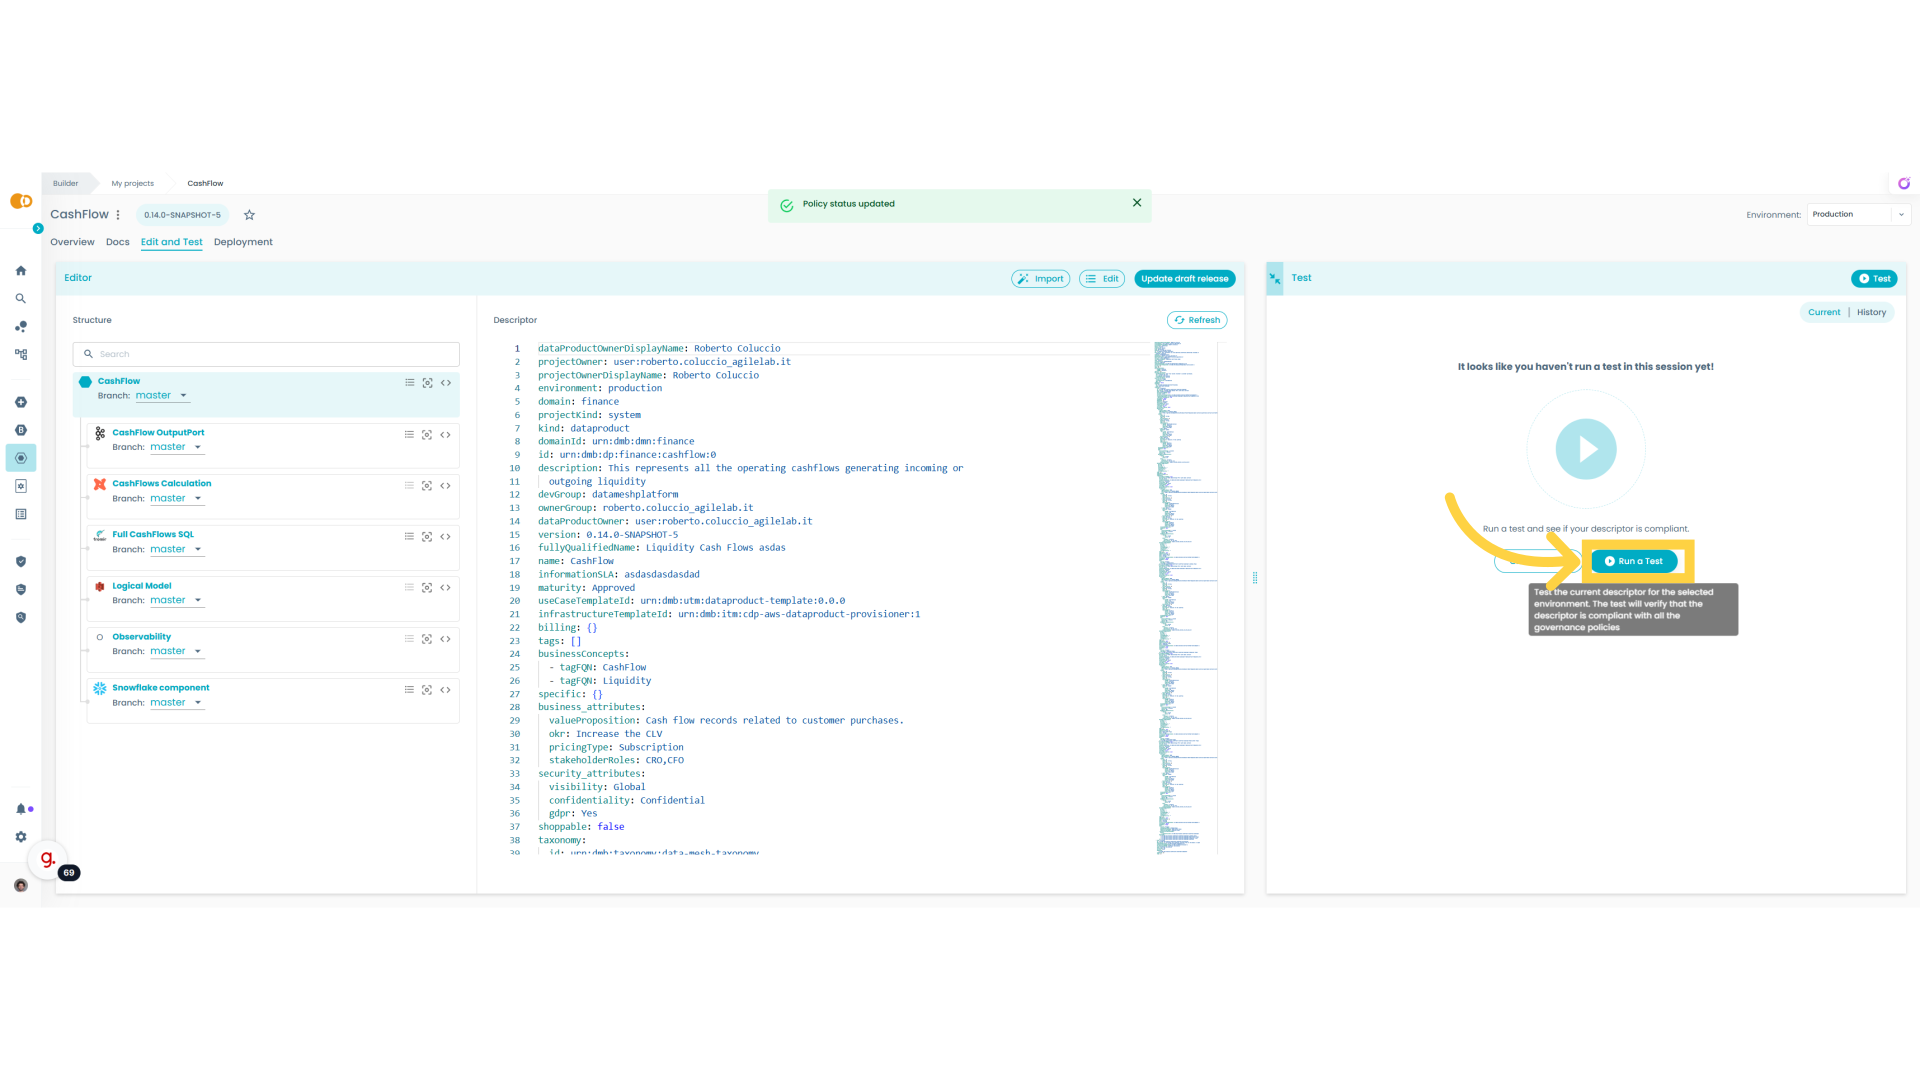
Let's try to test again the Data Product
42. Run Again
Let's run the test again
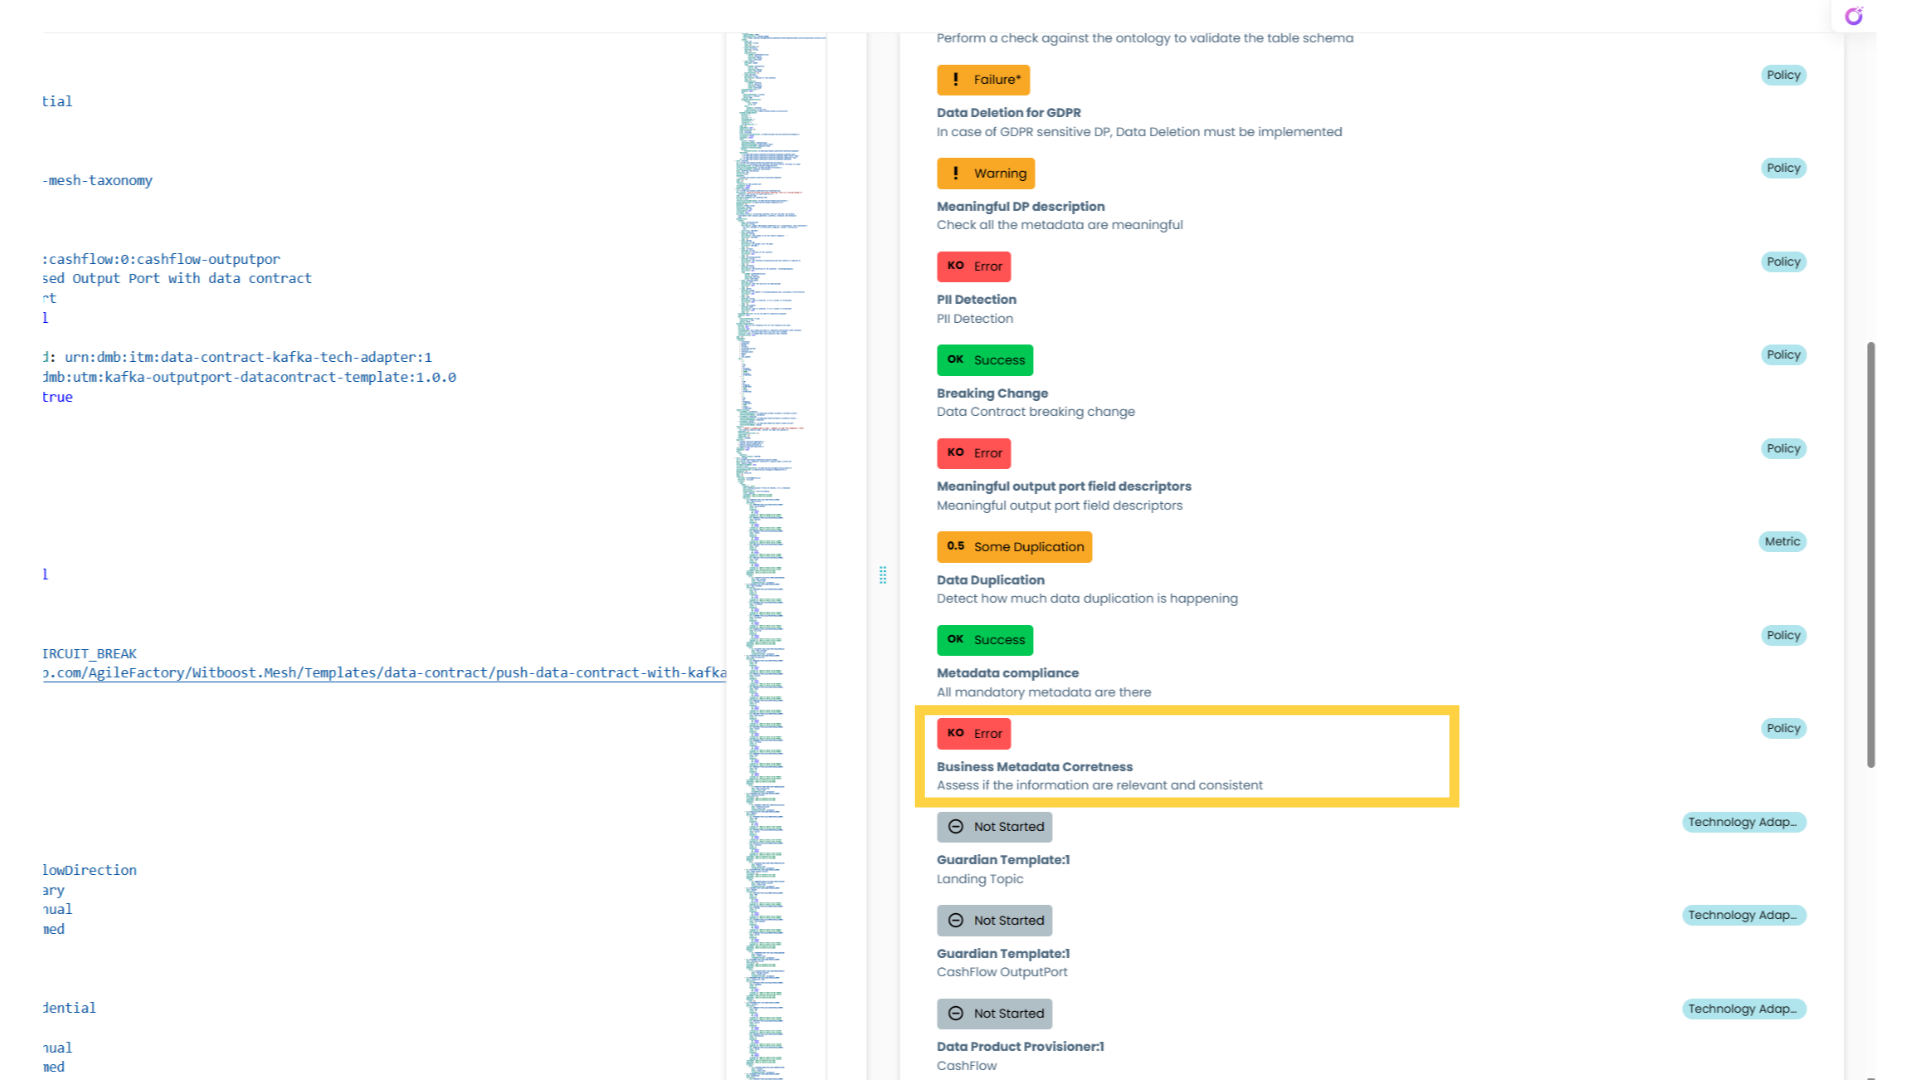
43. KO
Now that the policy is published, it is raising an error that will not allow to deploy this data product in production until the error will be fixed.
44. Disable
The platform team has also the extraordinary power to disable a policy in case of need ( Ex. an urgent deployment ). This also has the goal to minimize the friction between the platform team and the data product ones.

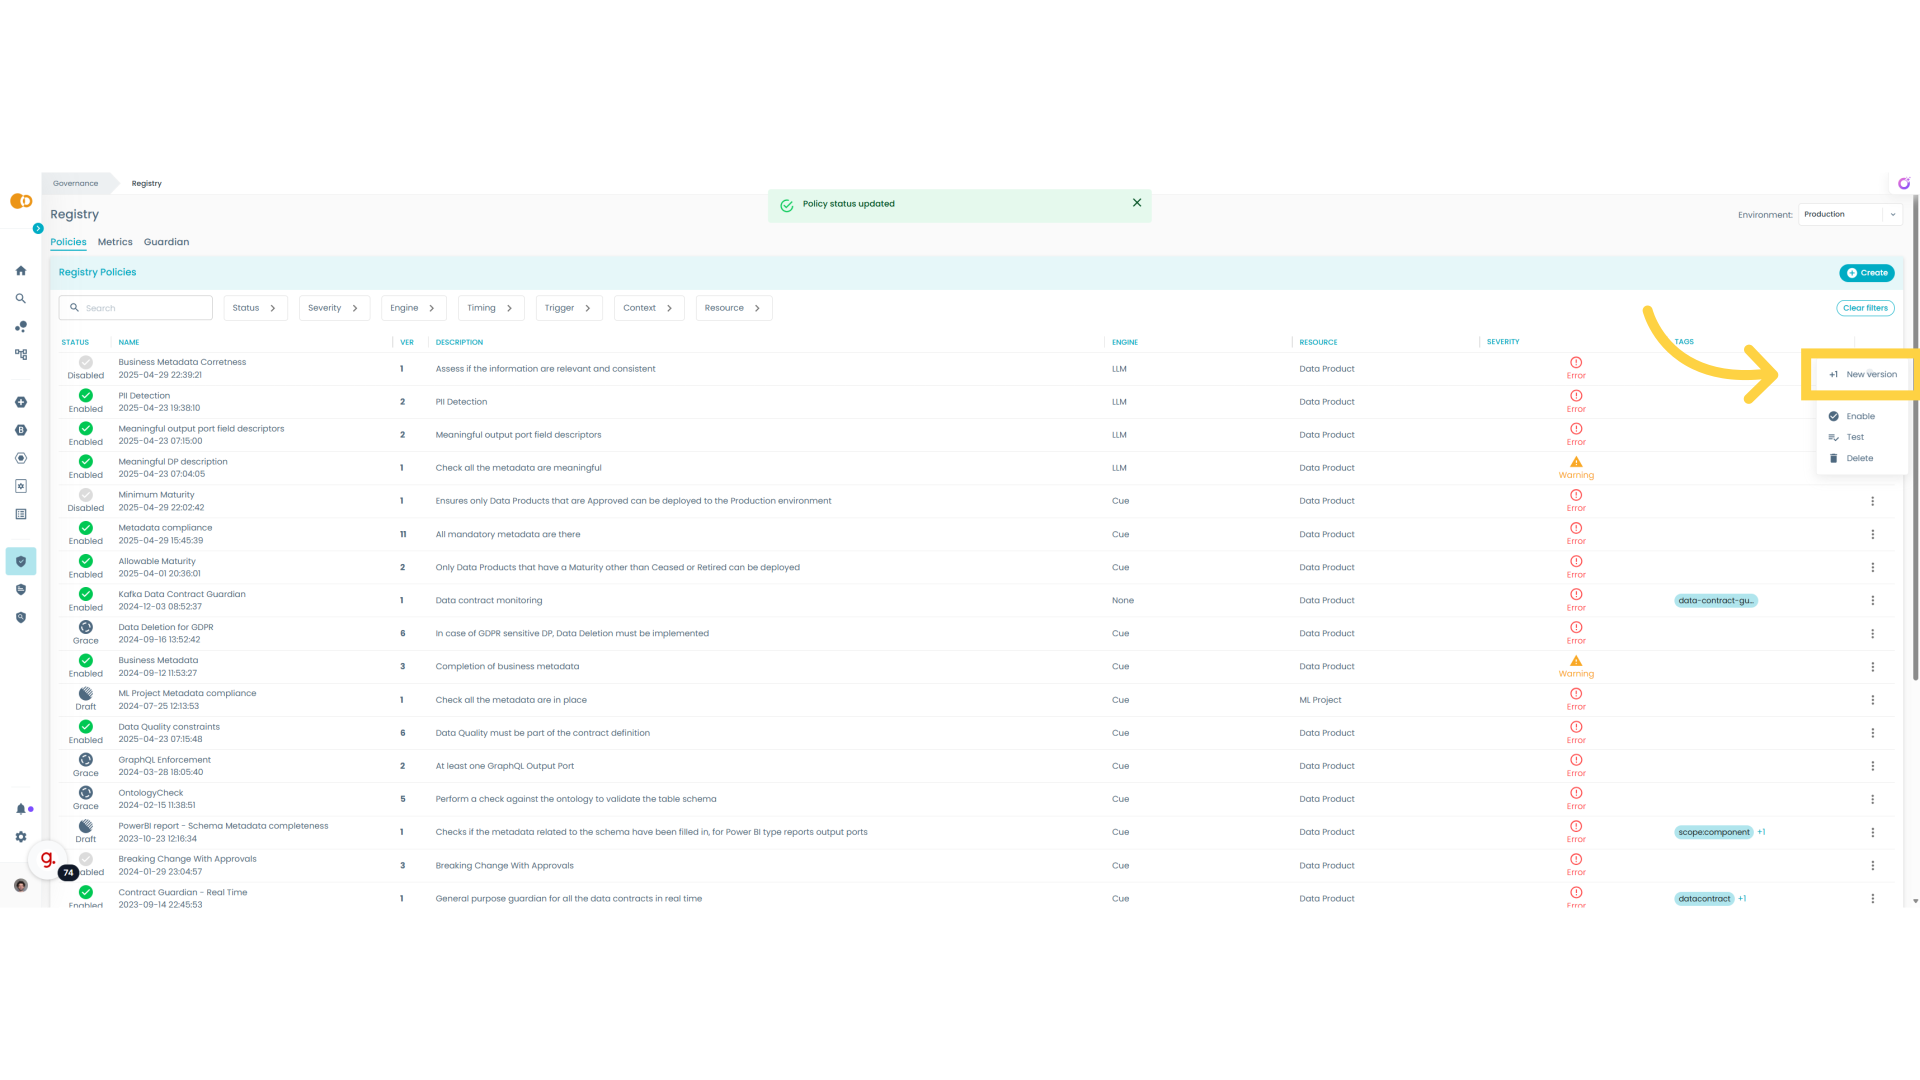
45. New version
At certain point there could be the need to evolve the policy, so is possible to create a new version.
The guide covered the detailed process of creating, testing, and evolving an LLM policy on Witboost.