Configure the Versioning System
To begin creating your projects, the first step is to configure authentication with your version control systems. This step is mandatory and this tutorial will guide you through the process of inserting an access token in Witboost. The second section focuses on how to create a token with the required scopes for the versioning systems supported by Witboost, such as Gitlab, Azure DevOps, GitHub, and BitBucket.
1. Introduction
Before proceeding, make sure you have your access token ready. If you are unsure how to create one, please refer to the second section of this tutorial. In this example, we'll use a Gitlab generated token.
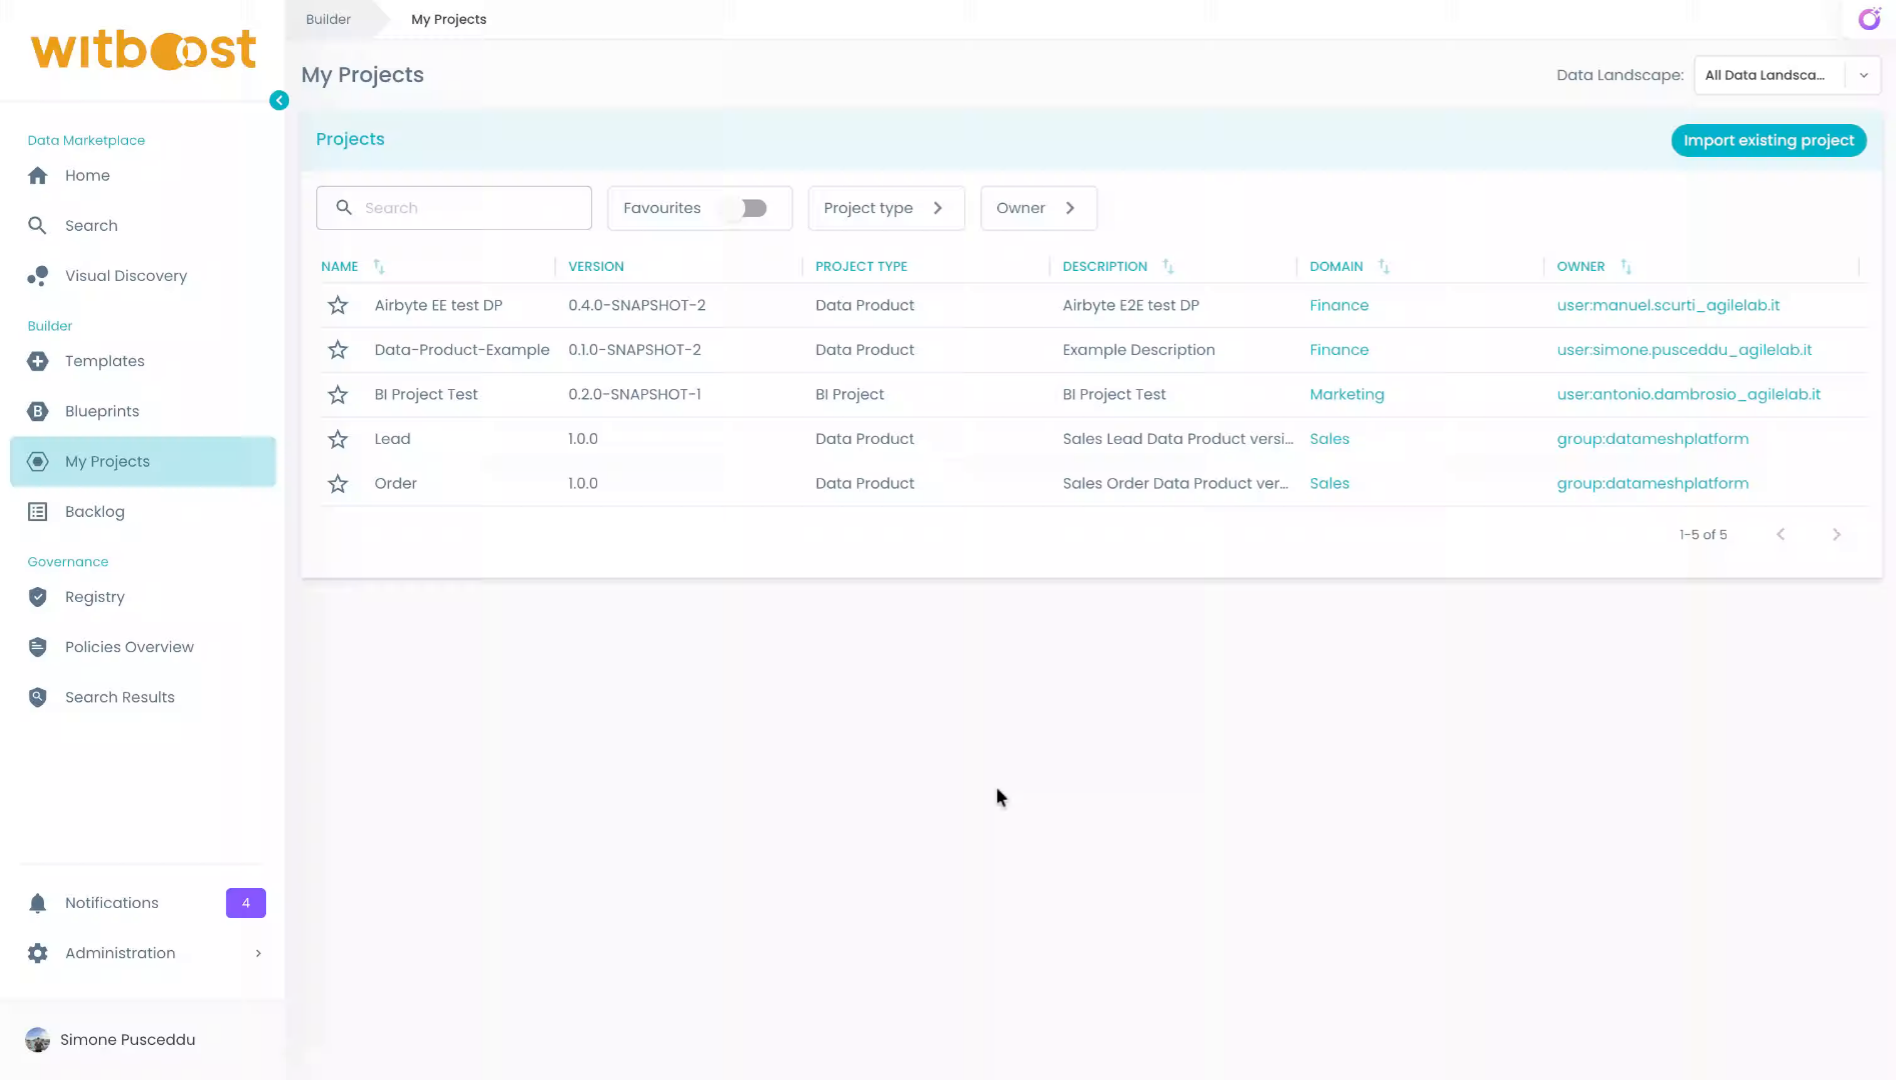
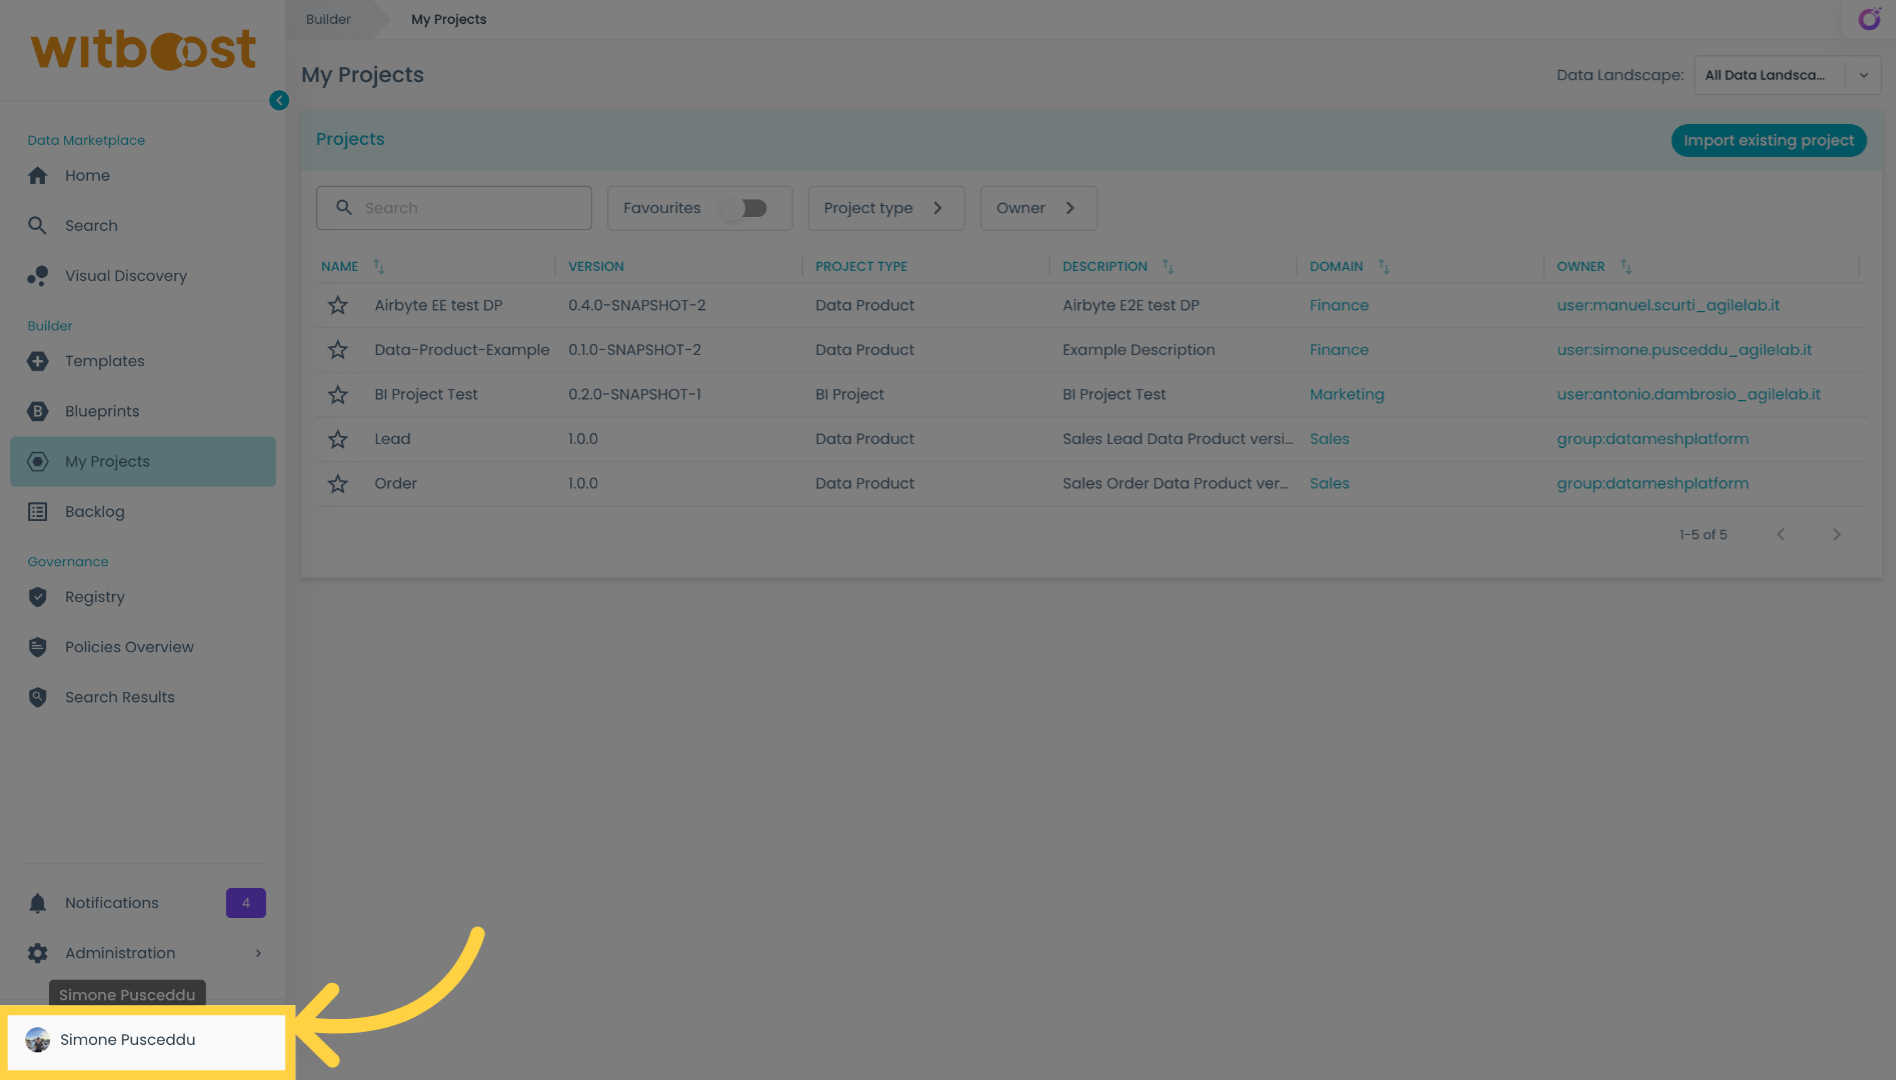
2. Click on the user profile
Click on your profile name to open your profile settings.
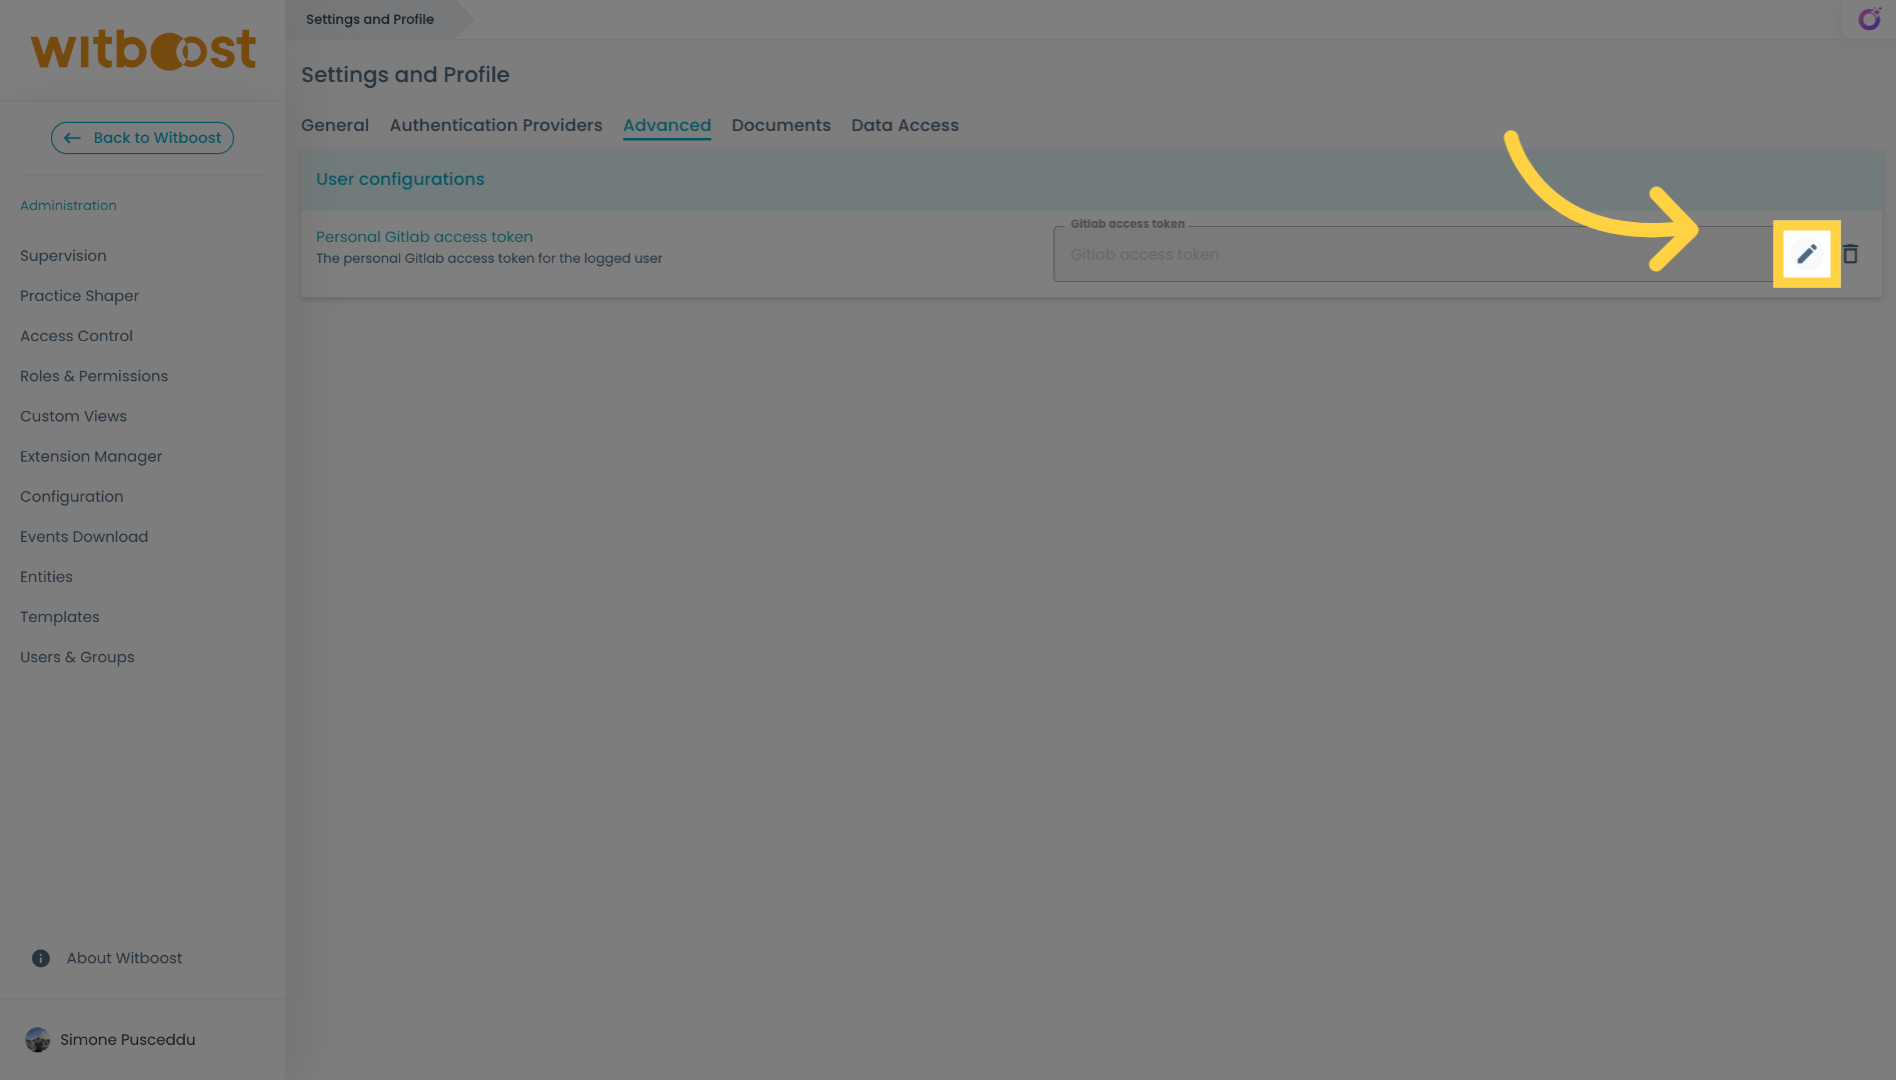
3. Click "Advanced"
Click the "Advanced" tab

4. Click on edit
Click into the edit button
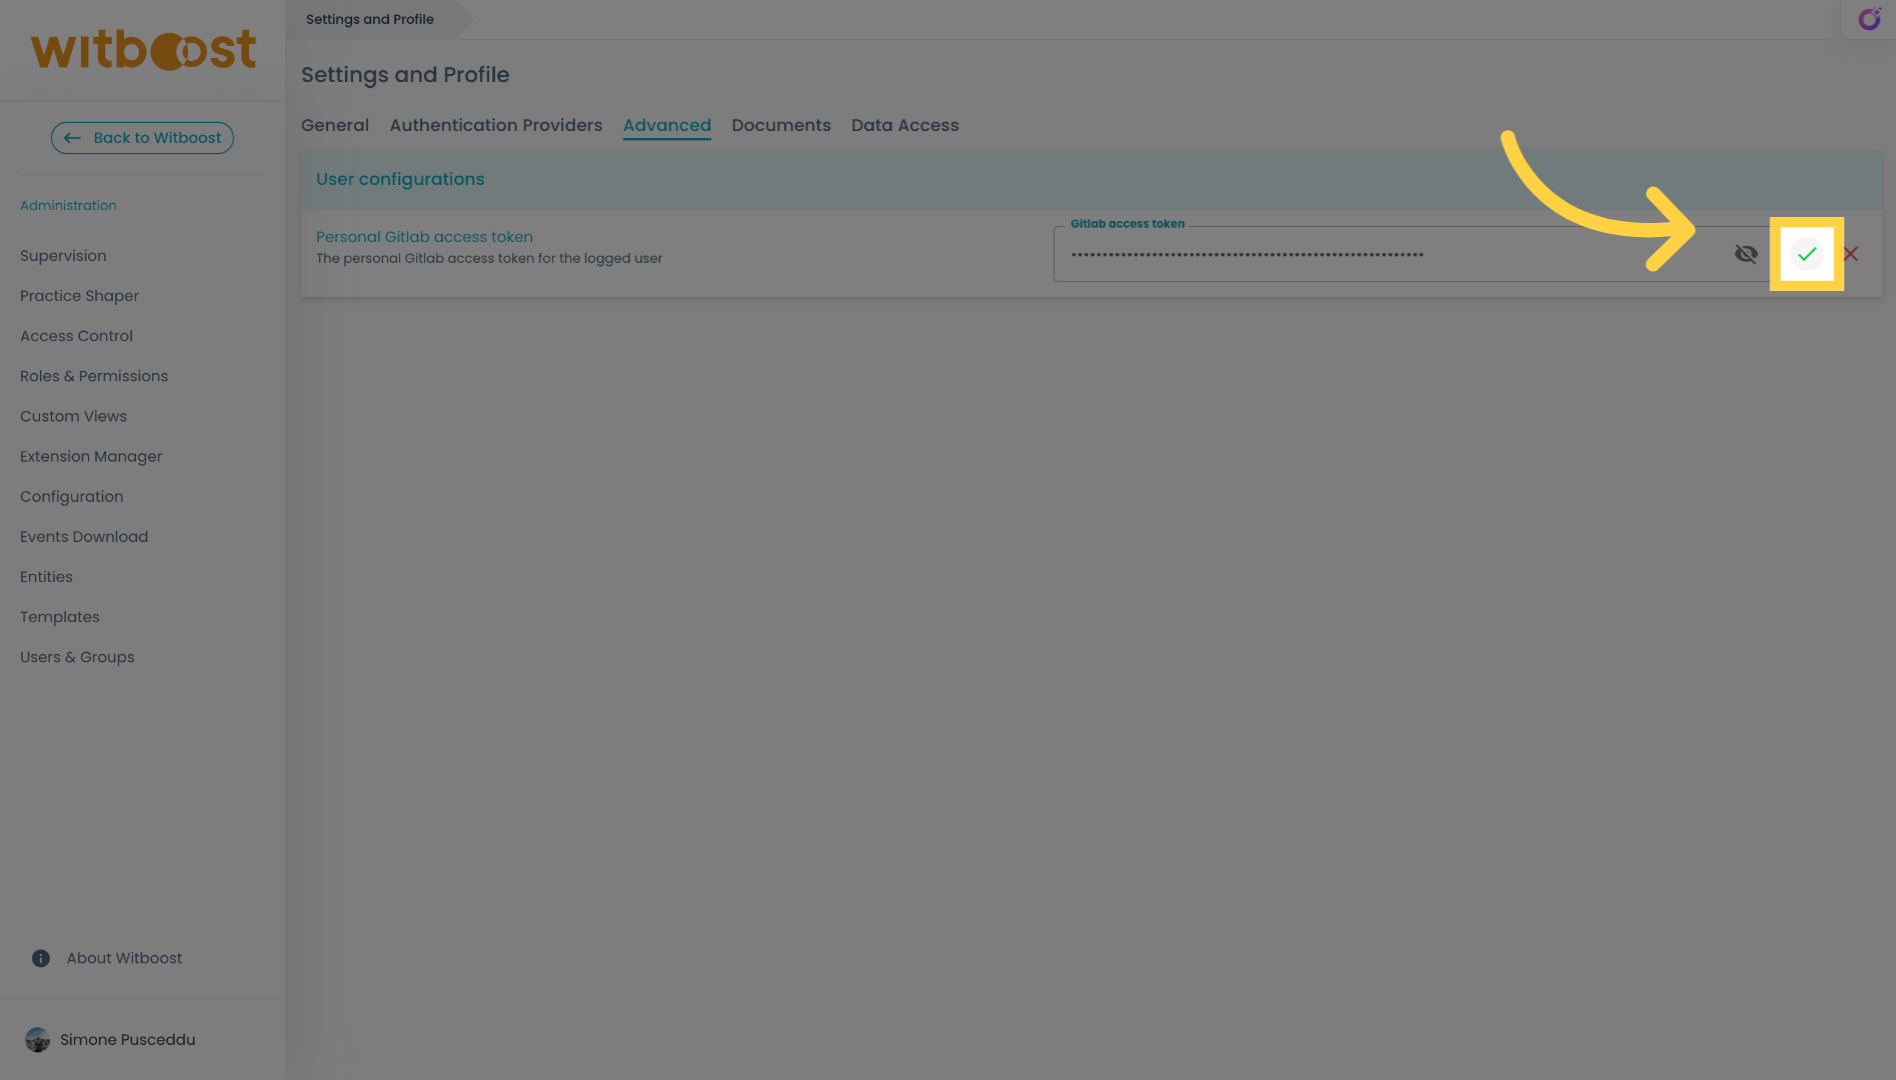
5. Fill "Gitlab access token"
Enter your personal access token.
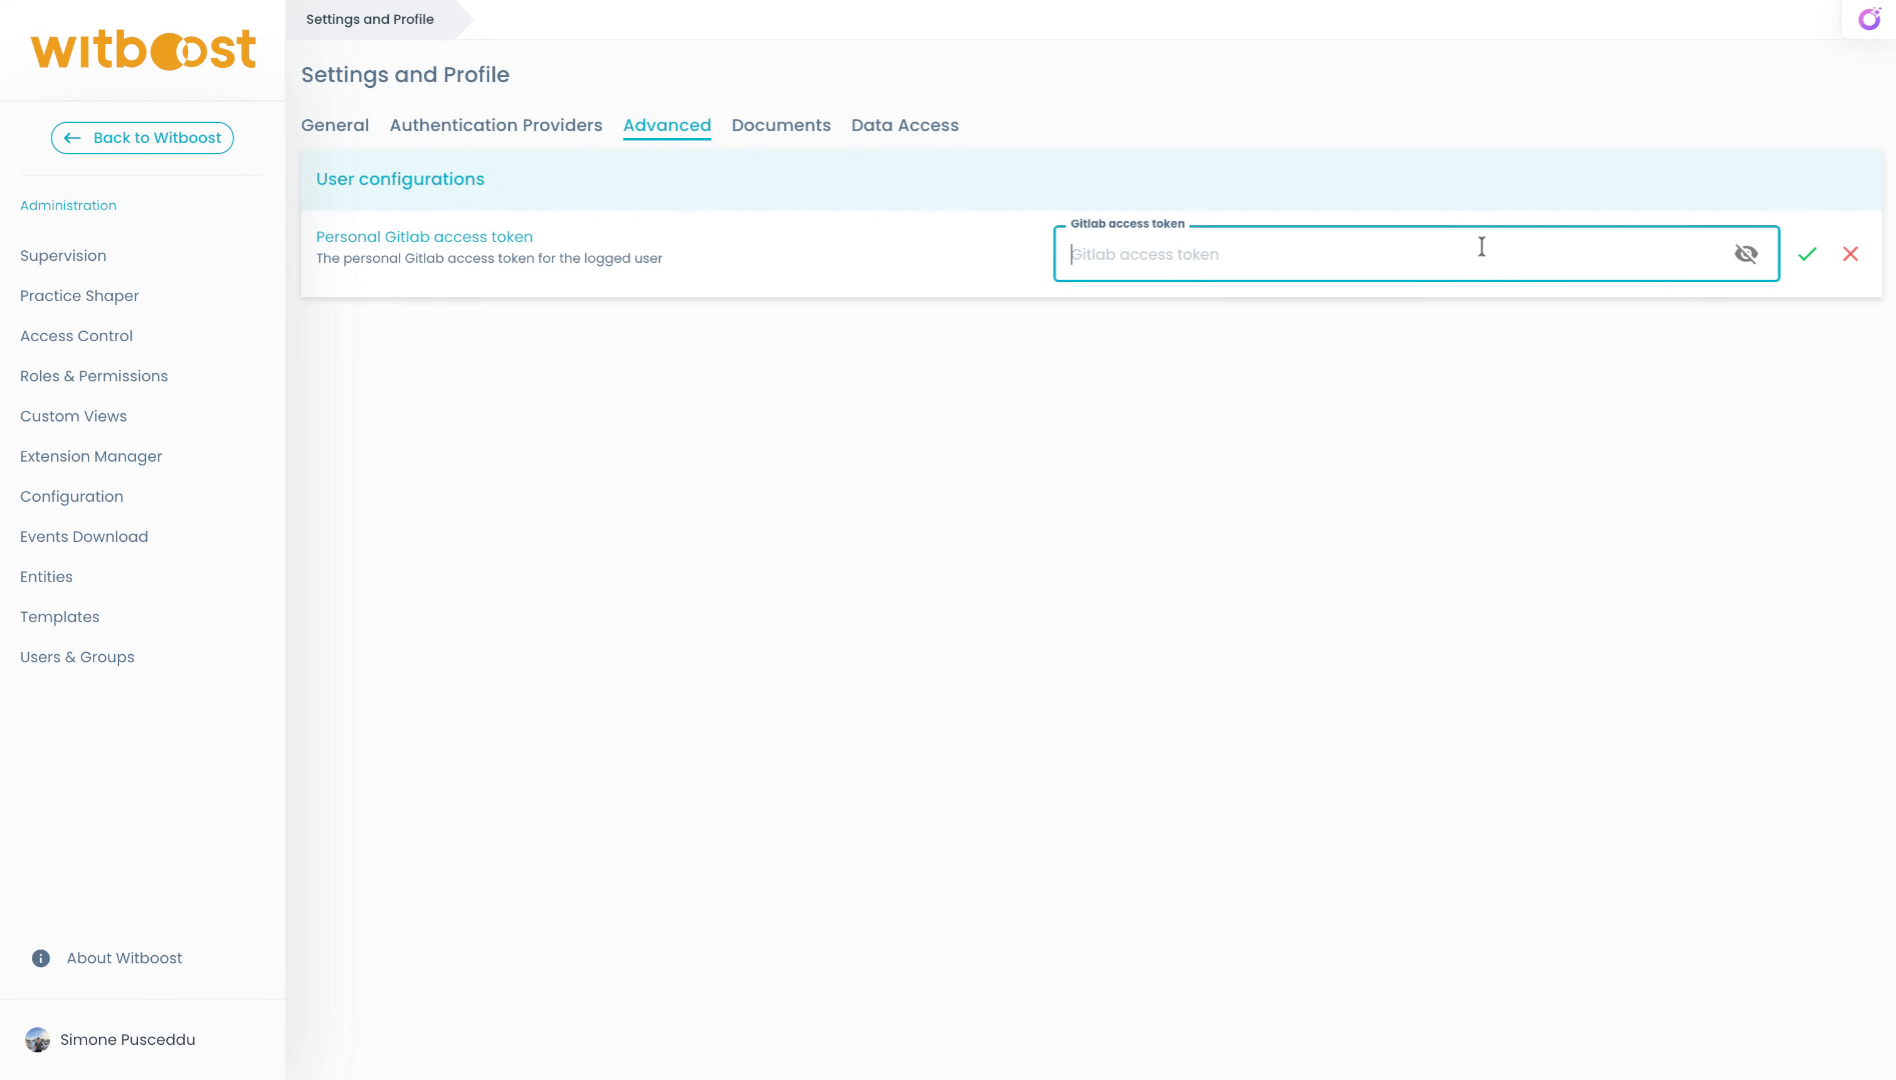
6. Click on the save button
Click the confirmation button to save your Gitlab access token and complete the setup process.
7. Finished inserting an access token
You have successfully inserted your Gitlab access token, you can now go ahead and start creating amazing projects!

8. How to create Gitlab access token
This tutorial guides you through creating a personal access token in Gitlab.

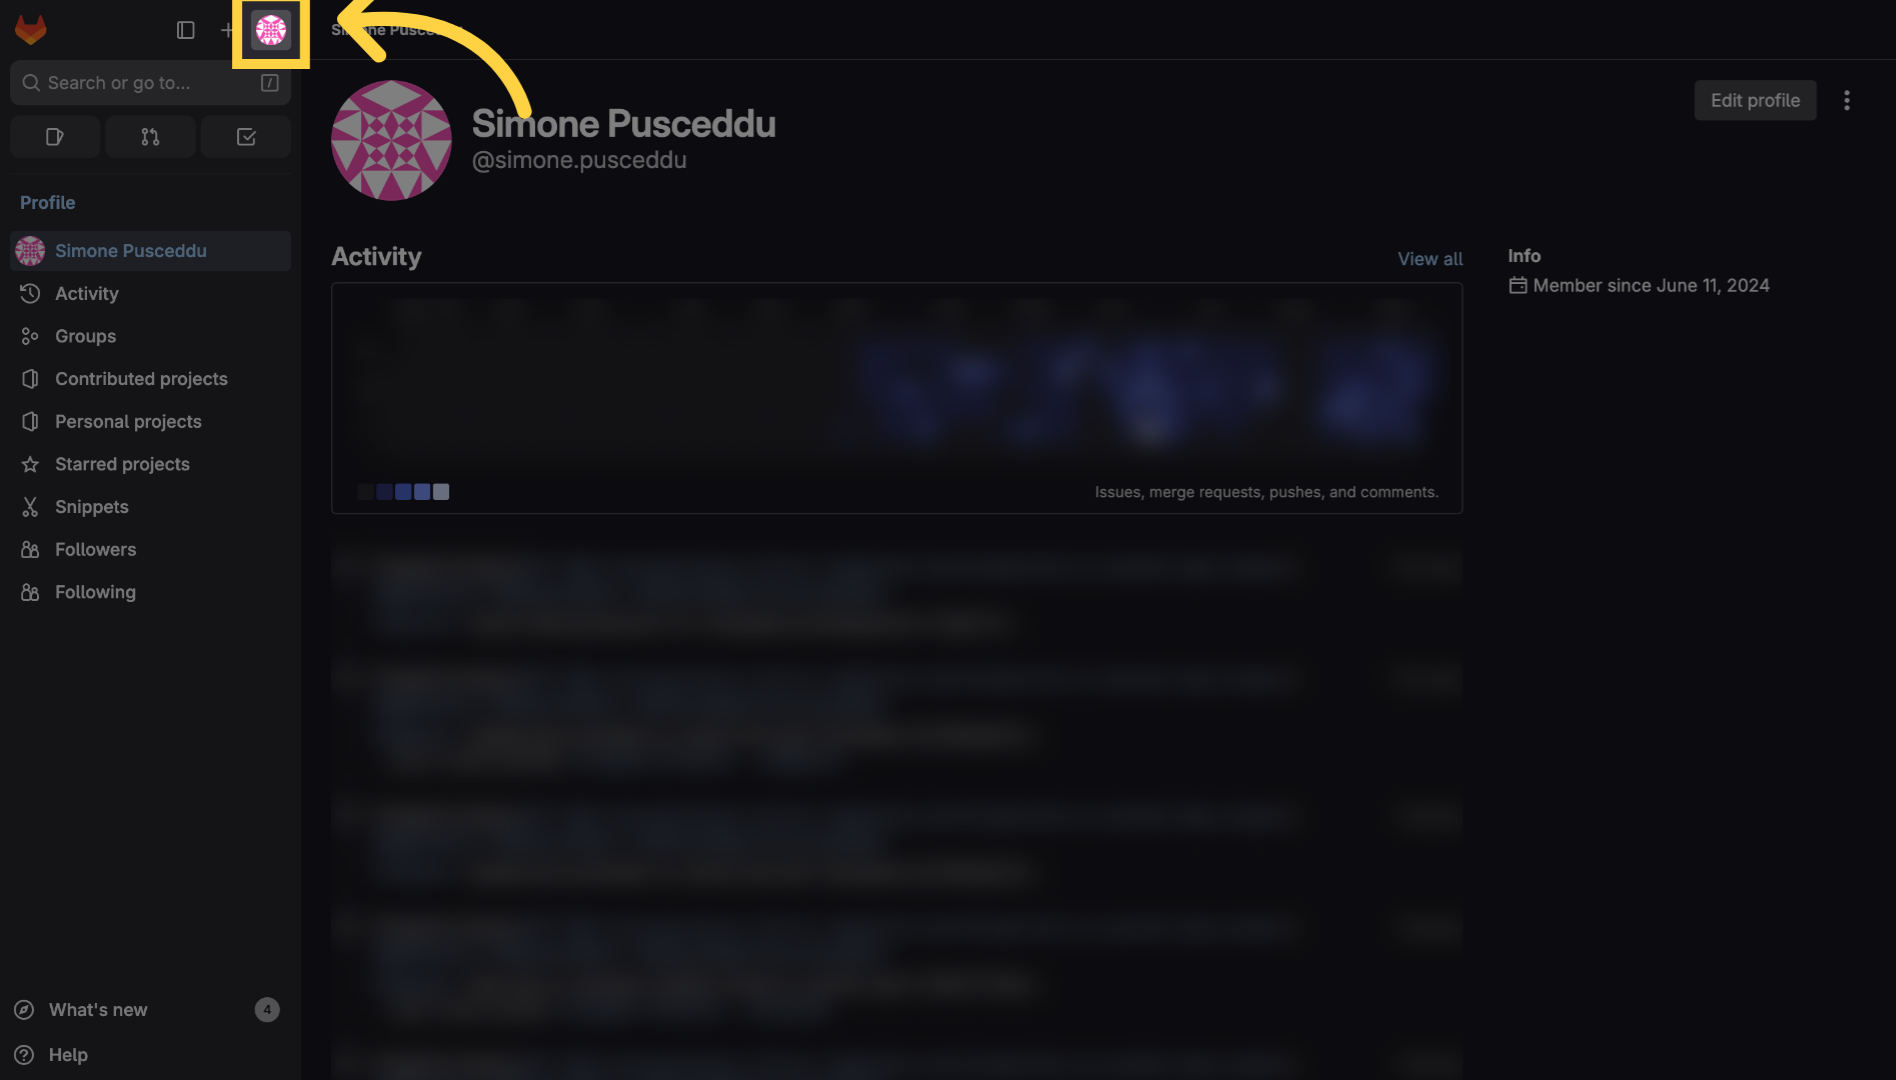
9. Click on your user profile
Select your user profile icon.
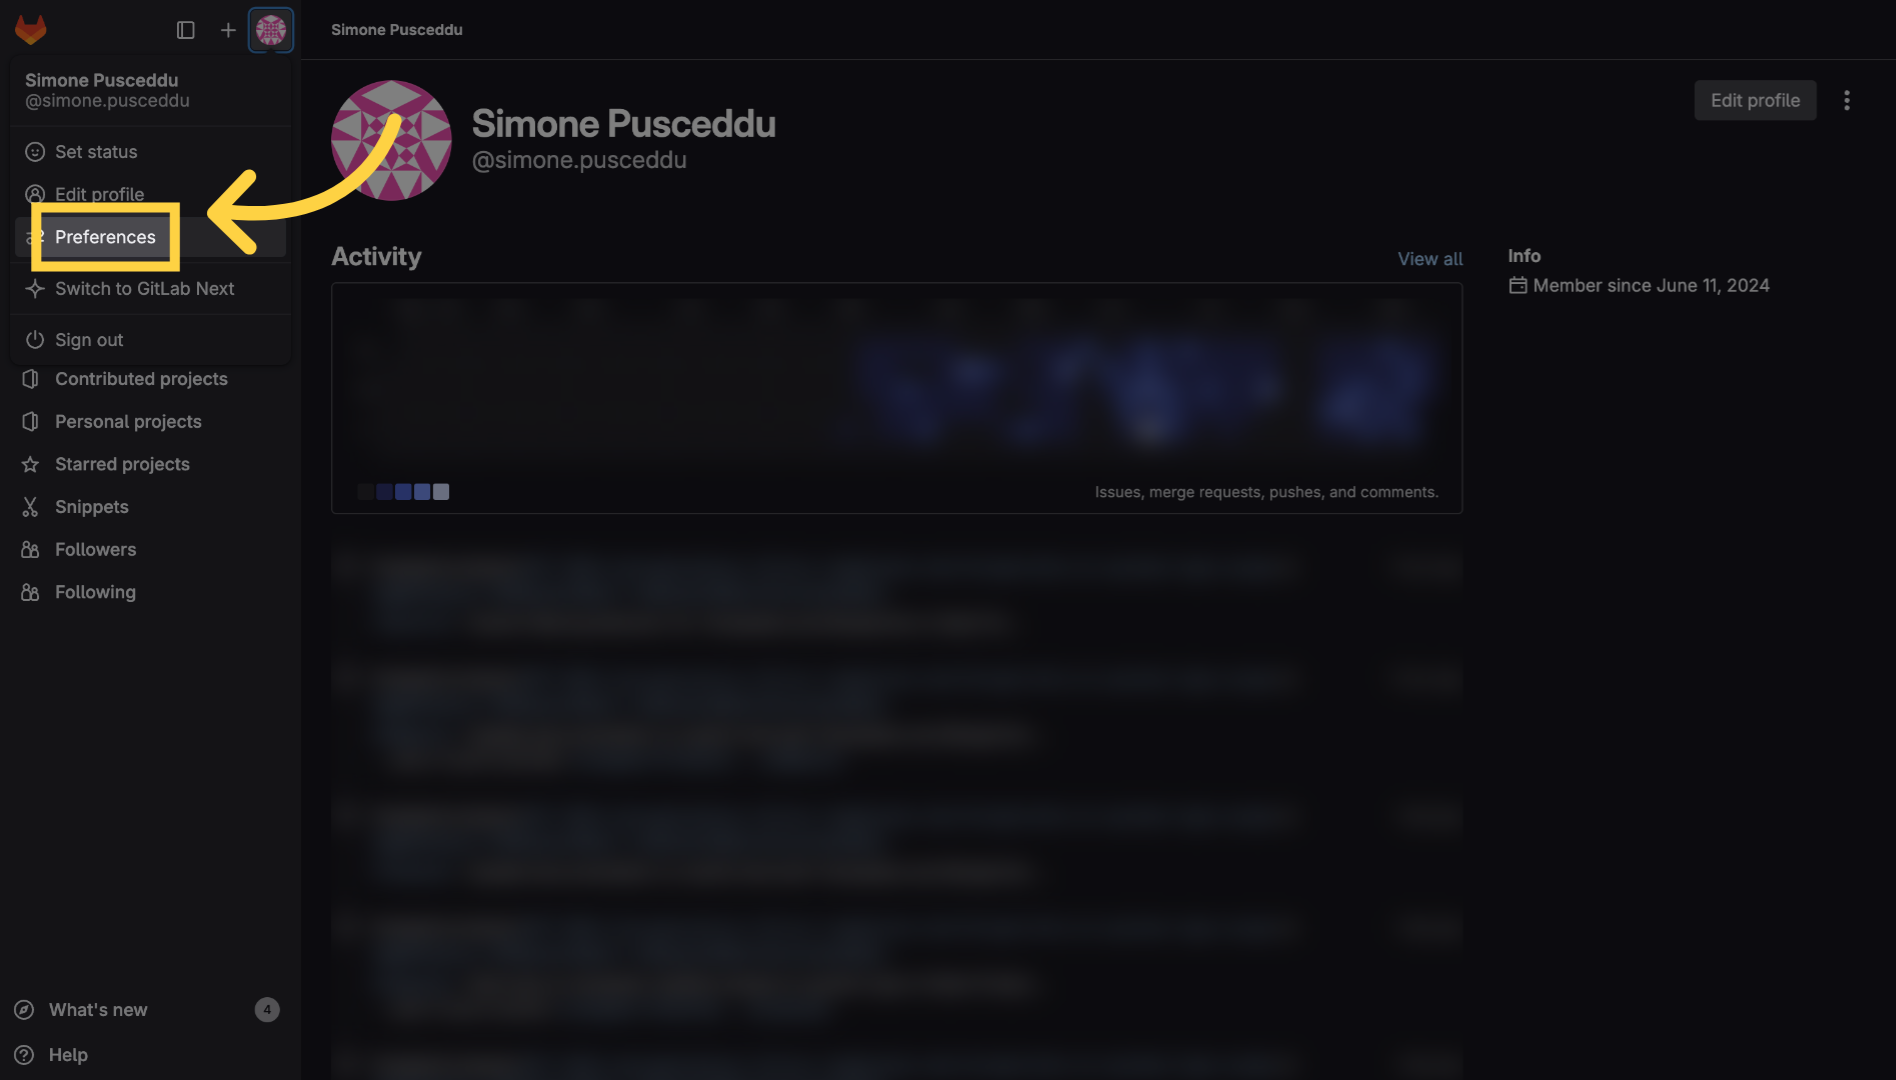
10. Click "Preferences"
Navigate to your user settings by clicking on "Preferences" to access personal configuration options.
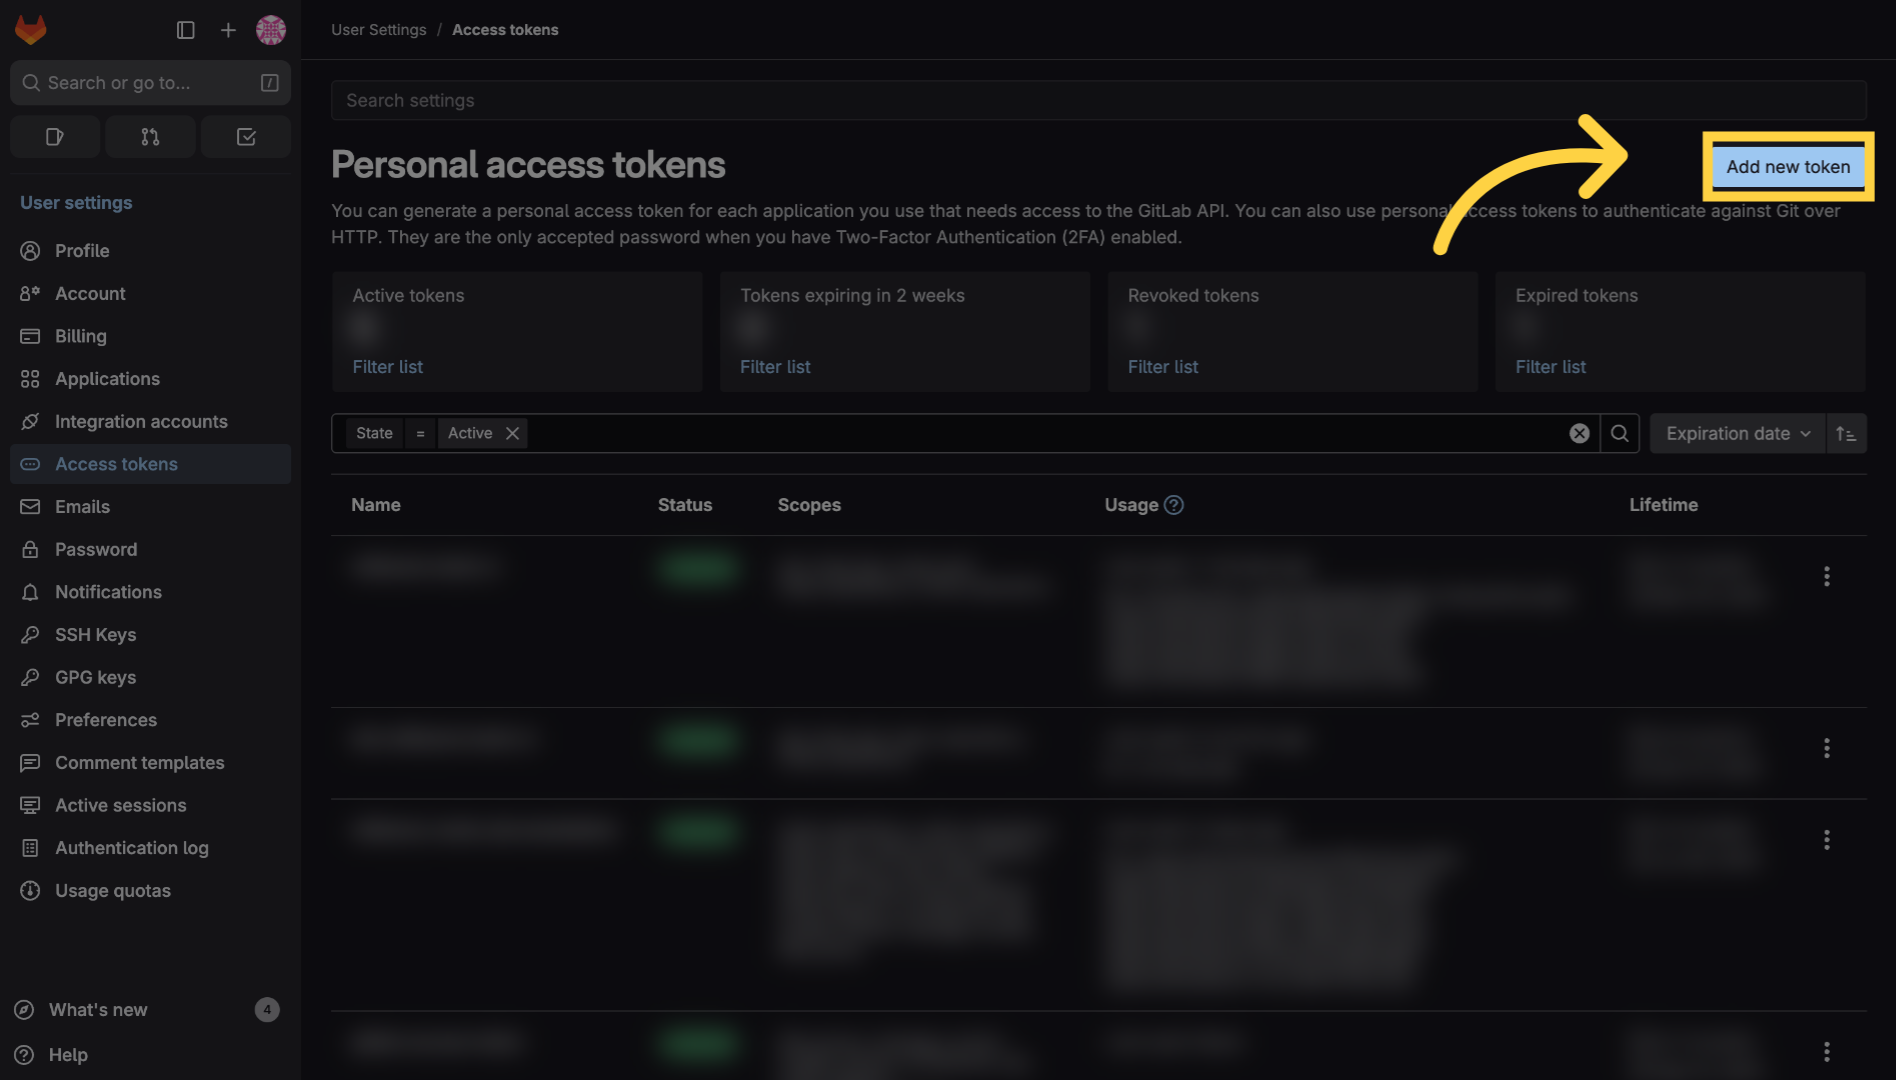
11. Click "Access tokens"
Select the "Access tokens" section to manage and create personal access tokens.

12. Click "Add new token"
Initiate the creation of a new access token by clicking the "Add new token" button.
13. Choose a token name
Enter a descriptive name for your token to identify its purpose later.
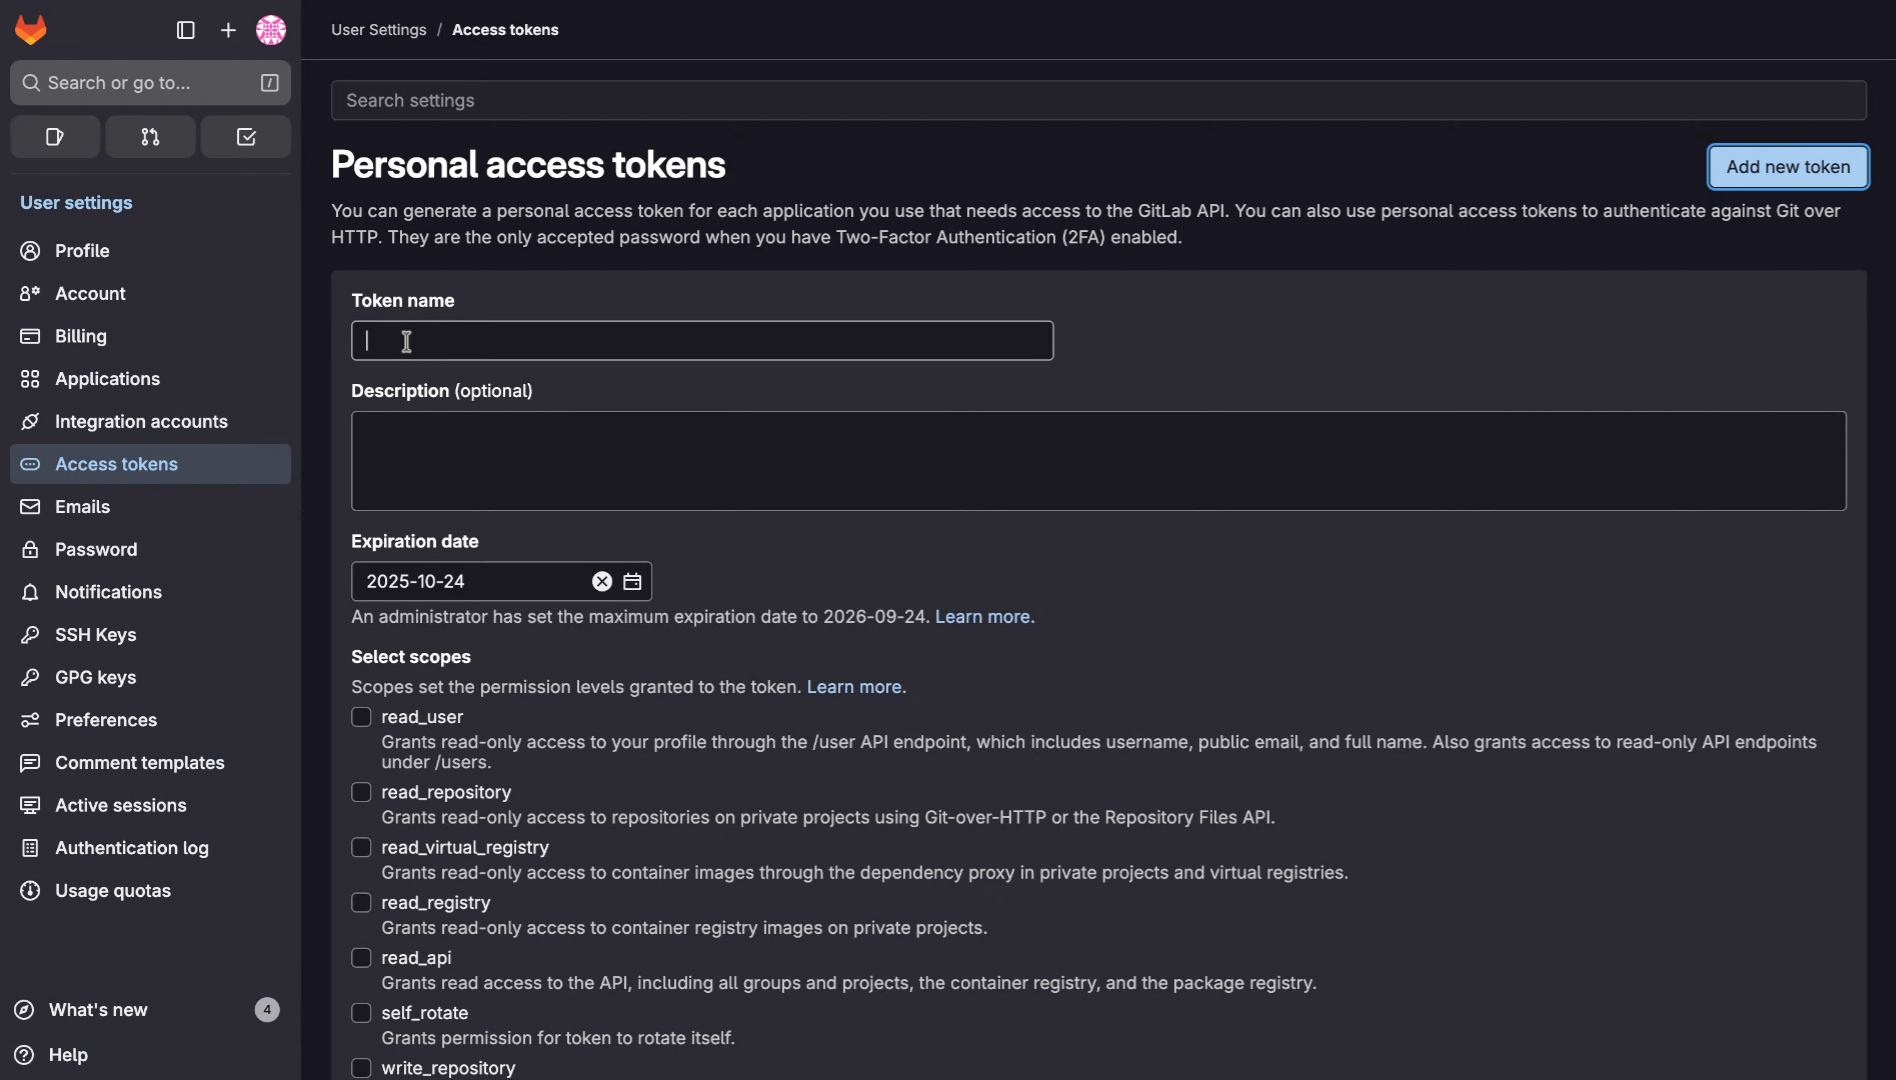
14. Select "Expiration date"
Click on the "Expiration date" field to set when the token will expire for security.

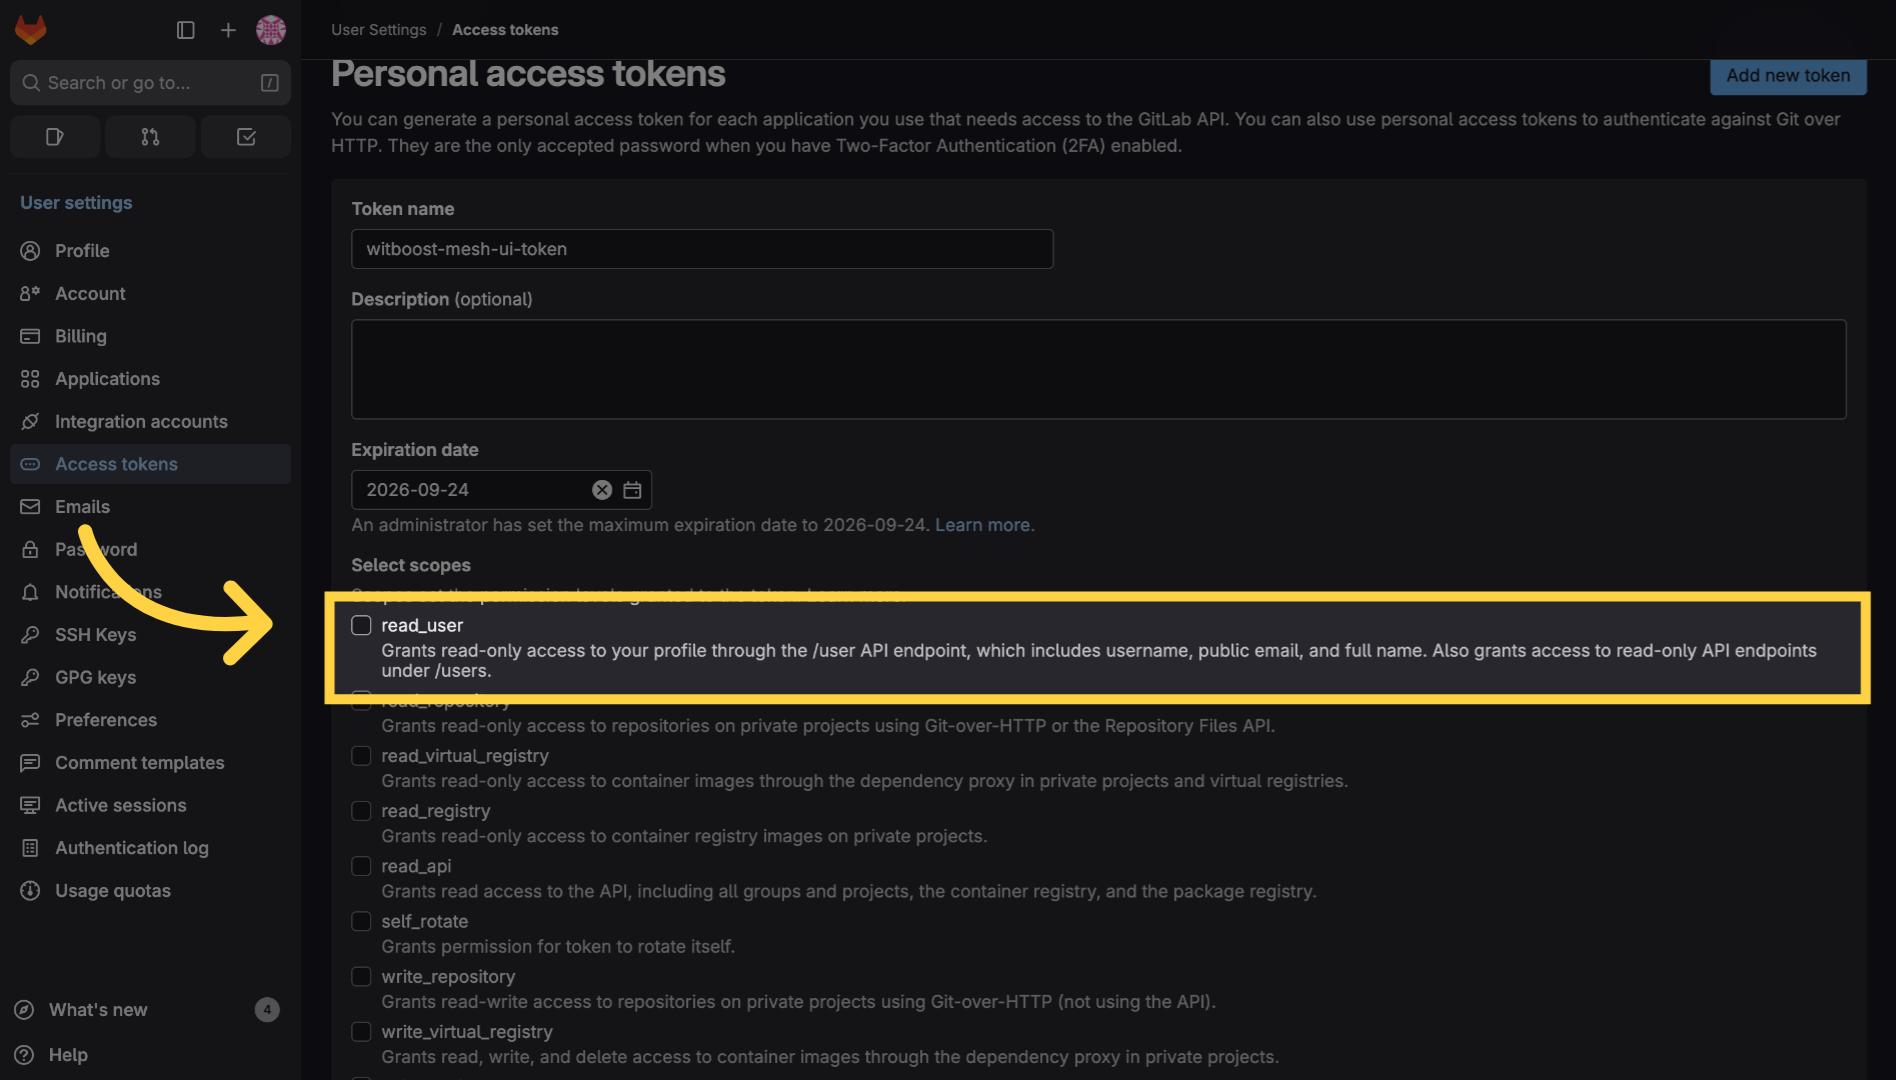
15. Select "read_user"
Enable the "read user" scope
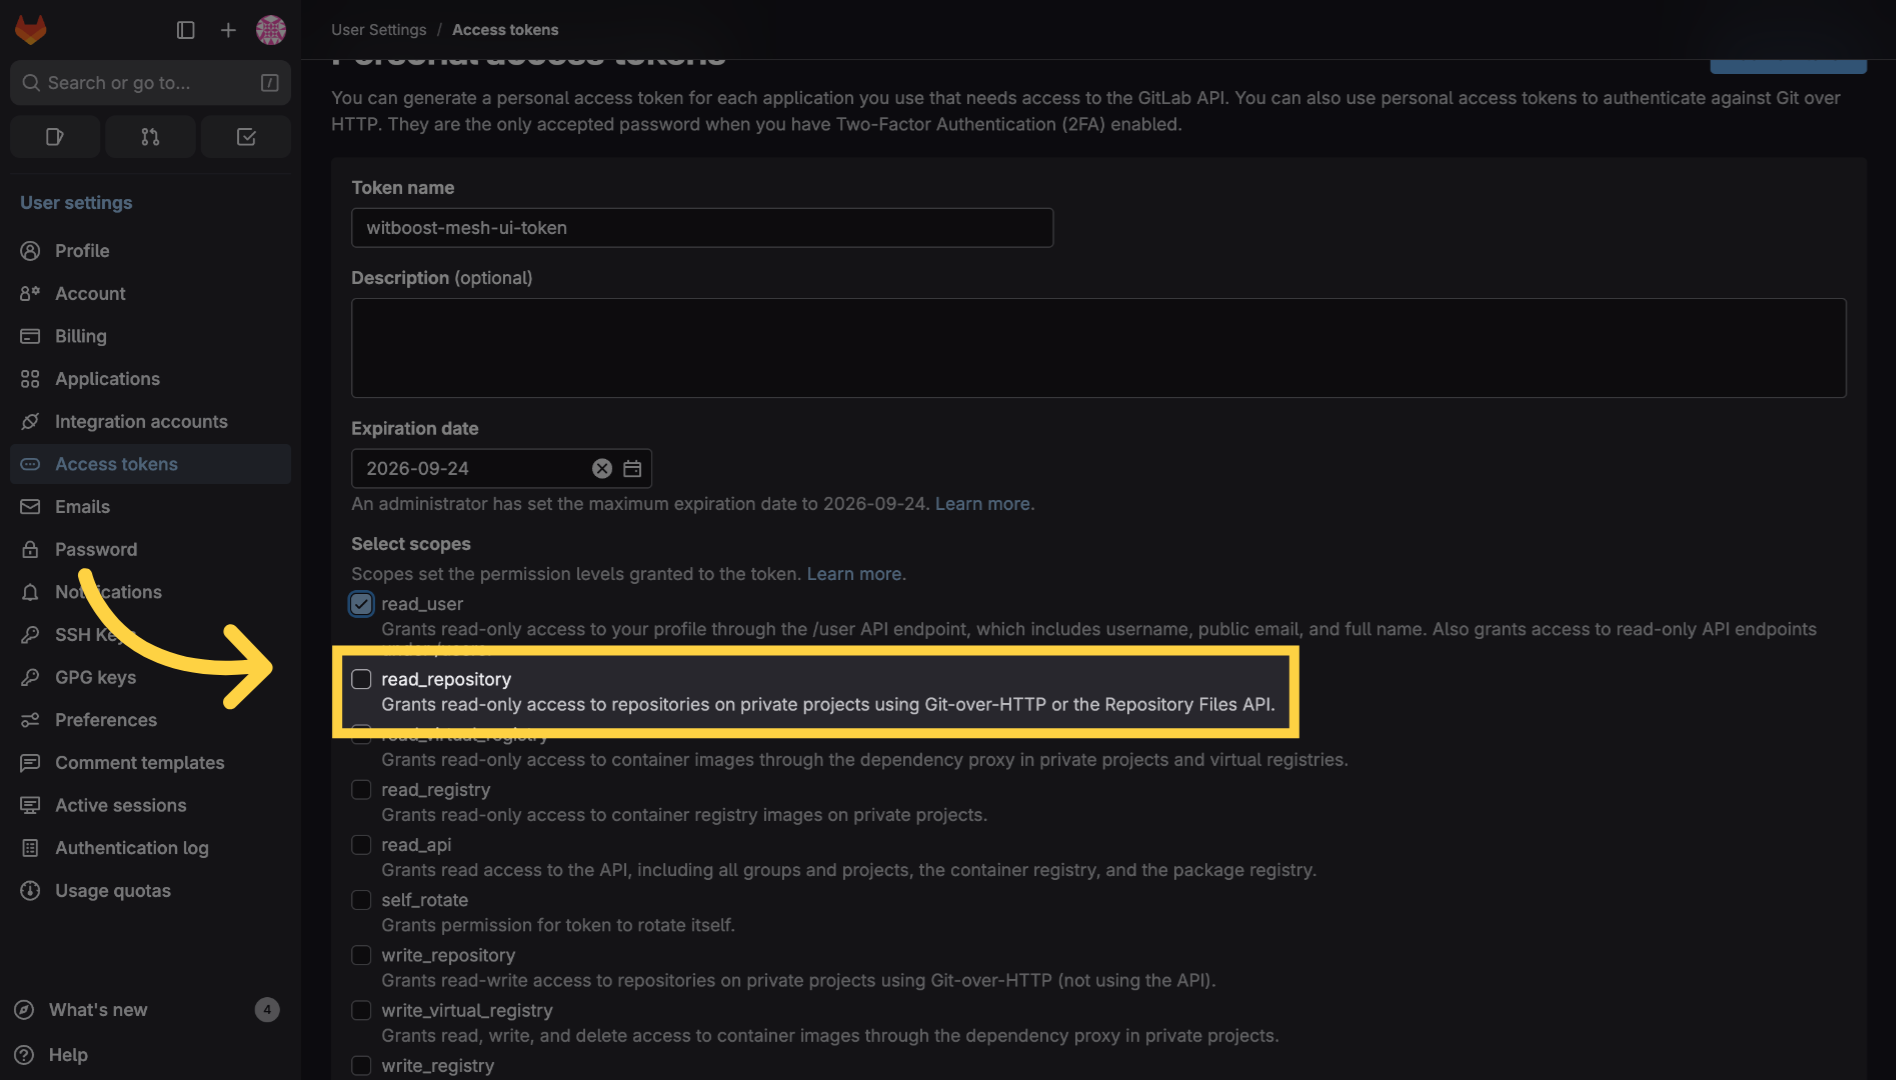
16. Select "read_repository"
Enable the "read repository" scope
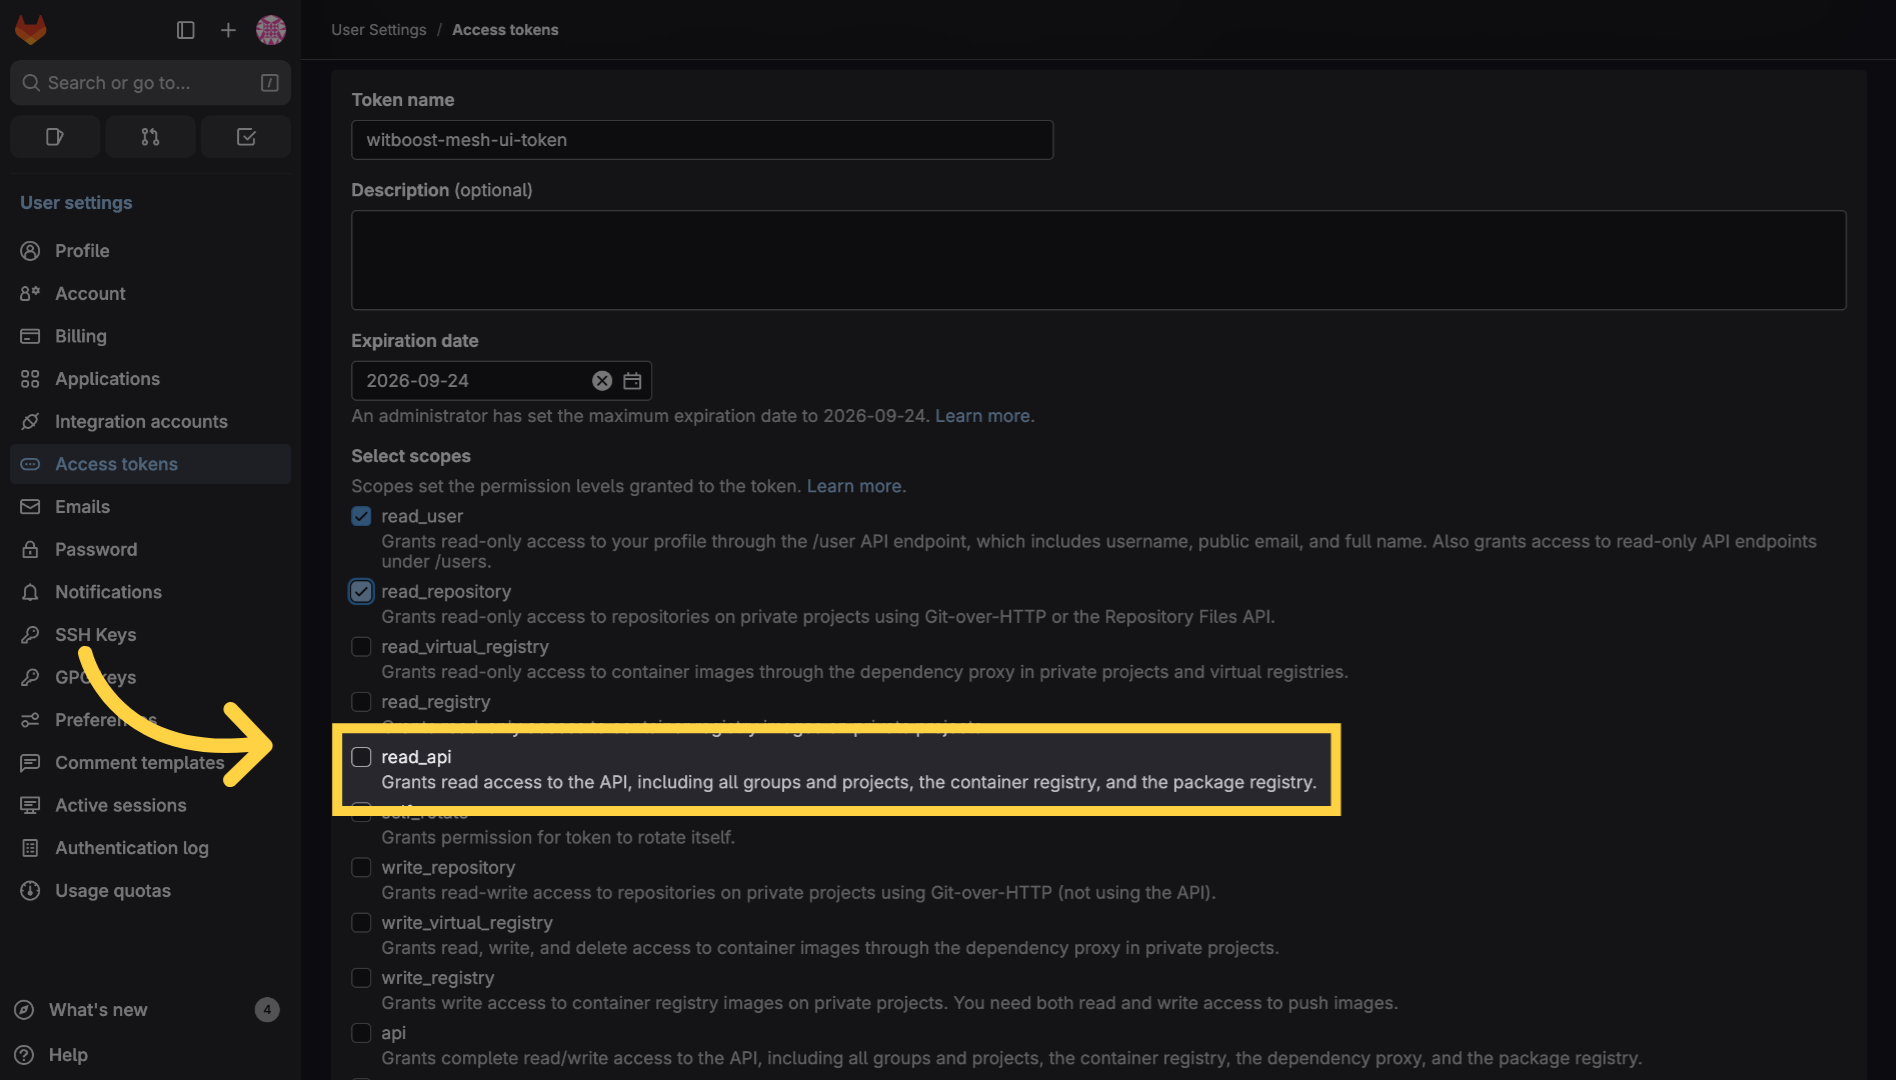
17. Select "read_api"
Enable the "read api" scope
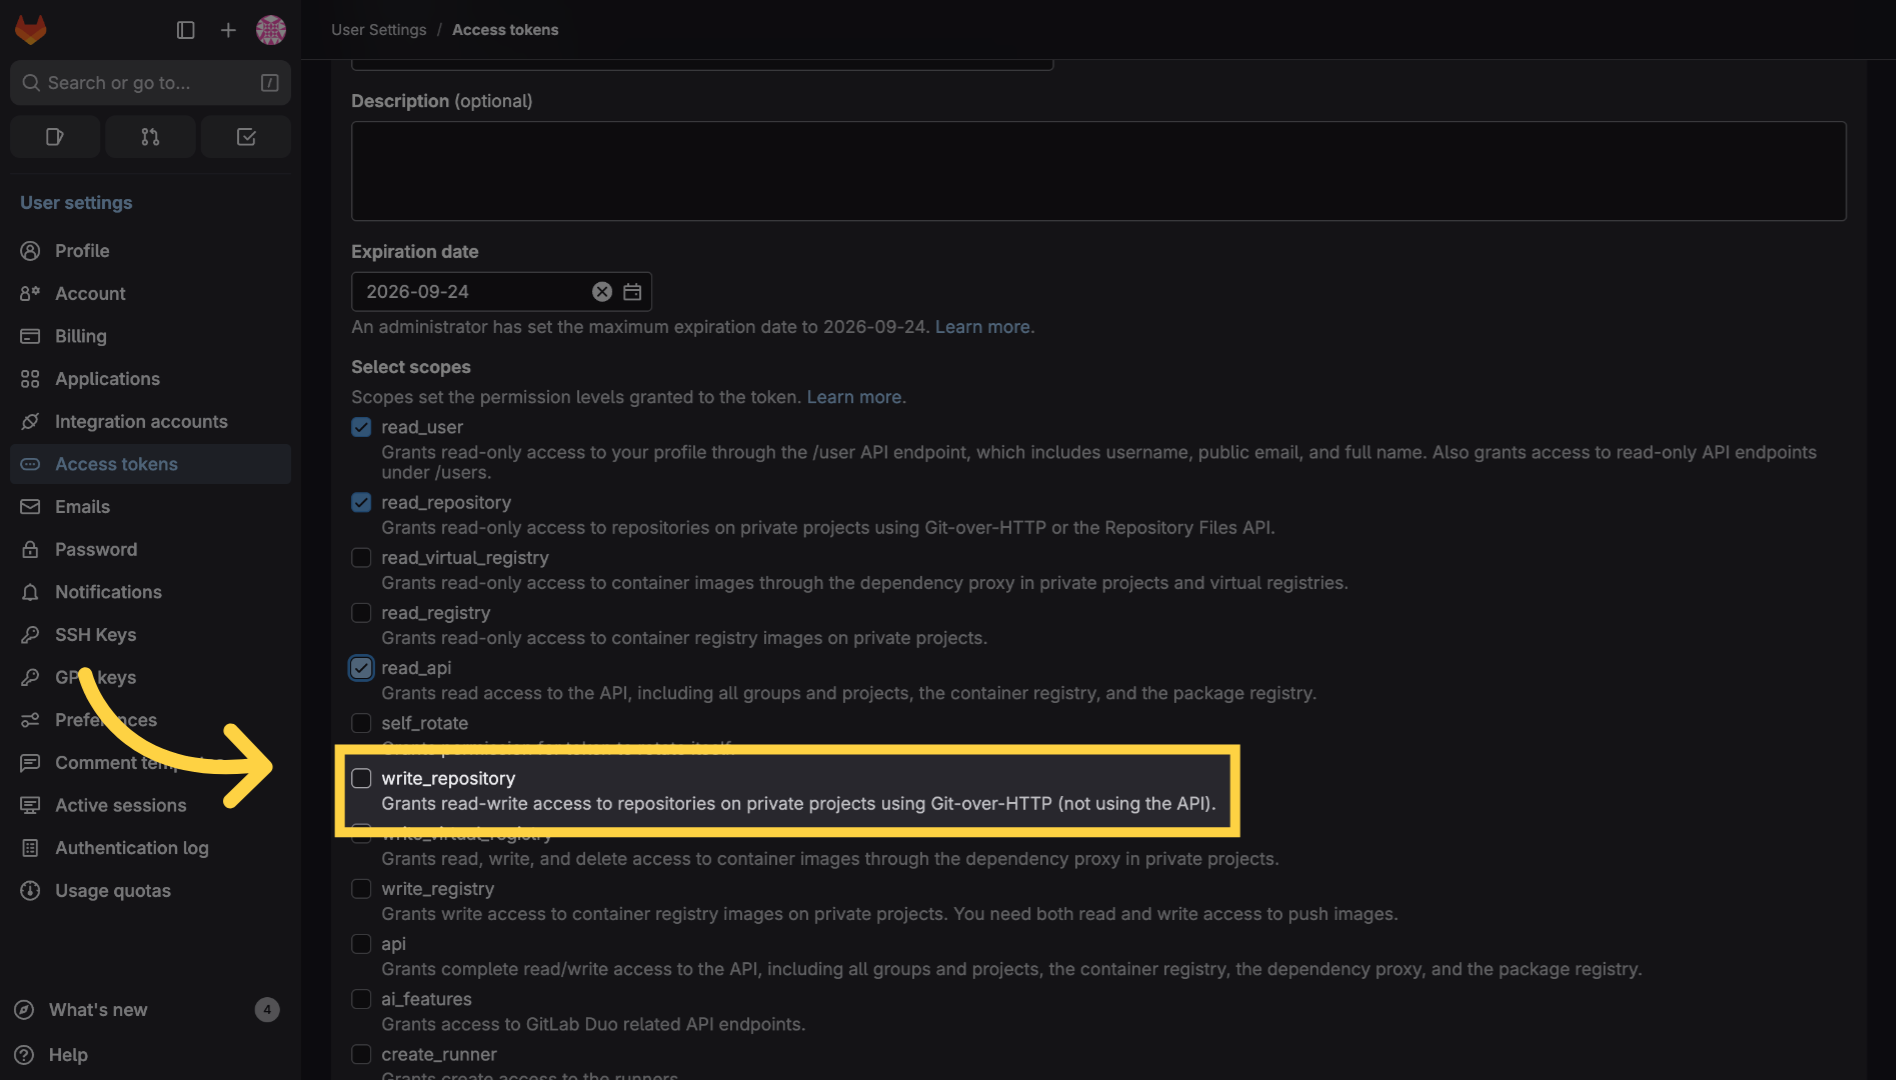
18. Select "write_repository"
Enable the "write repository" scope
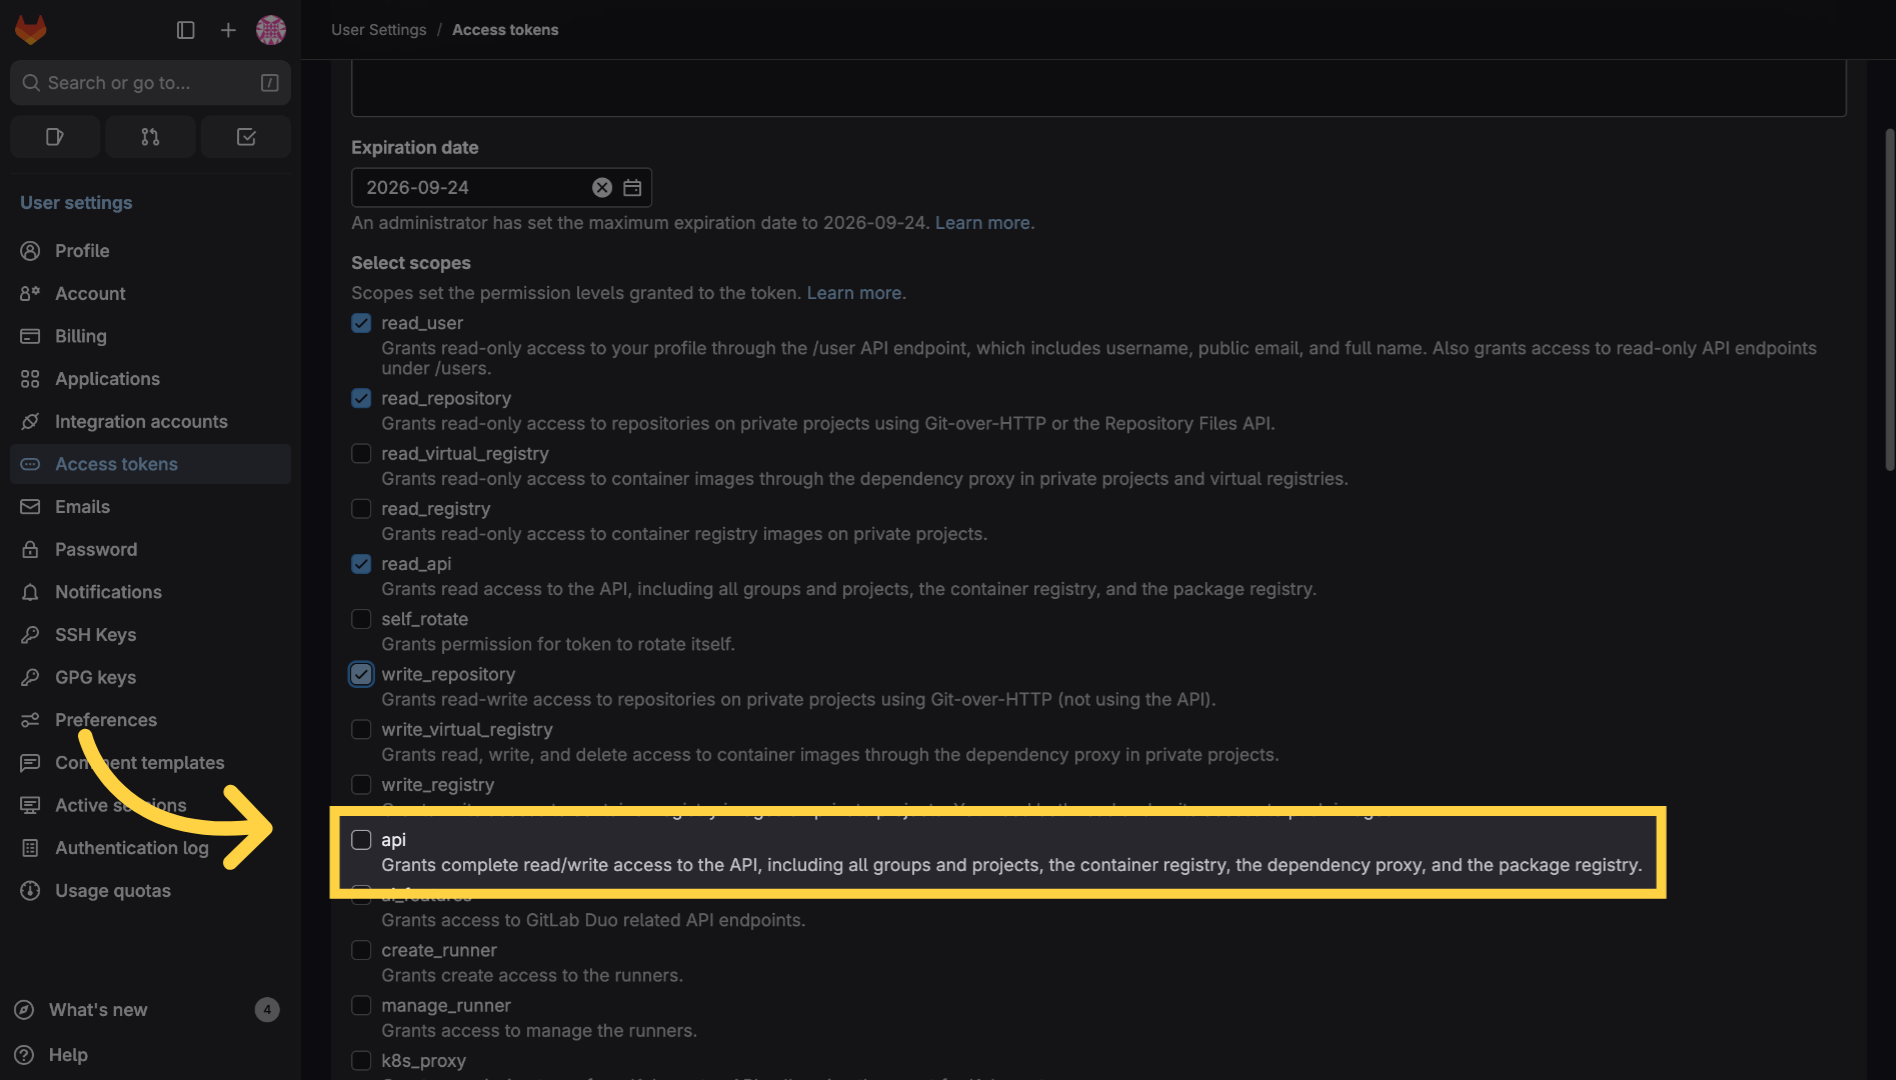
19. Select "api"
Enable the "api" scope
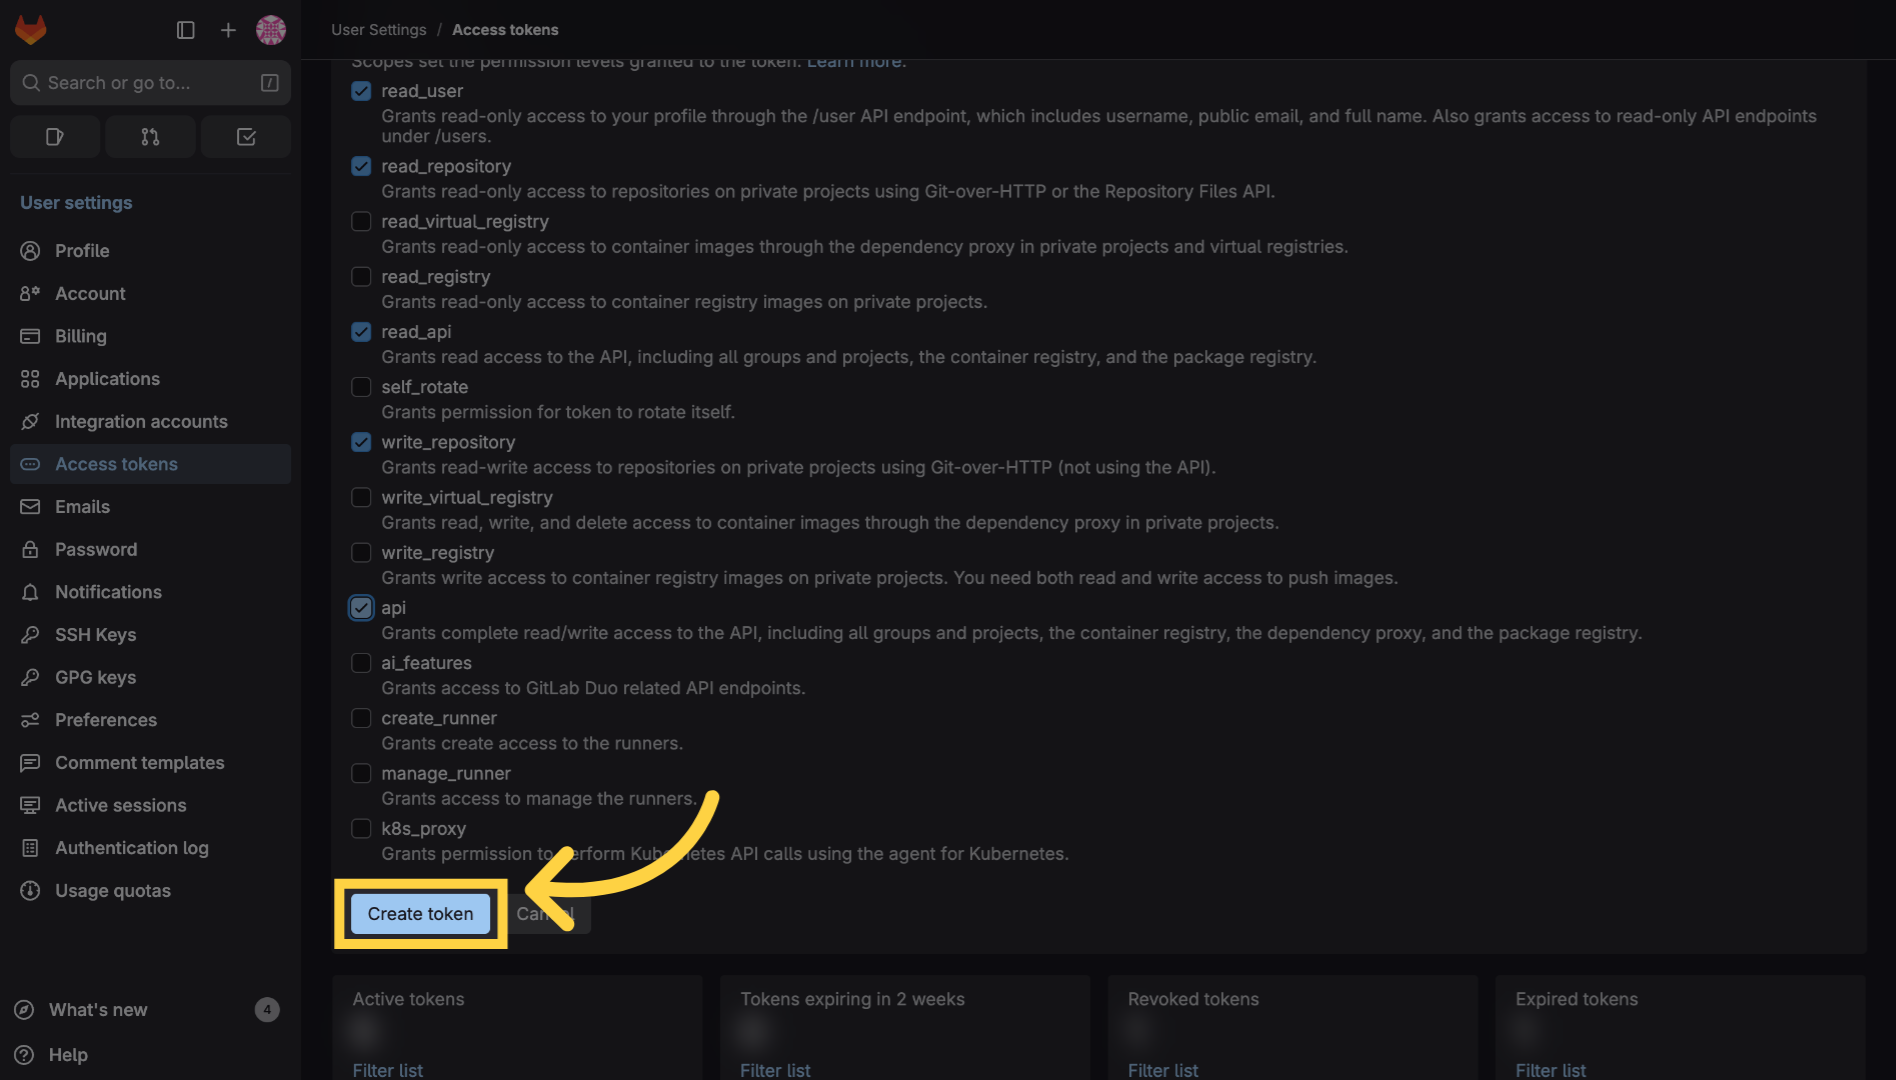
20. Click "Create token"
Click the "Create token" button to generate your new personal access token.
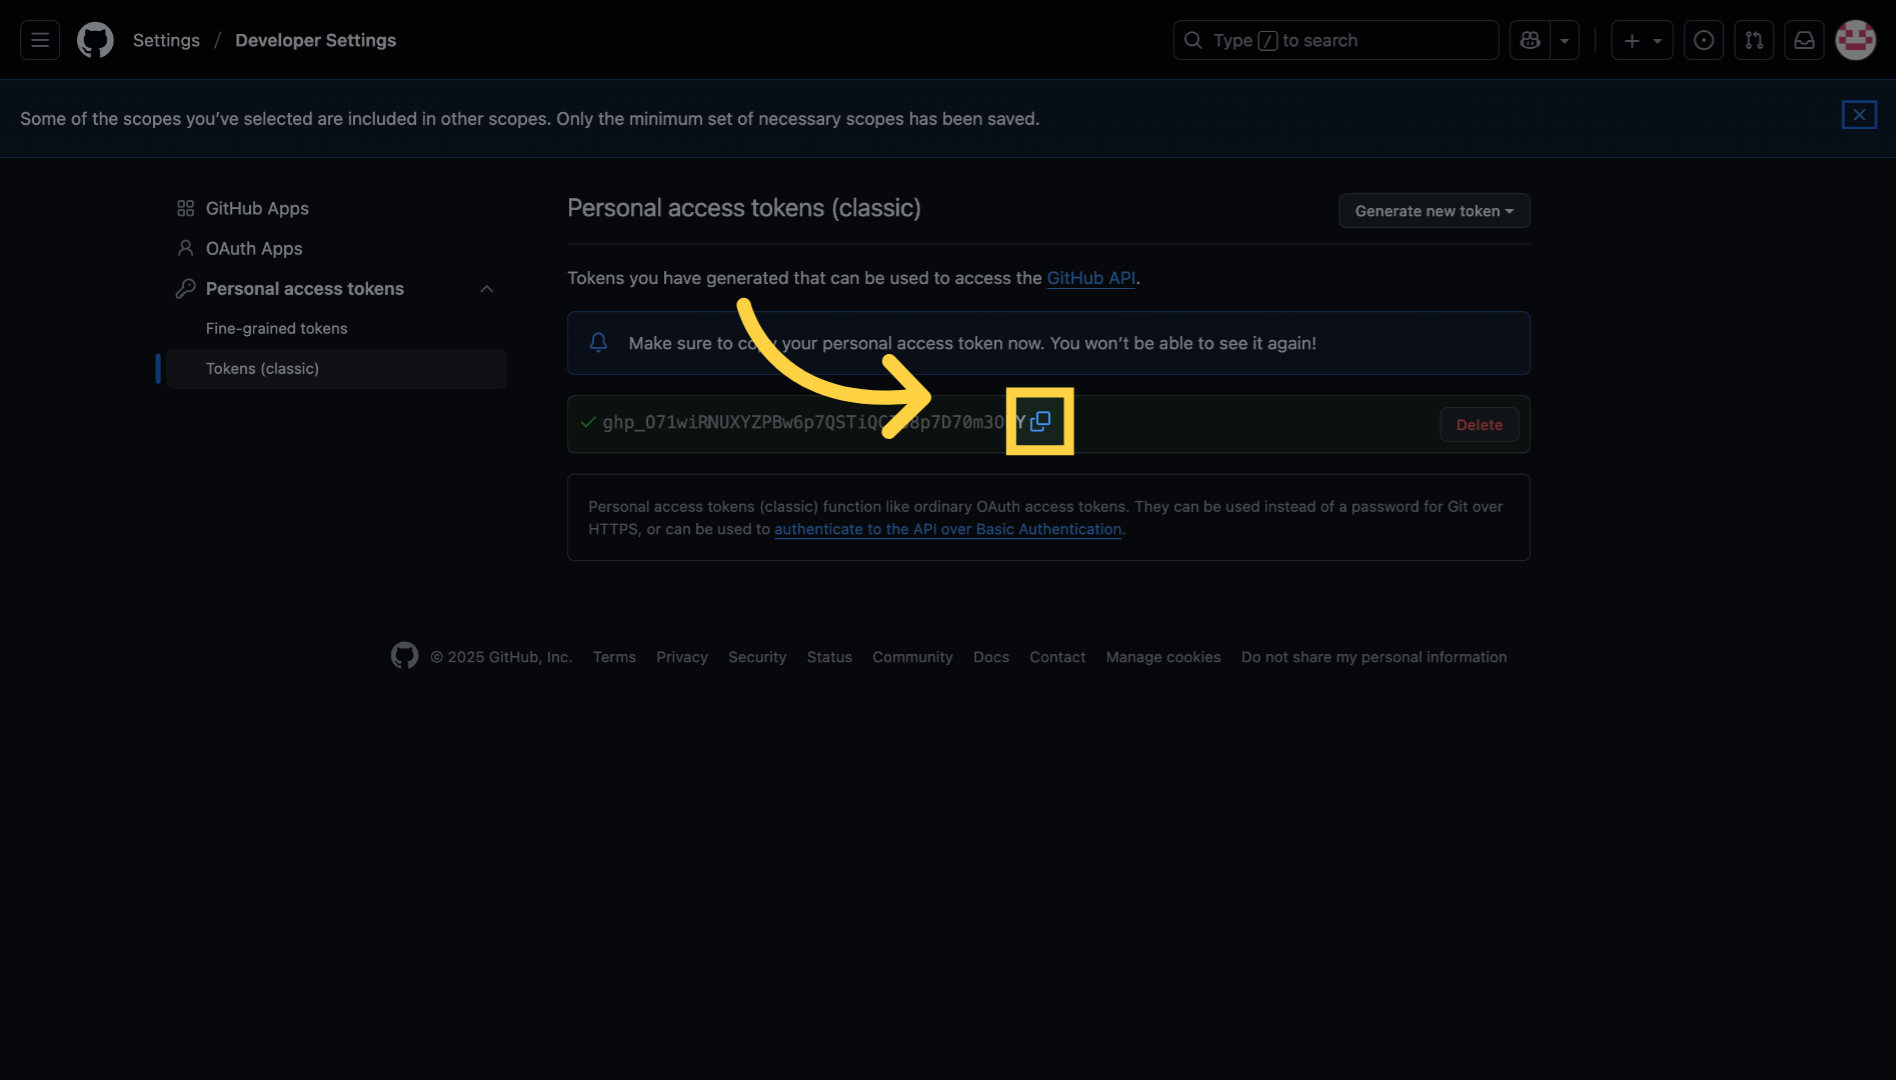
21. Copy the personal access token
Copy or save the generated token securely as it will not be shown again.
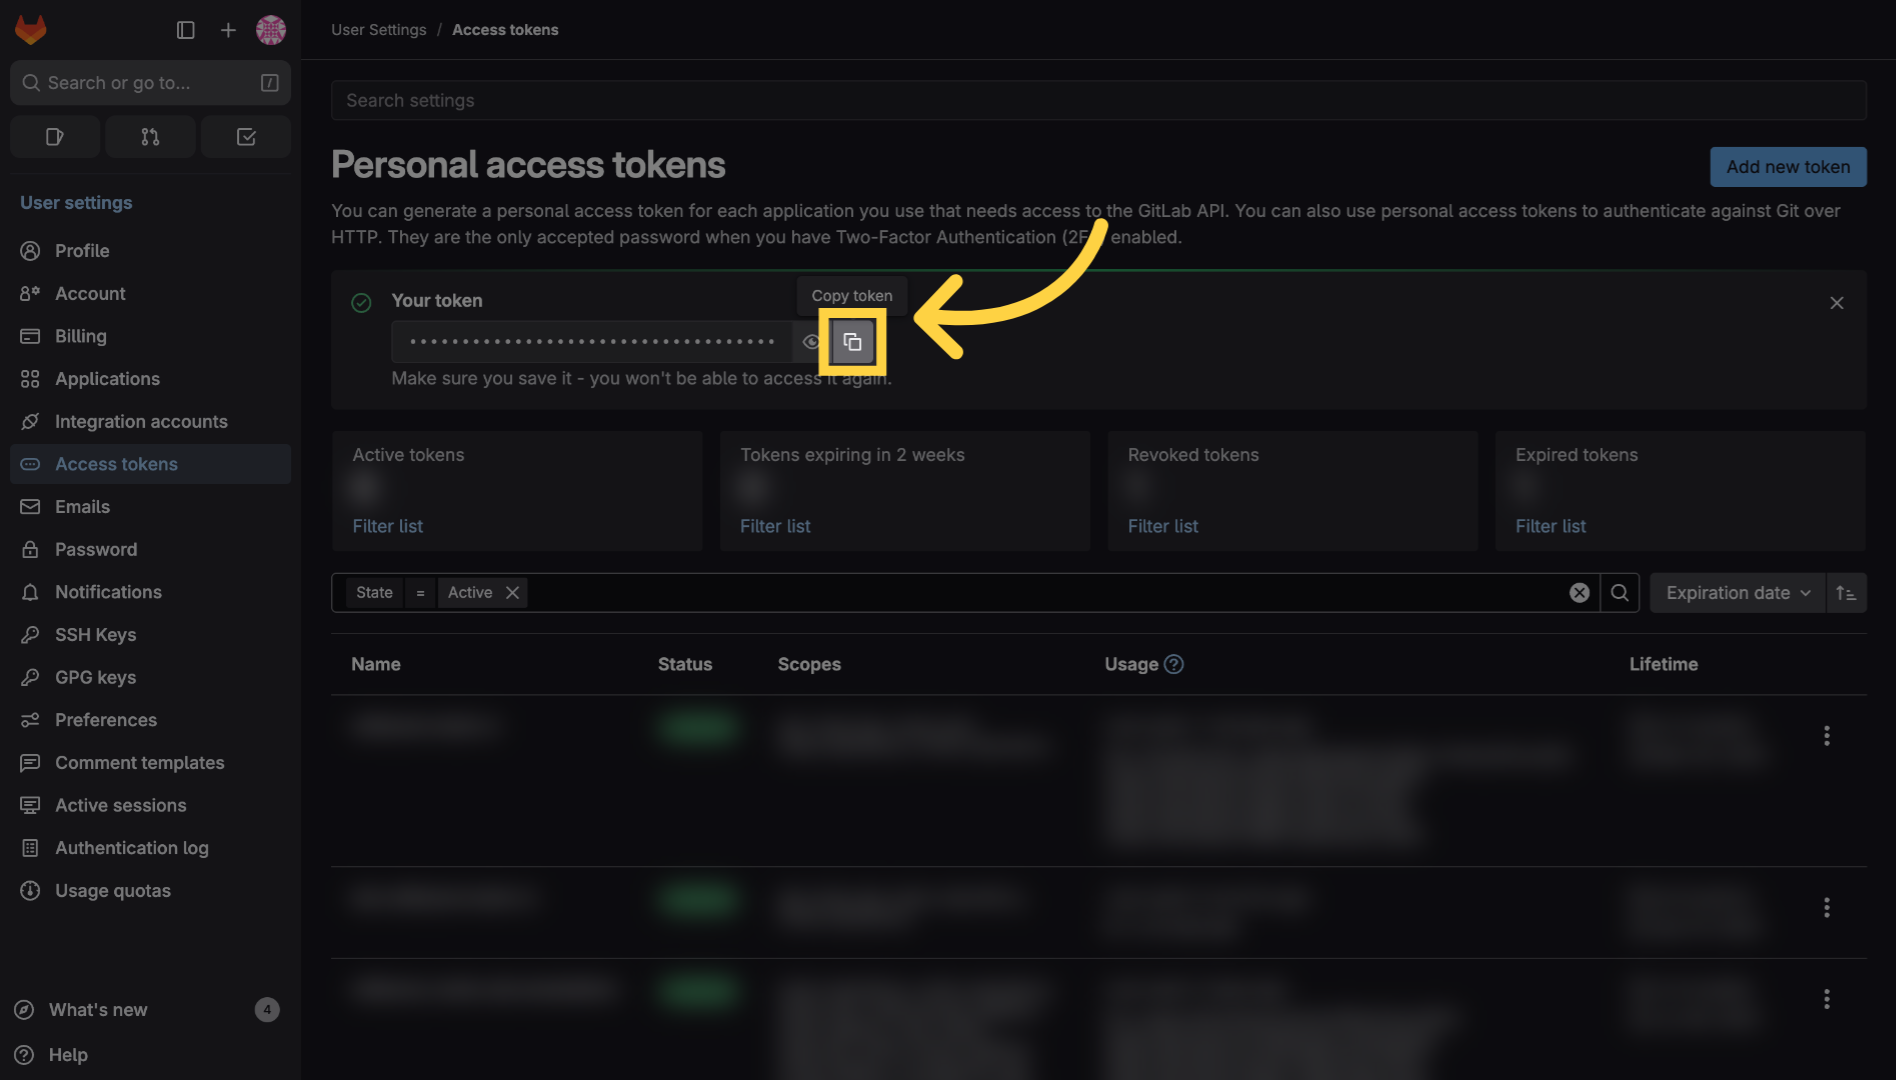
22. Finished creating a Gitlab token
You have successfully created a Gitlab personal access token with specific scopes and an expiration date.

23. How to create an Azure DevOps access token
This tutorial guides you through creating a personal access token in Azure DevOps.

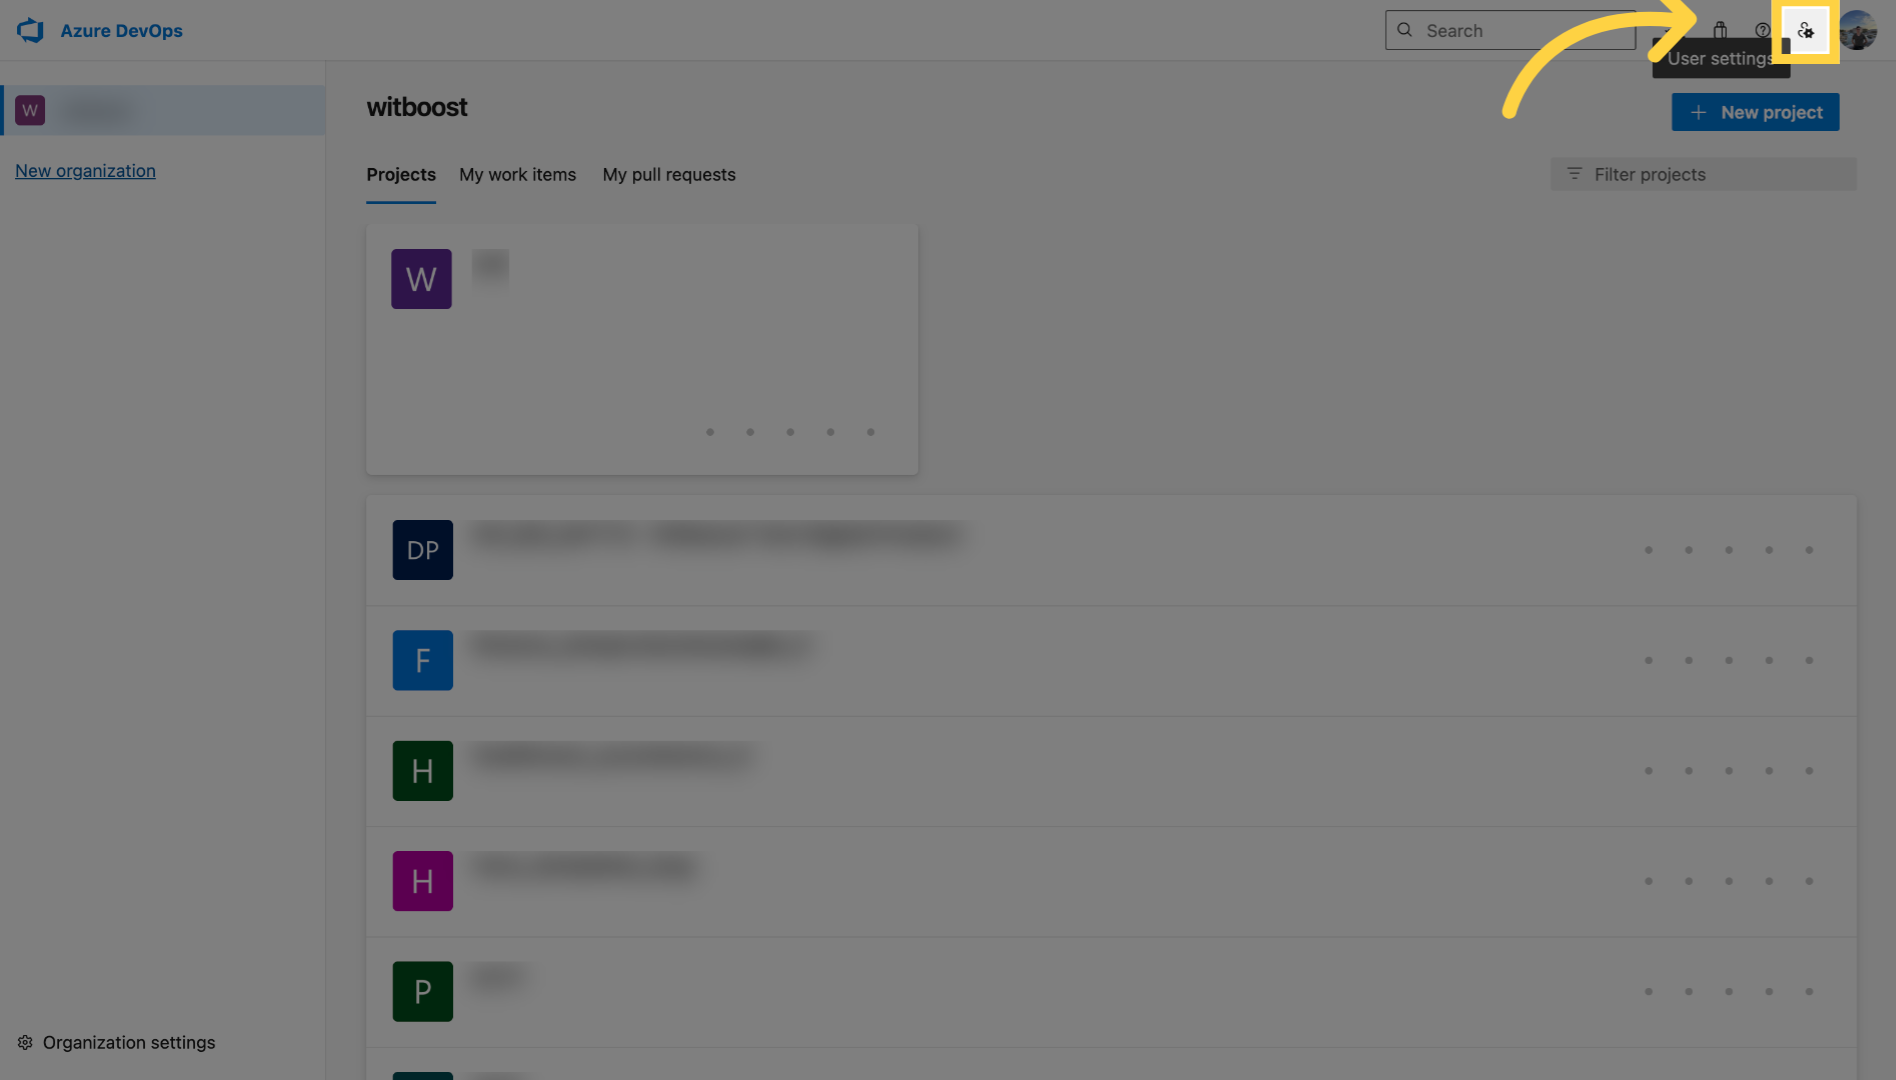
24. Click User Settings
Begin by clicking the user settings icon in the upper right corner.
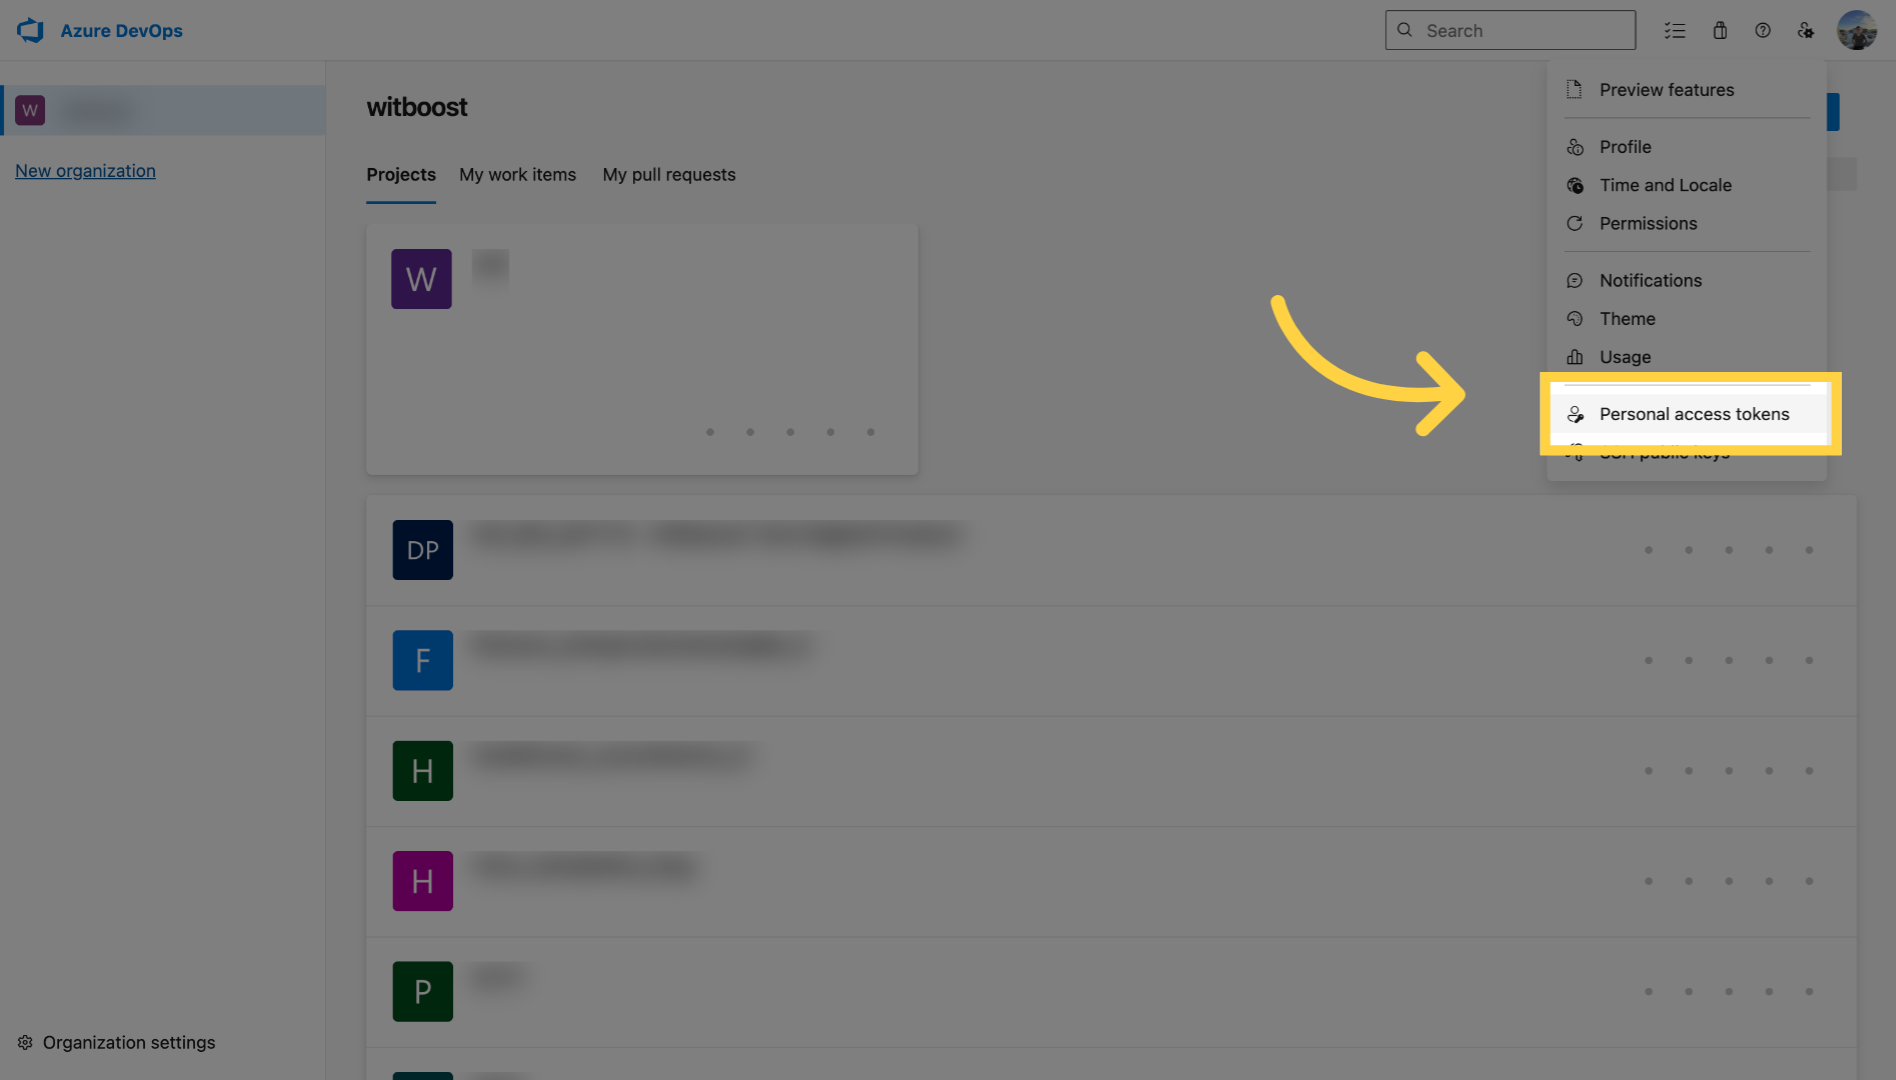
25. Click "Personal access tokens"
Select "Personal access tokens" from the dropdown menu.
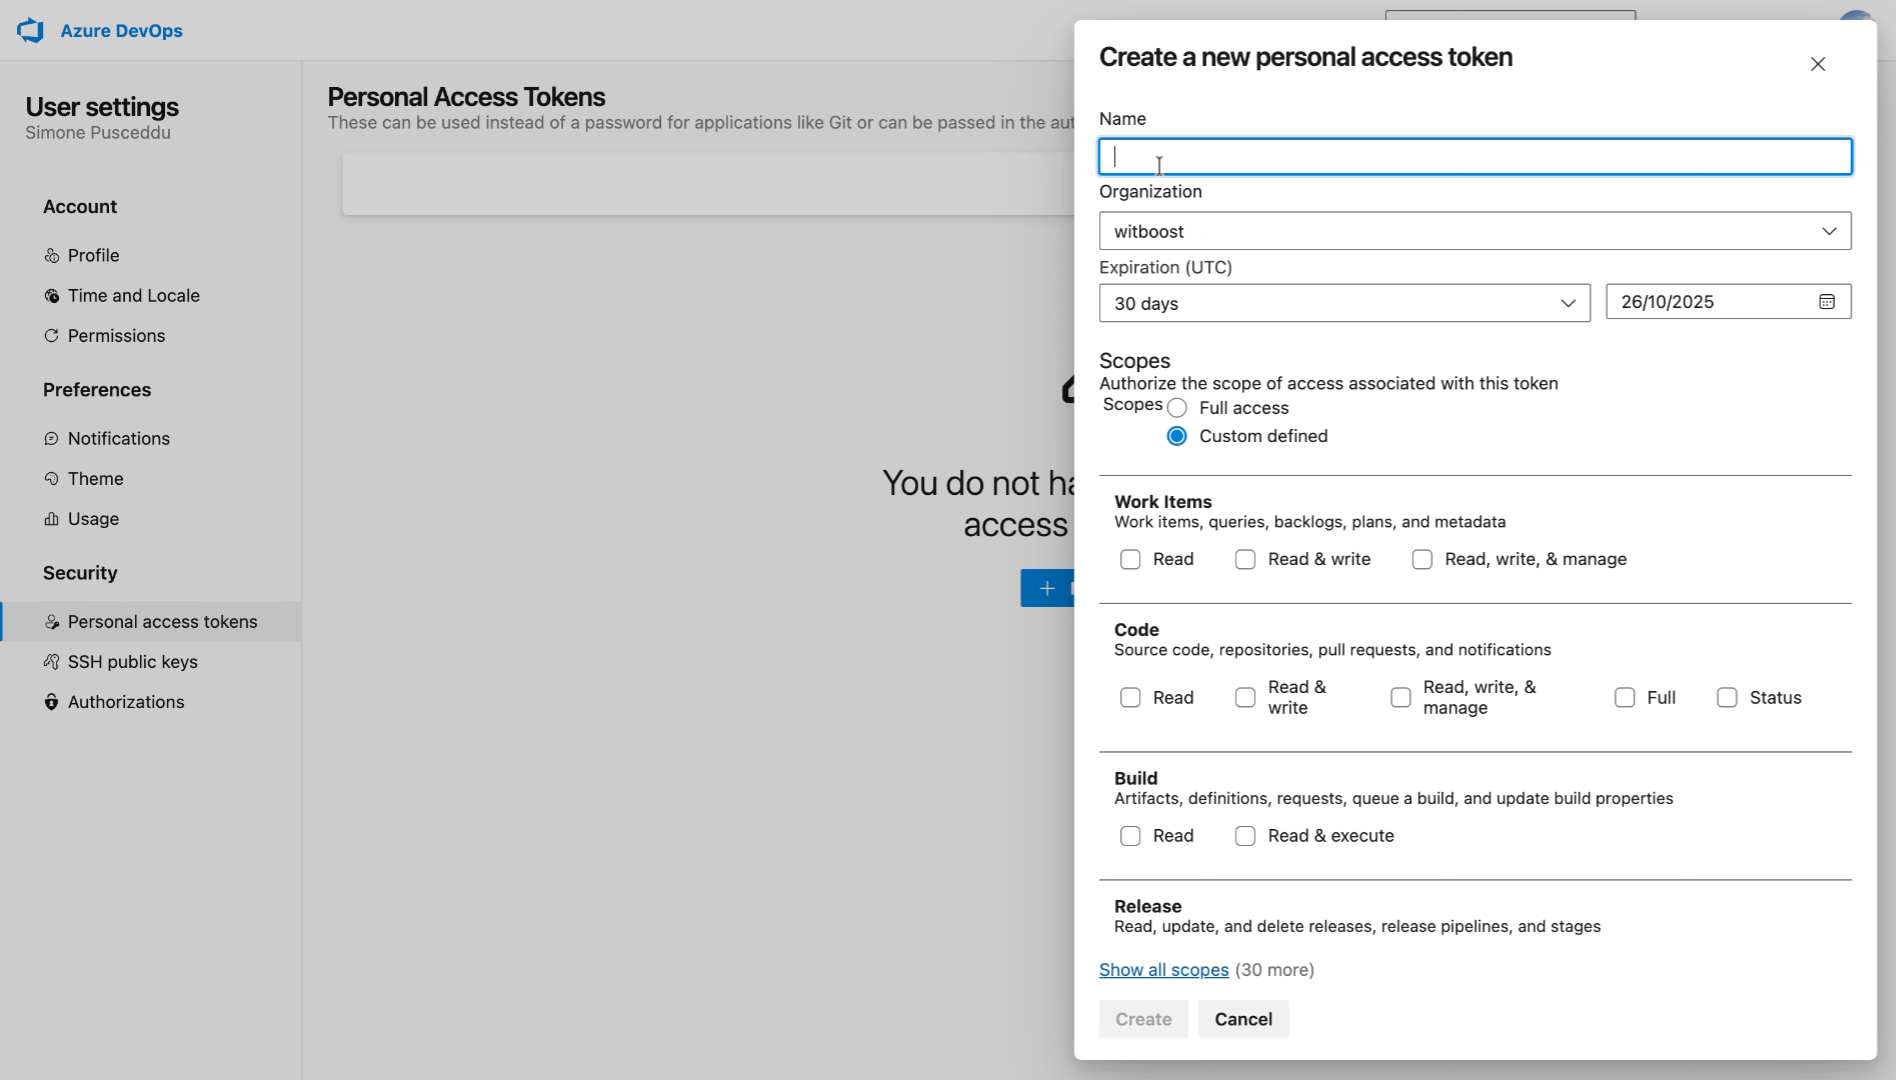
26. Click "New Token"
Click the "New Token" button.

27. Fill name field
Fill in the name field with a identifier for your token.
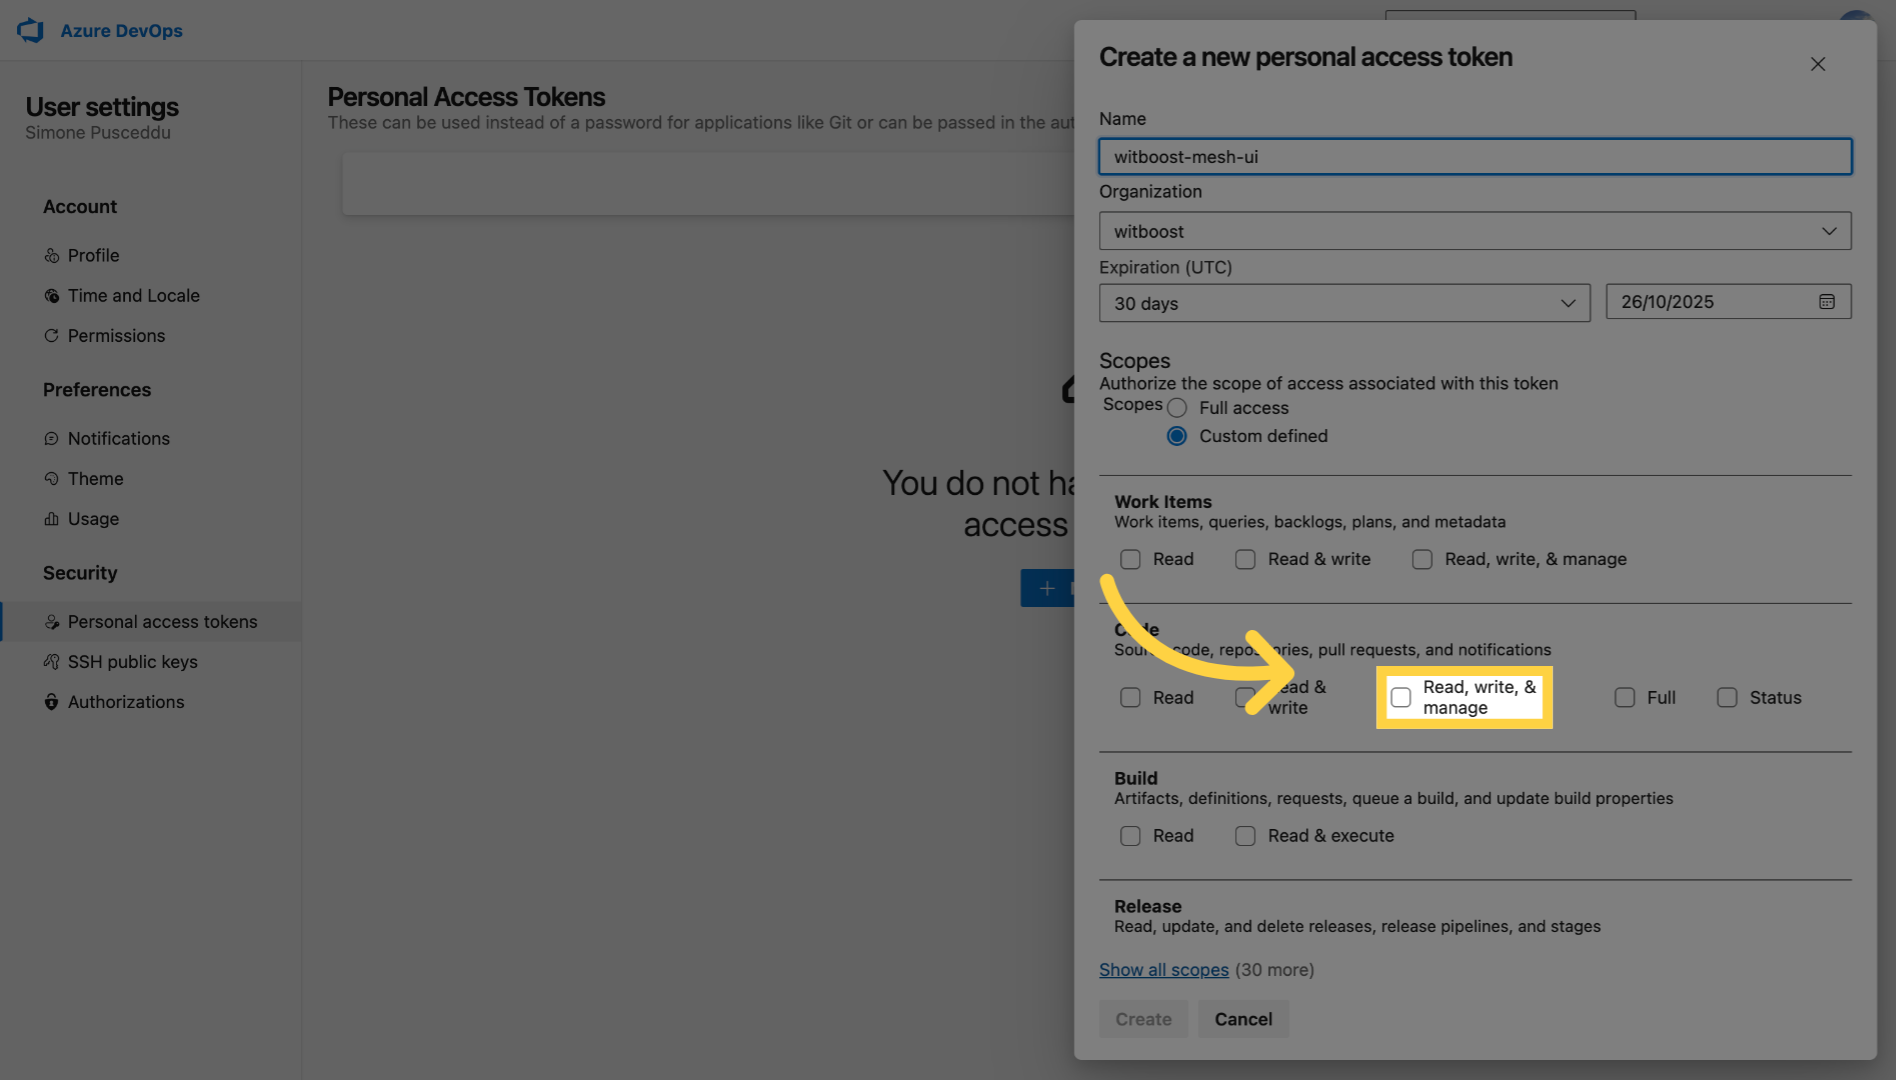
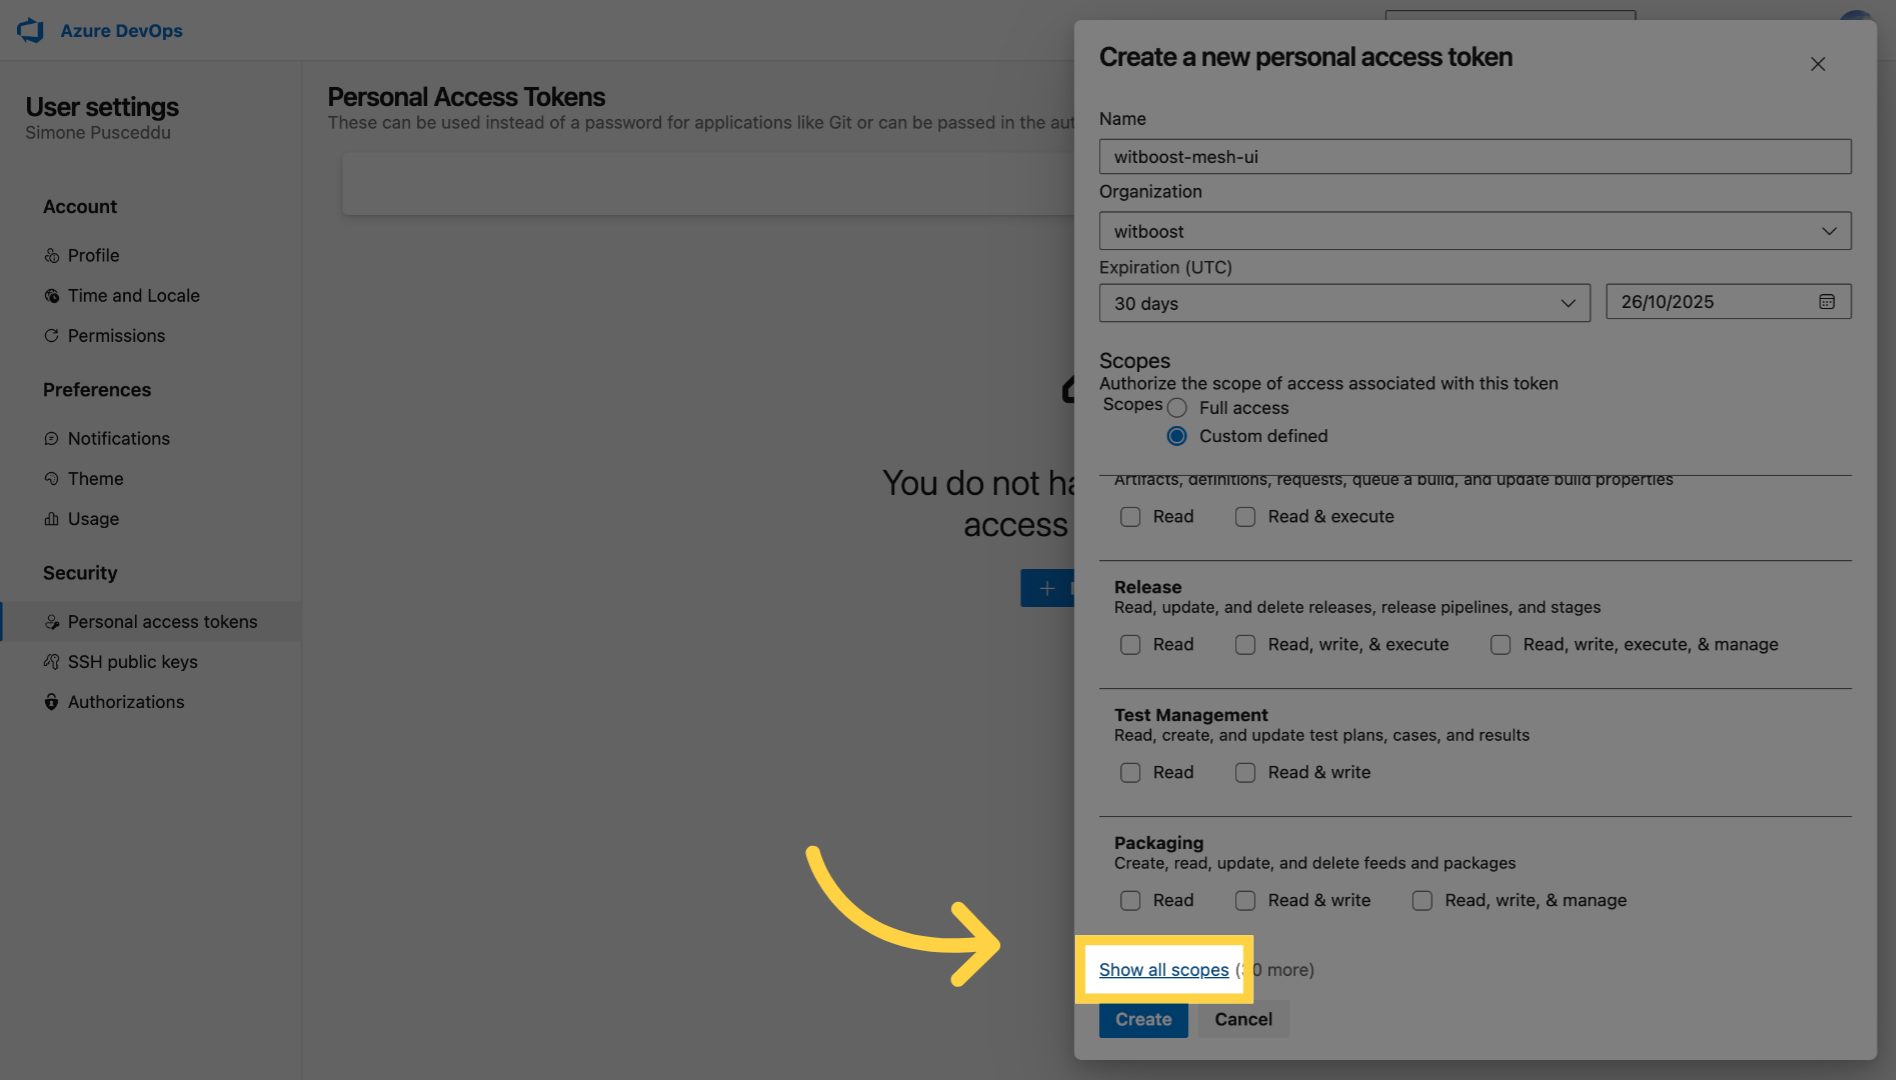
28. Give Code permissions
Select read, write and manage for code permissions.
29. Click "Show all scopes"
Click "Show all scopes".
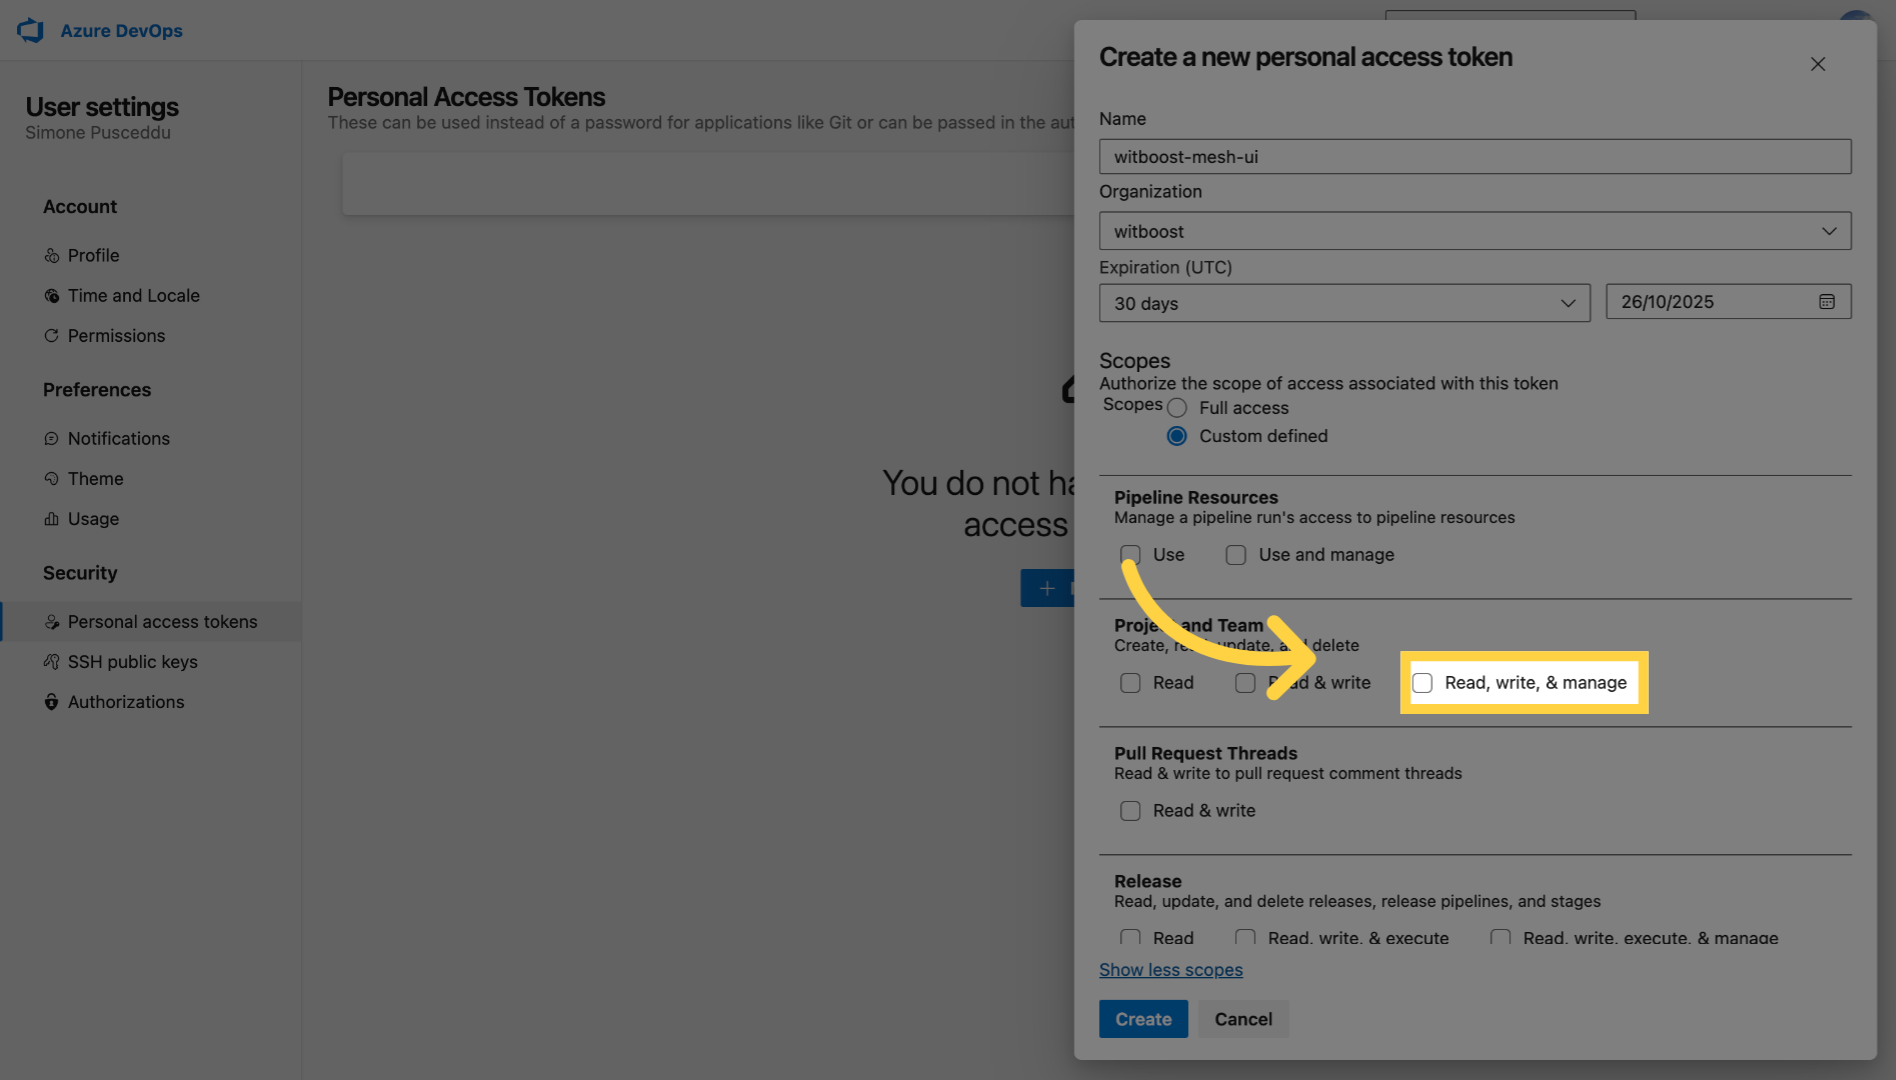
30. Give Project and Team permissions
Select read, write and Manage for Project and Team permissions
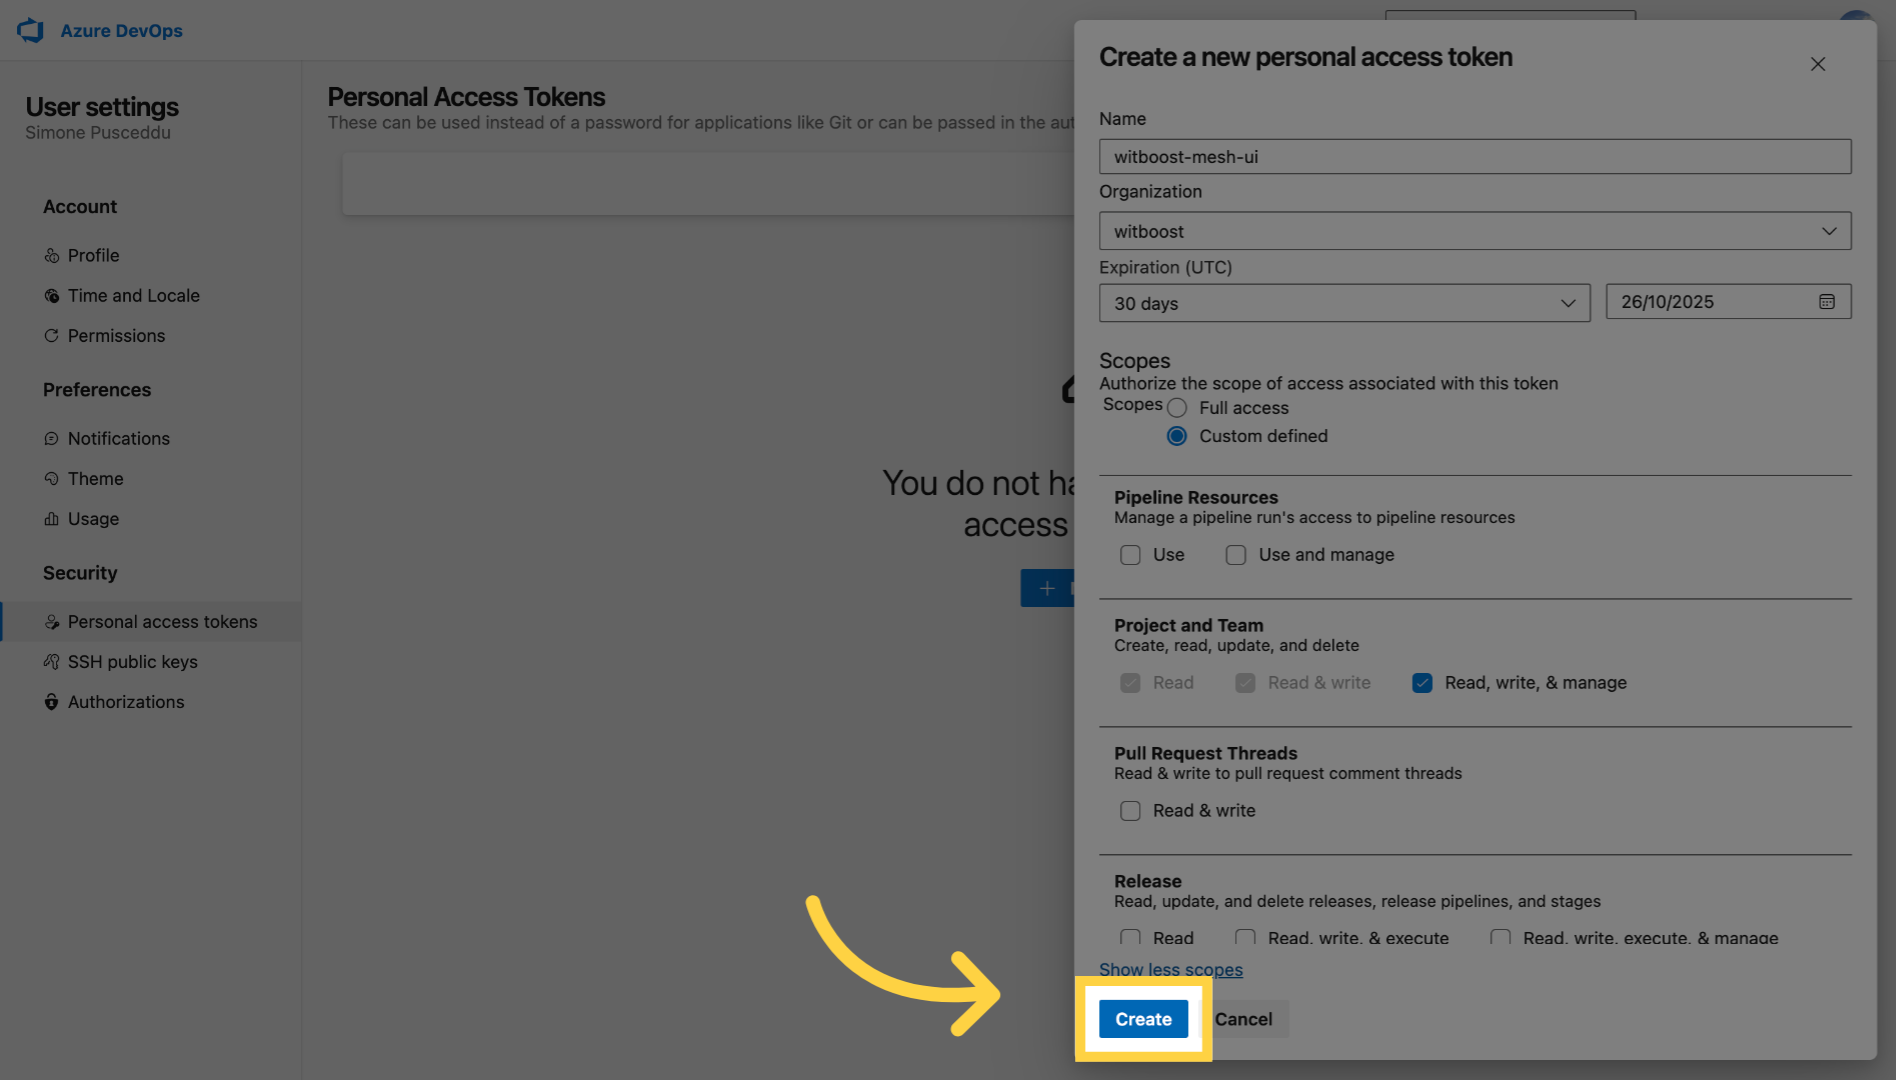
31. Click "Create"
Click the "Create" button to generate your personal access token.
32. Save the token
Finally, click the copy icon to securely copy your new token; be sure to save it now as it won’t be shown again.
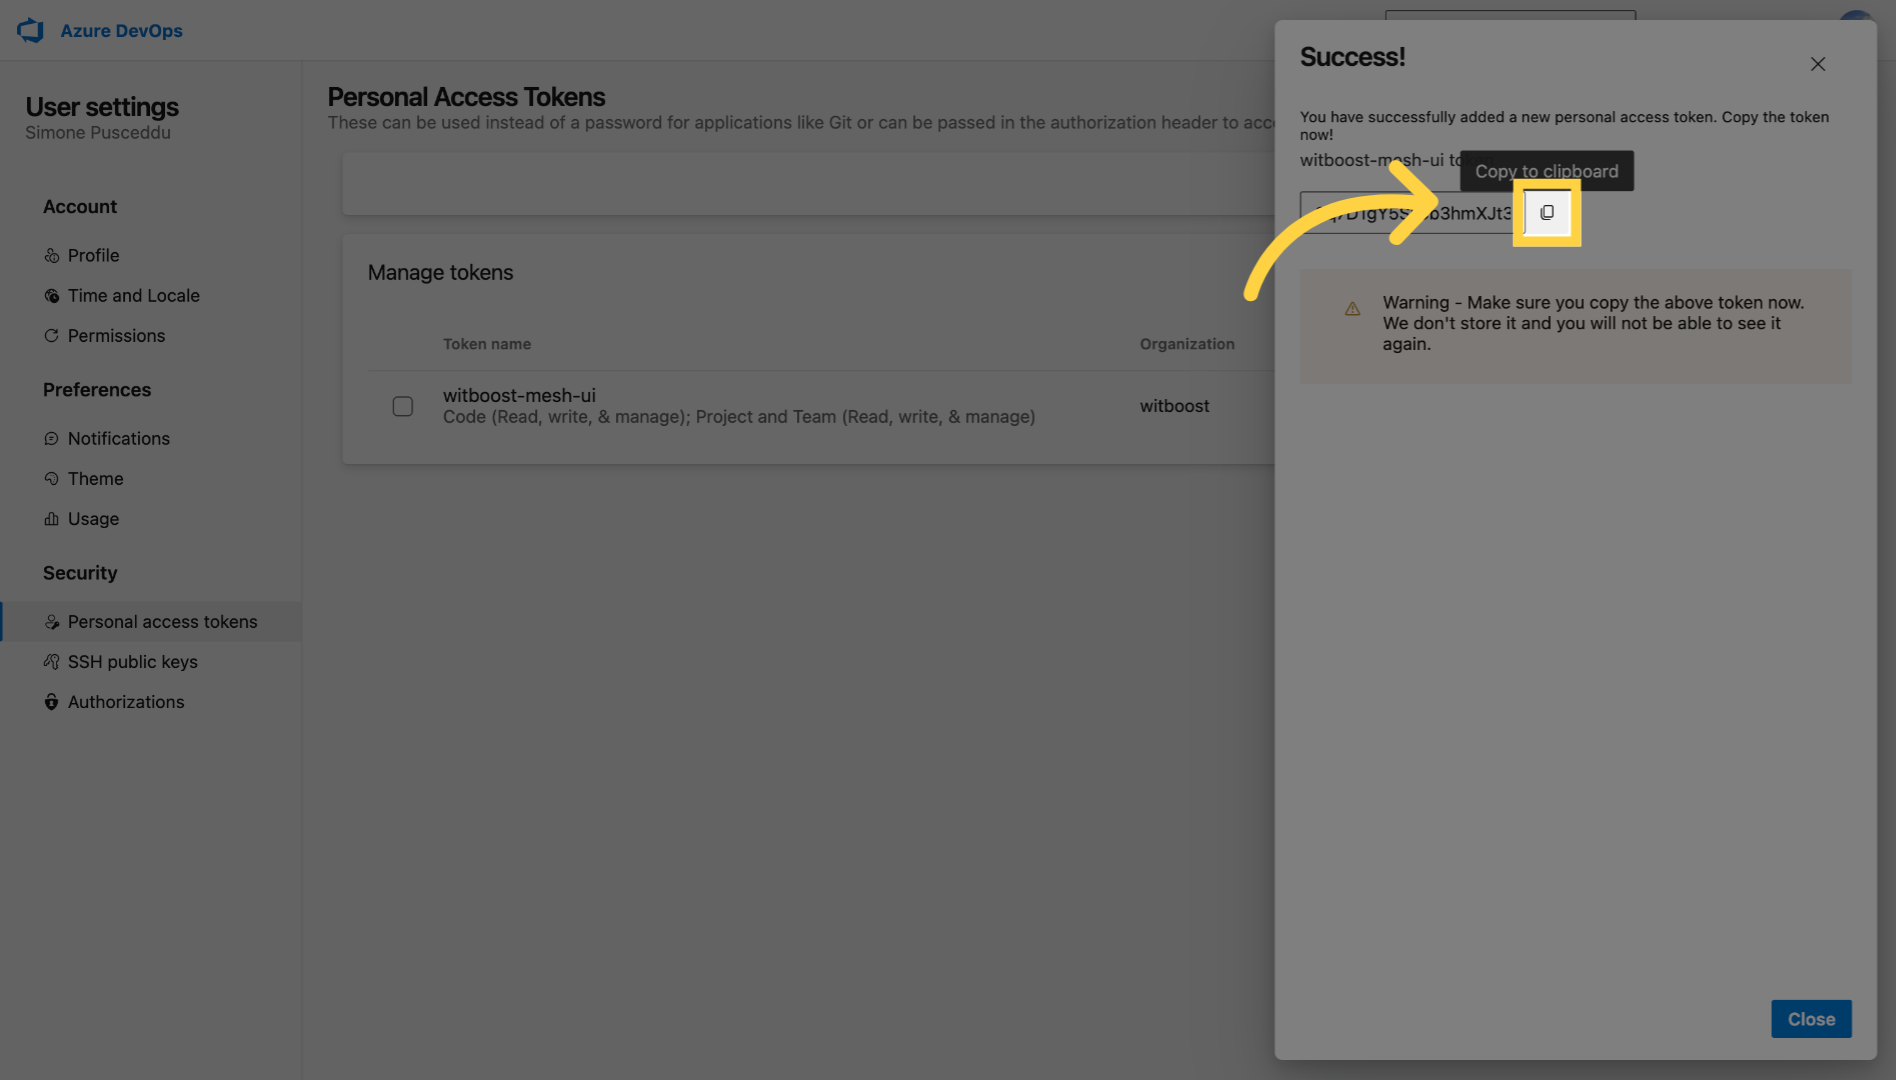
33. Thank you
You have successfully created a new Azure DevOps token

34. How to create Github personal access token
This tutorial guides you through creating a GitHub personal access token.

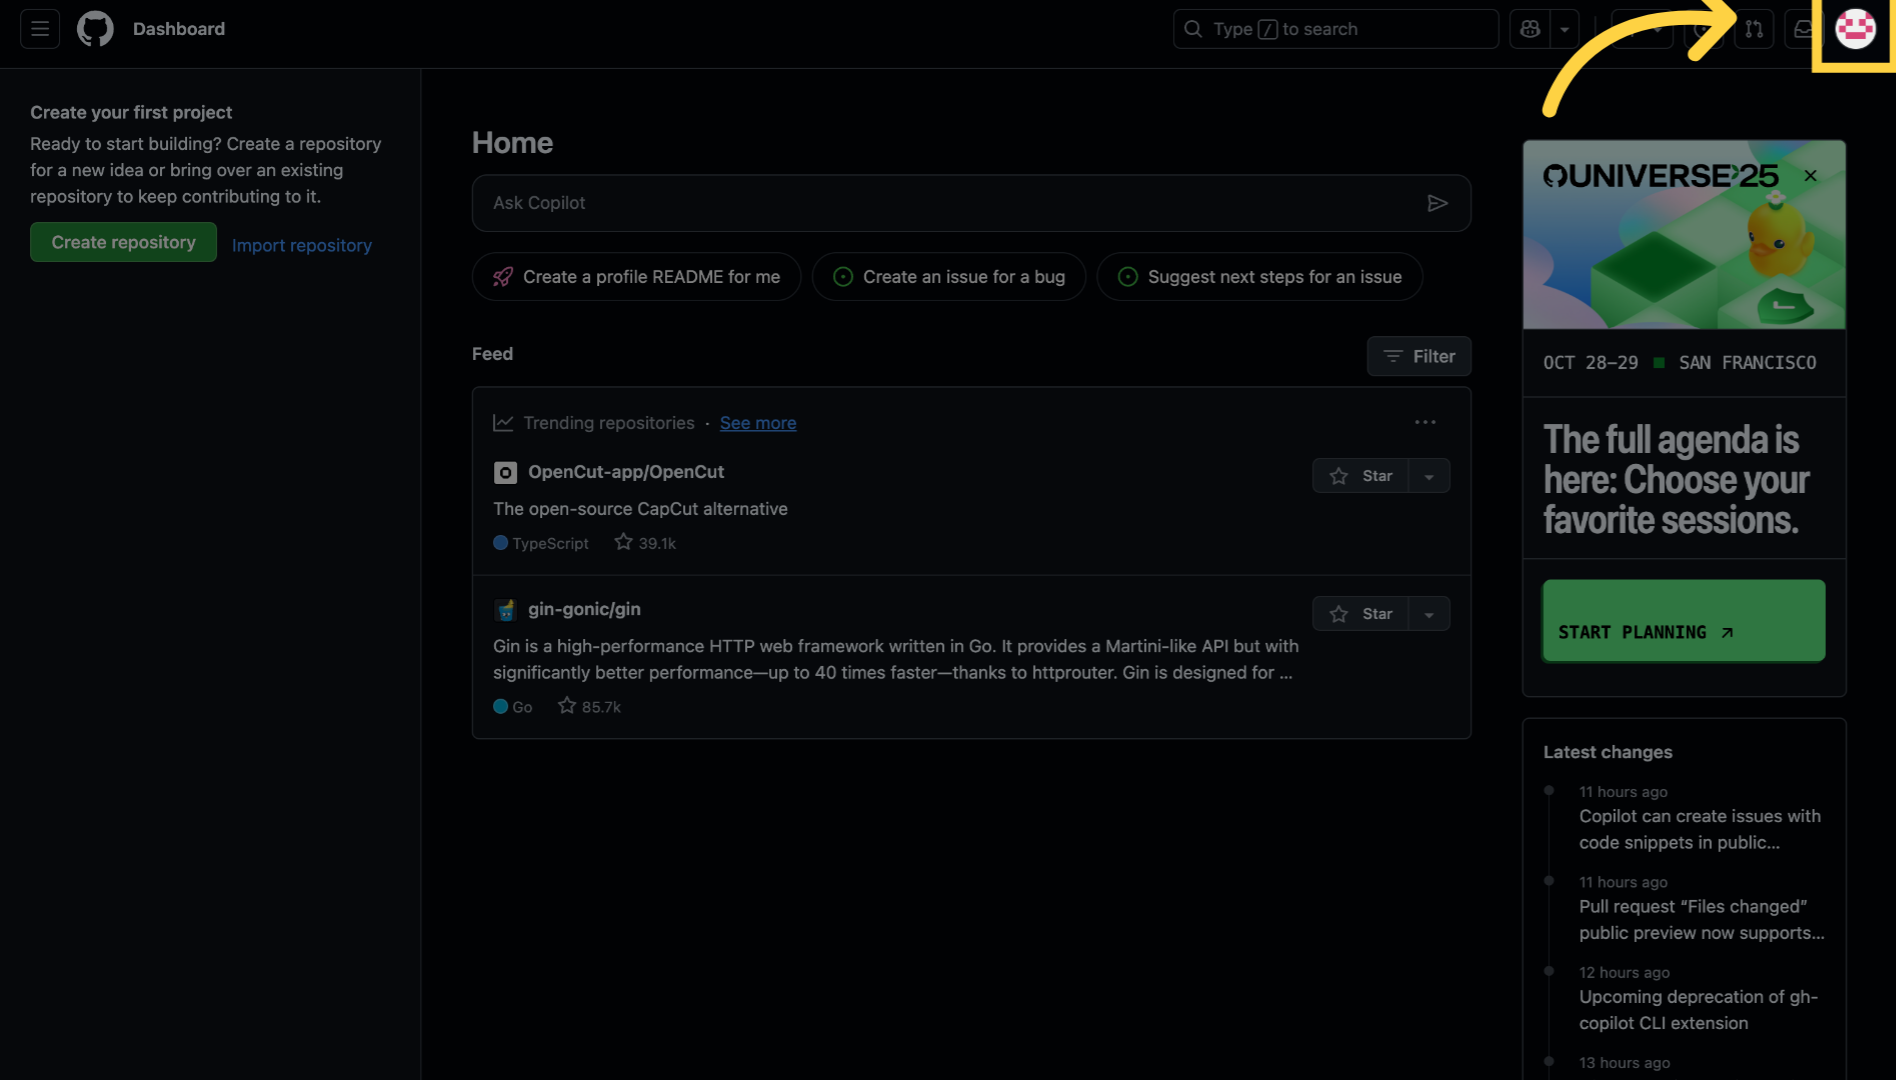
35. Click here
Begin by accessing your GitHub account dashboard.
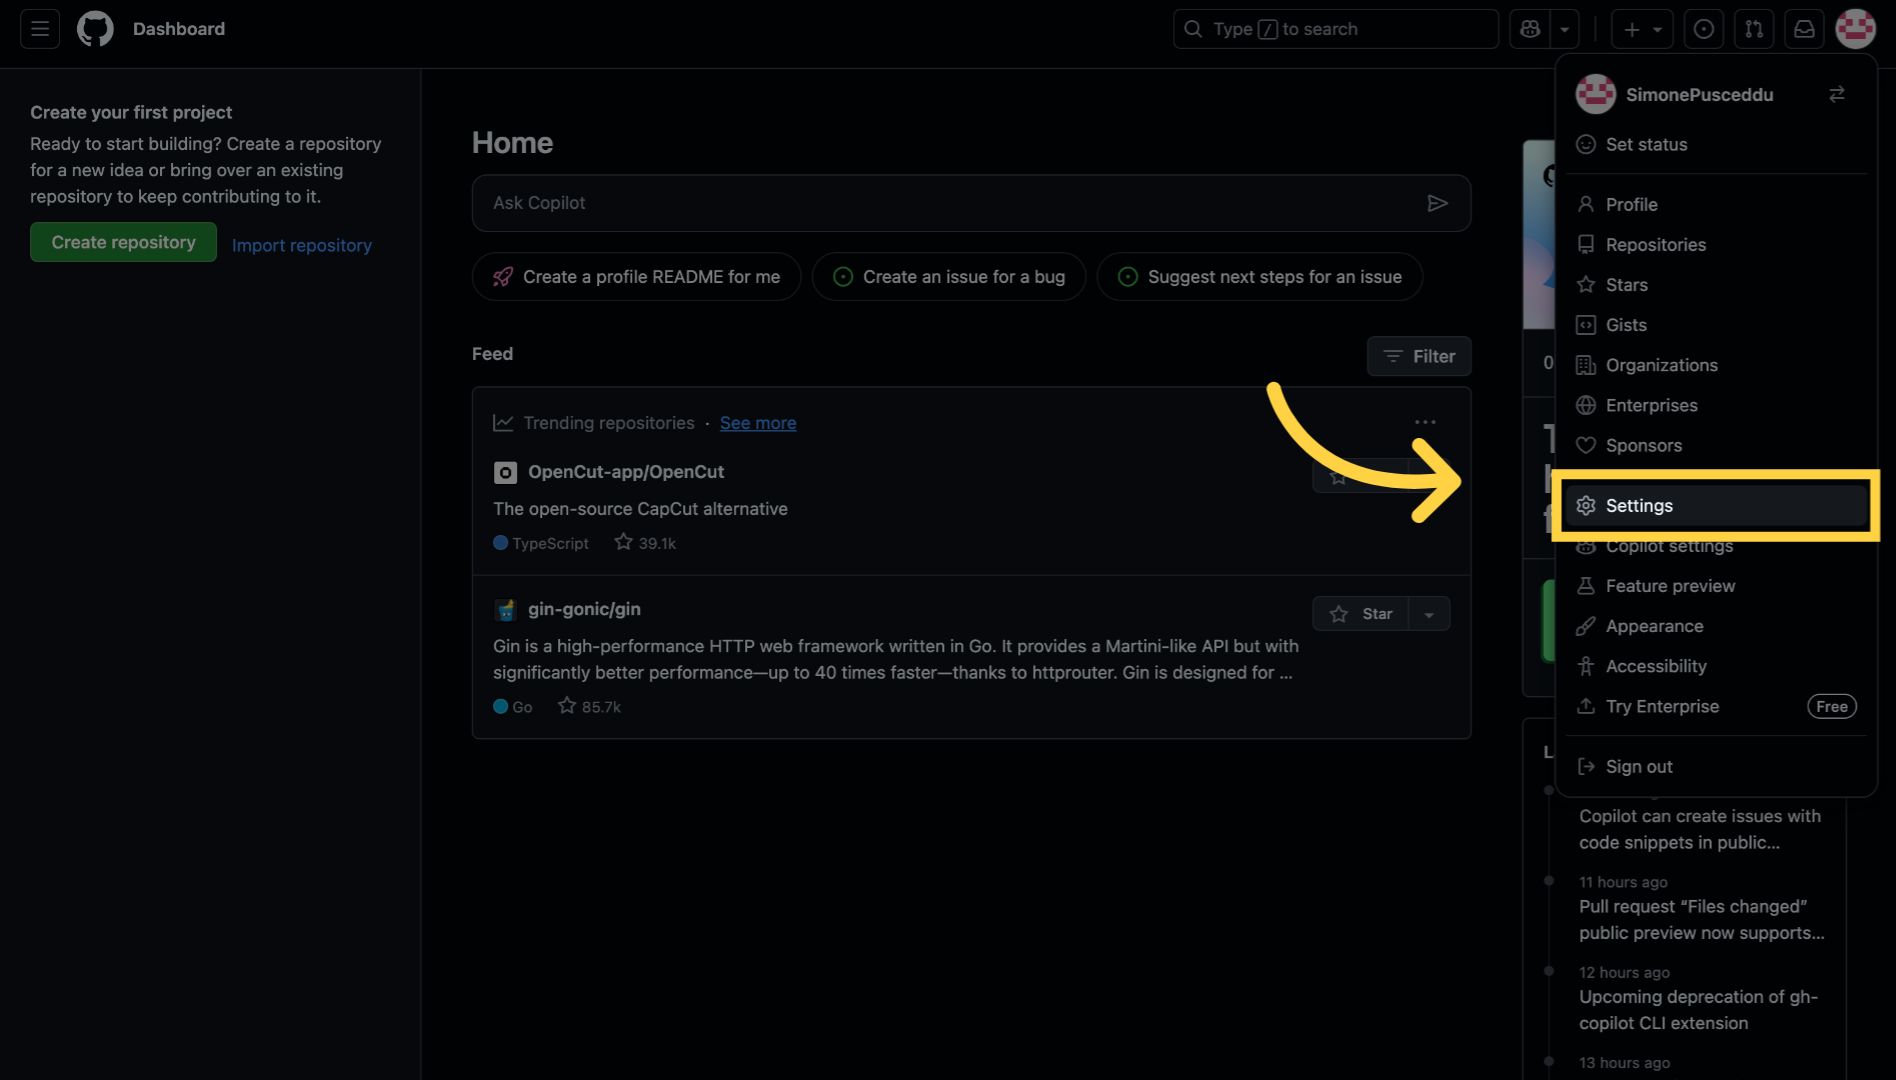
36. Click "Settings"
Click "Settings".
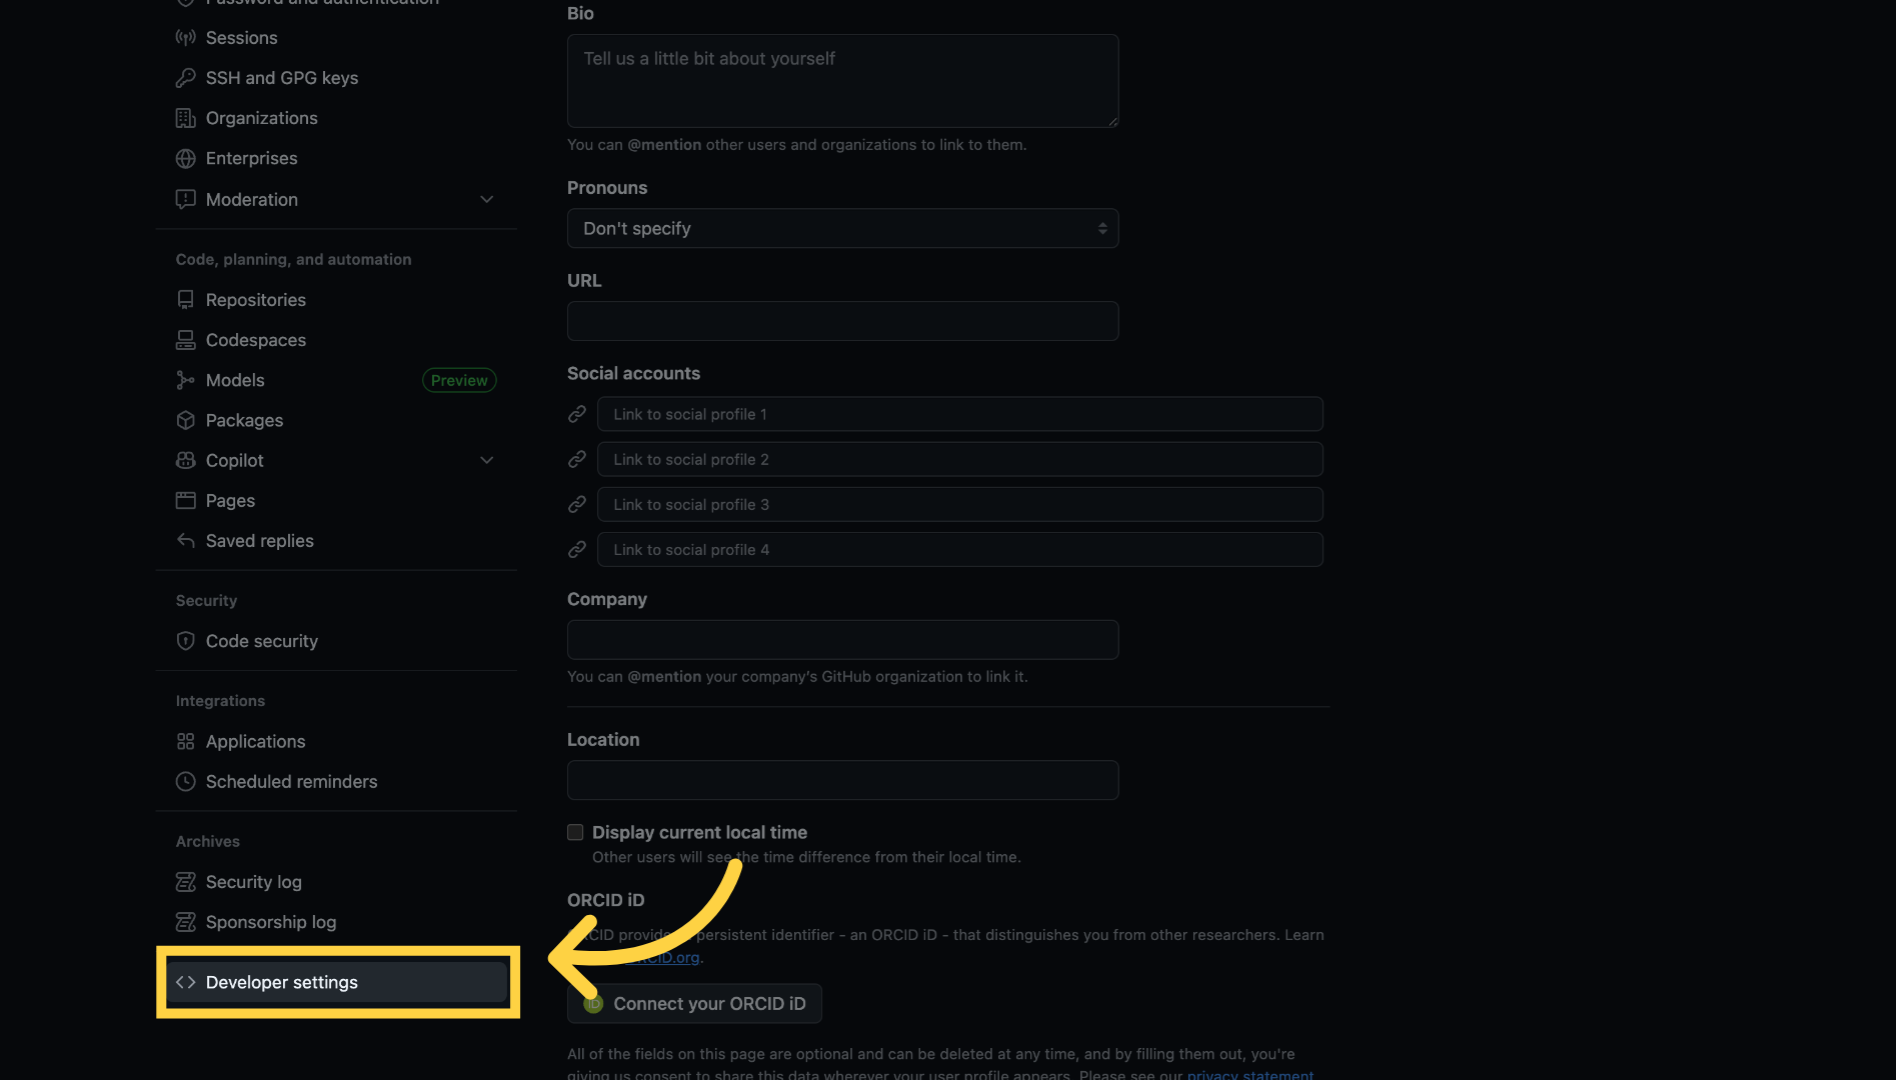
37. Click "Developer settings"
Select "Developer settings" from the sidebar
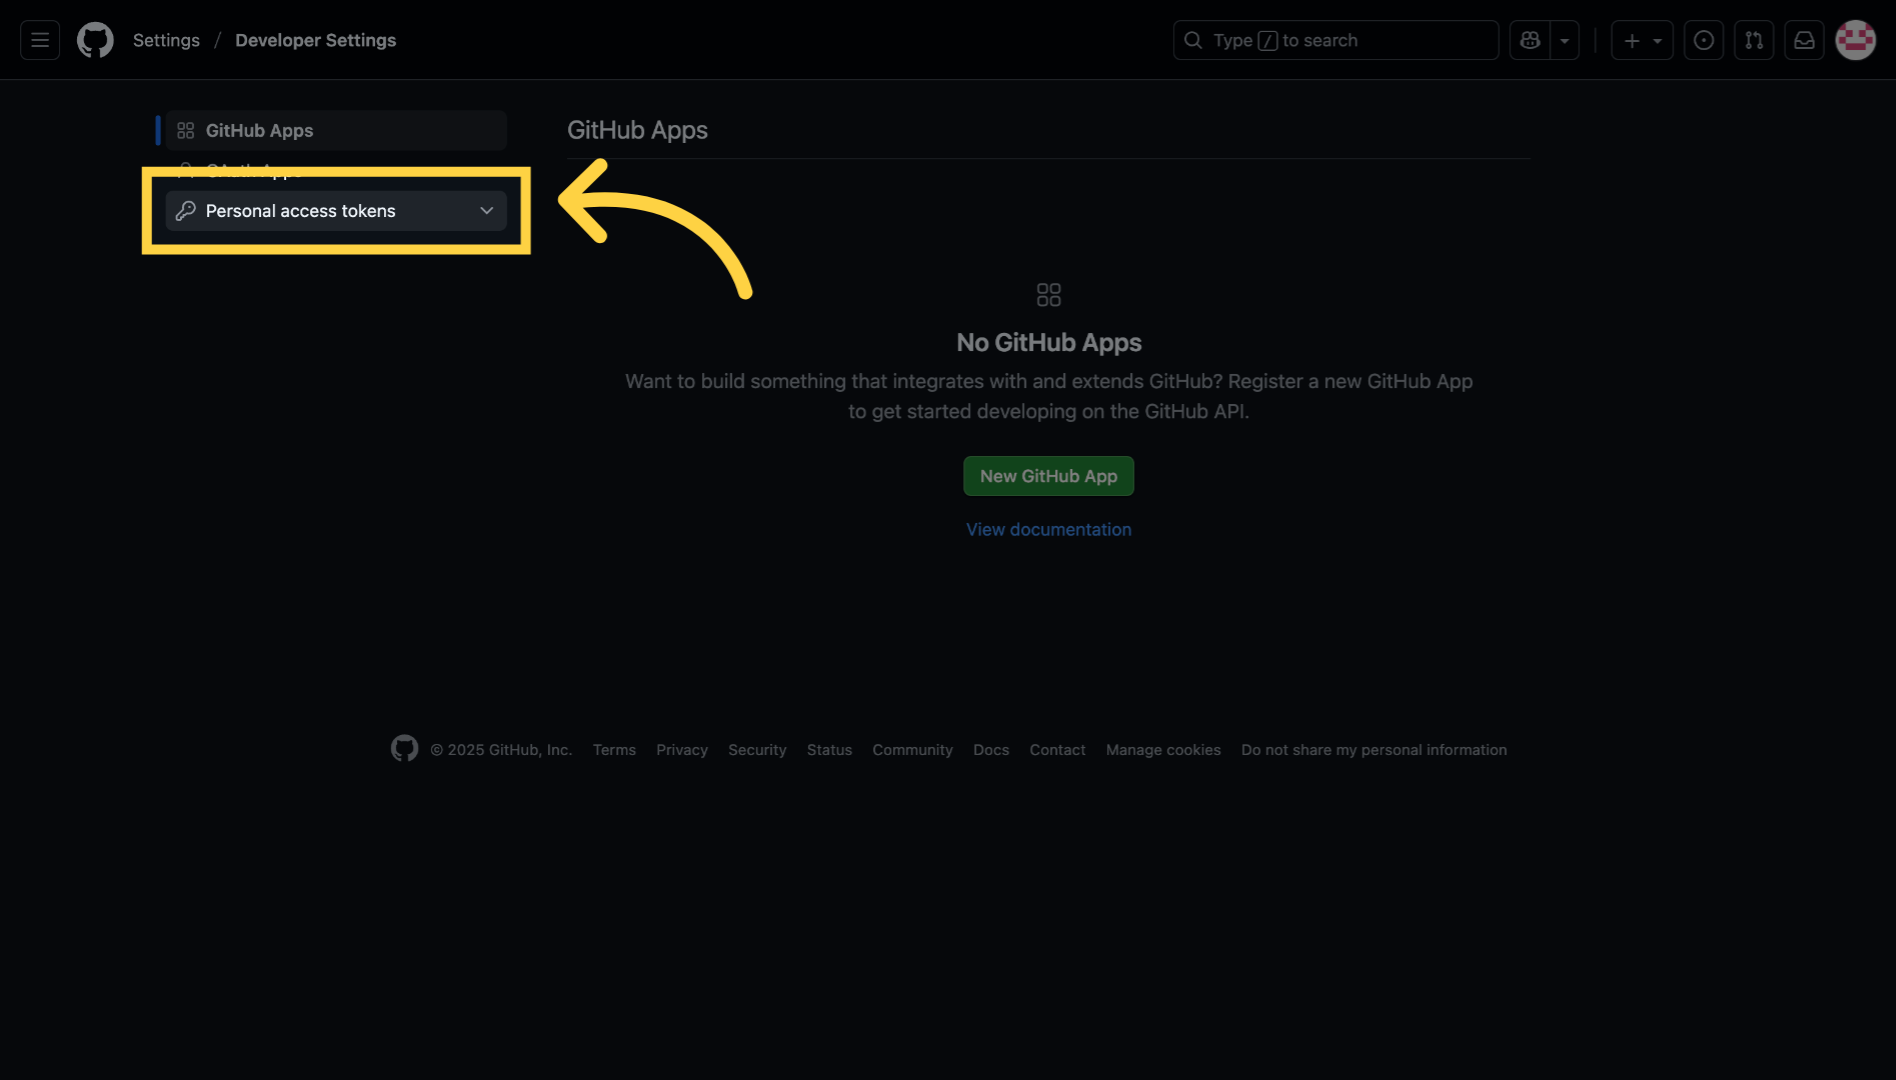
38. Click "Personal access tokens"
Click "Personal access tokens"
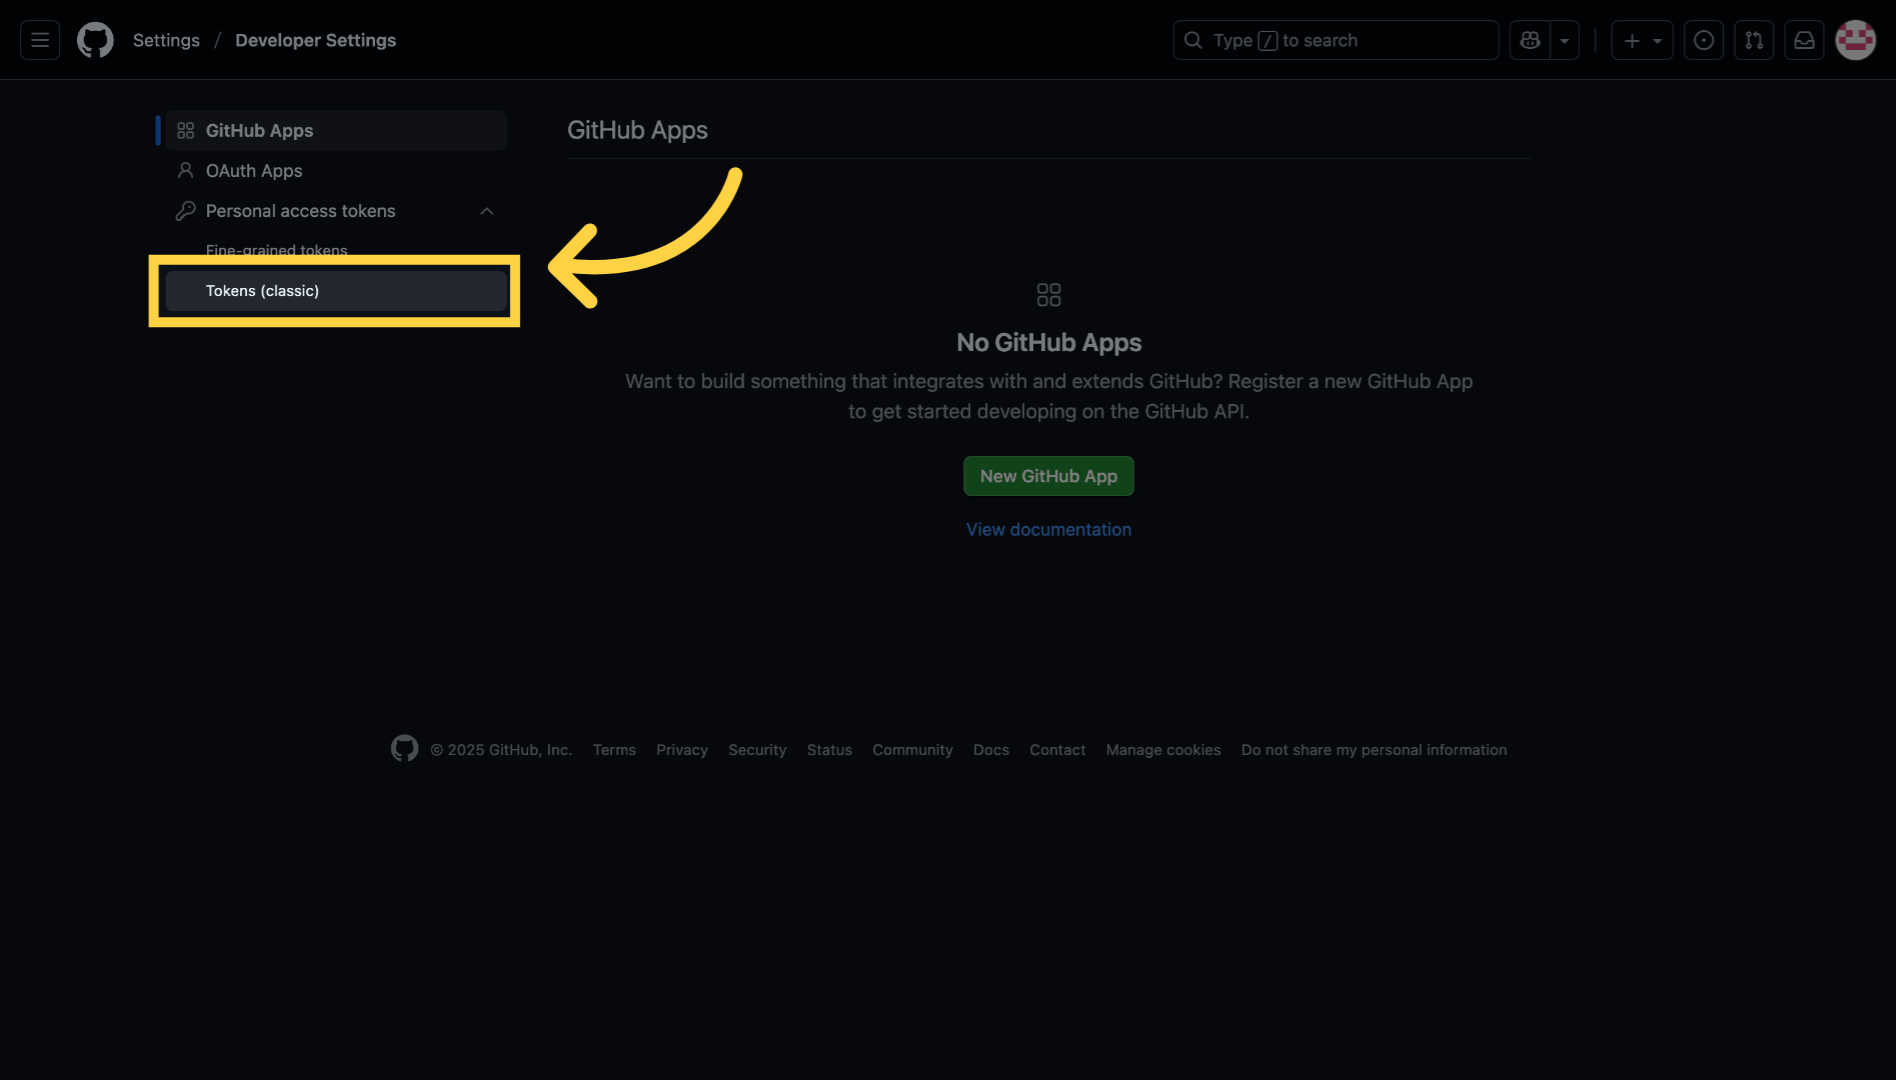
39. Click "Tokens (classic)"
Choose "Tokens (classic)".
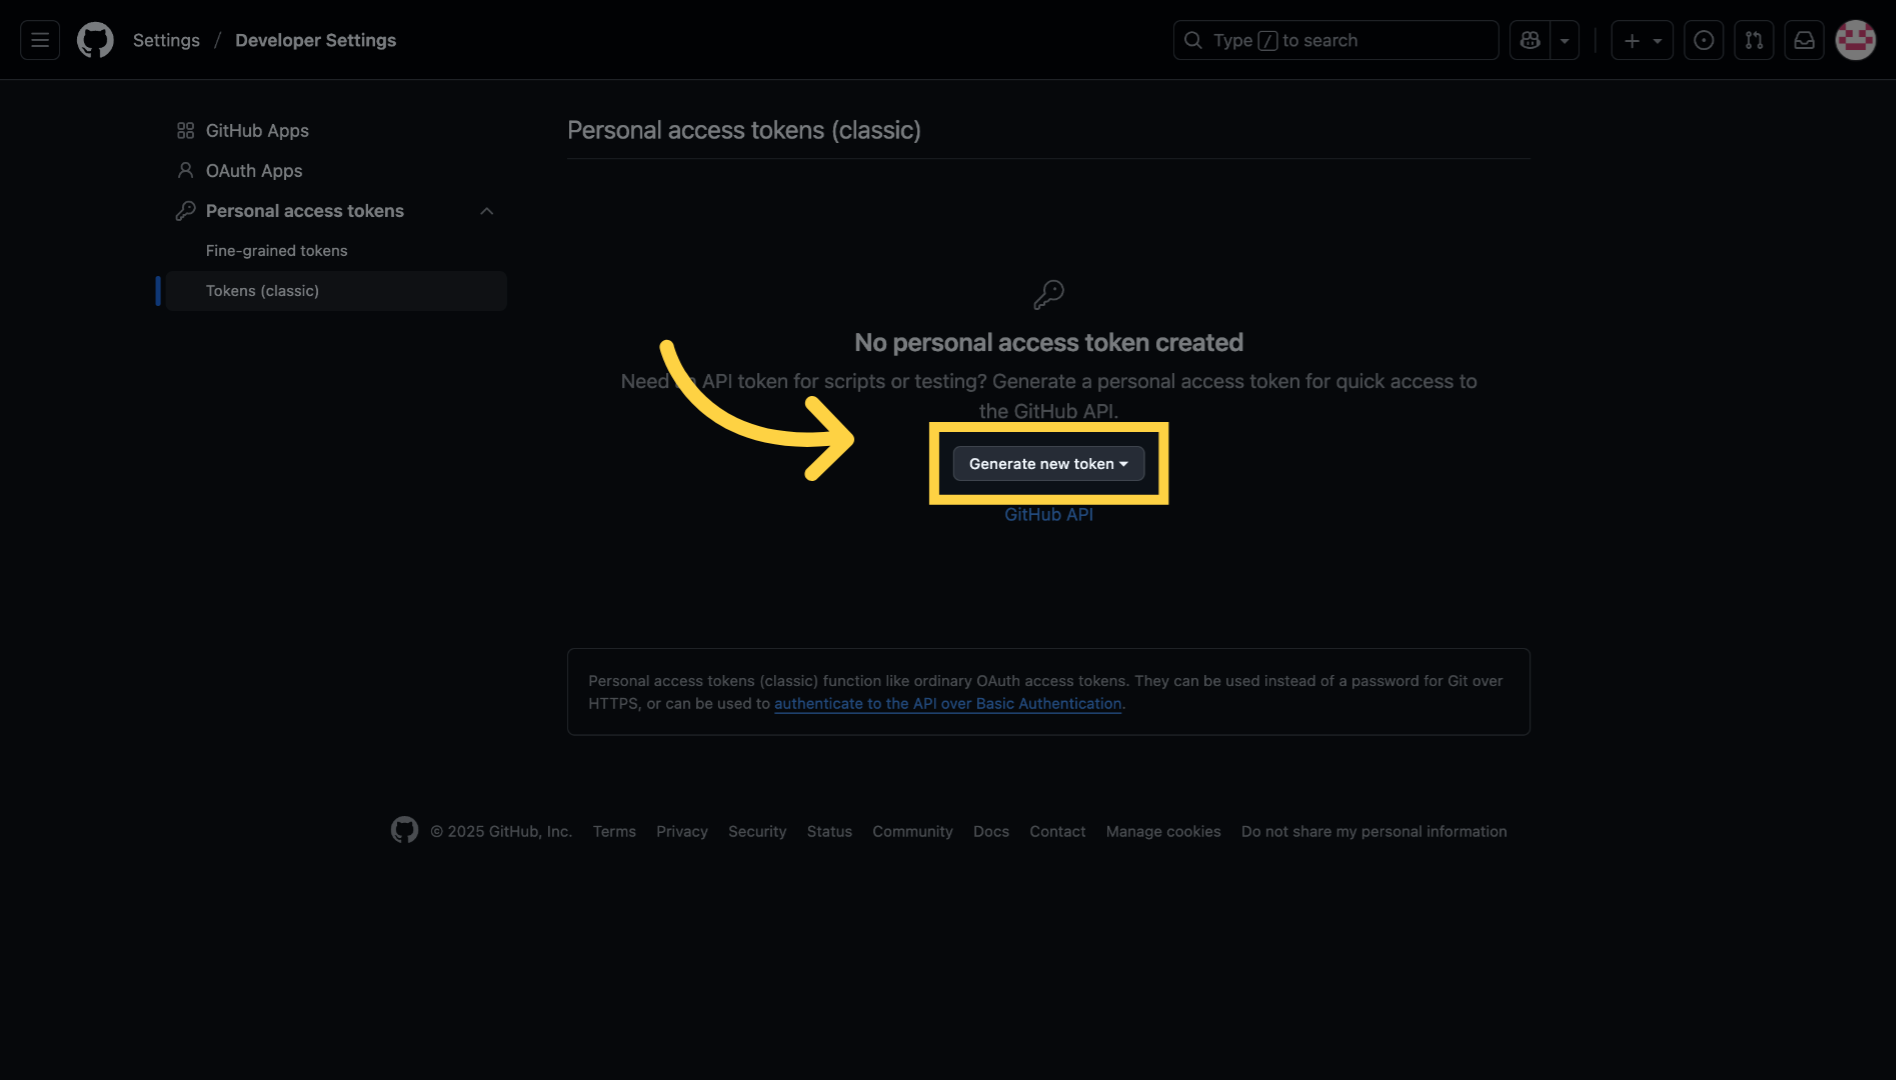
40. Click "Generate new token"
Click "Generate new token".
41. Click "Generate new token (classic)"
Click "Generate new token (classic)".

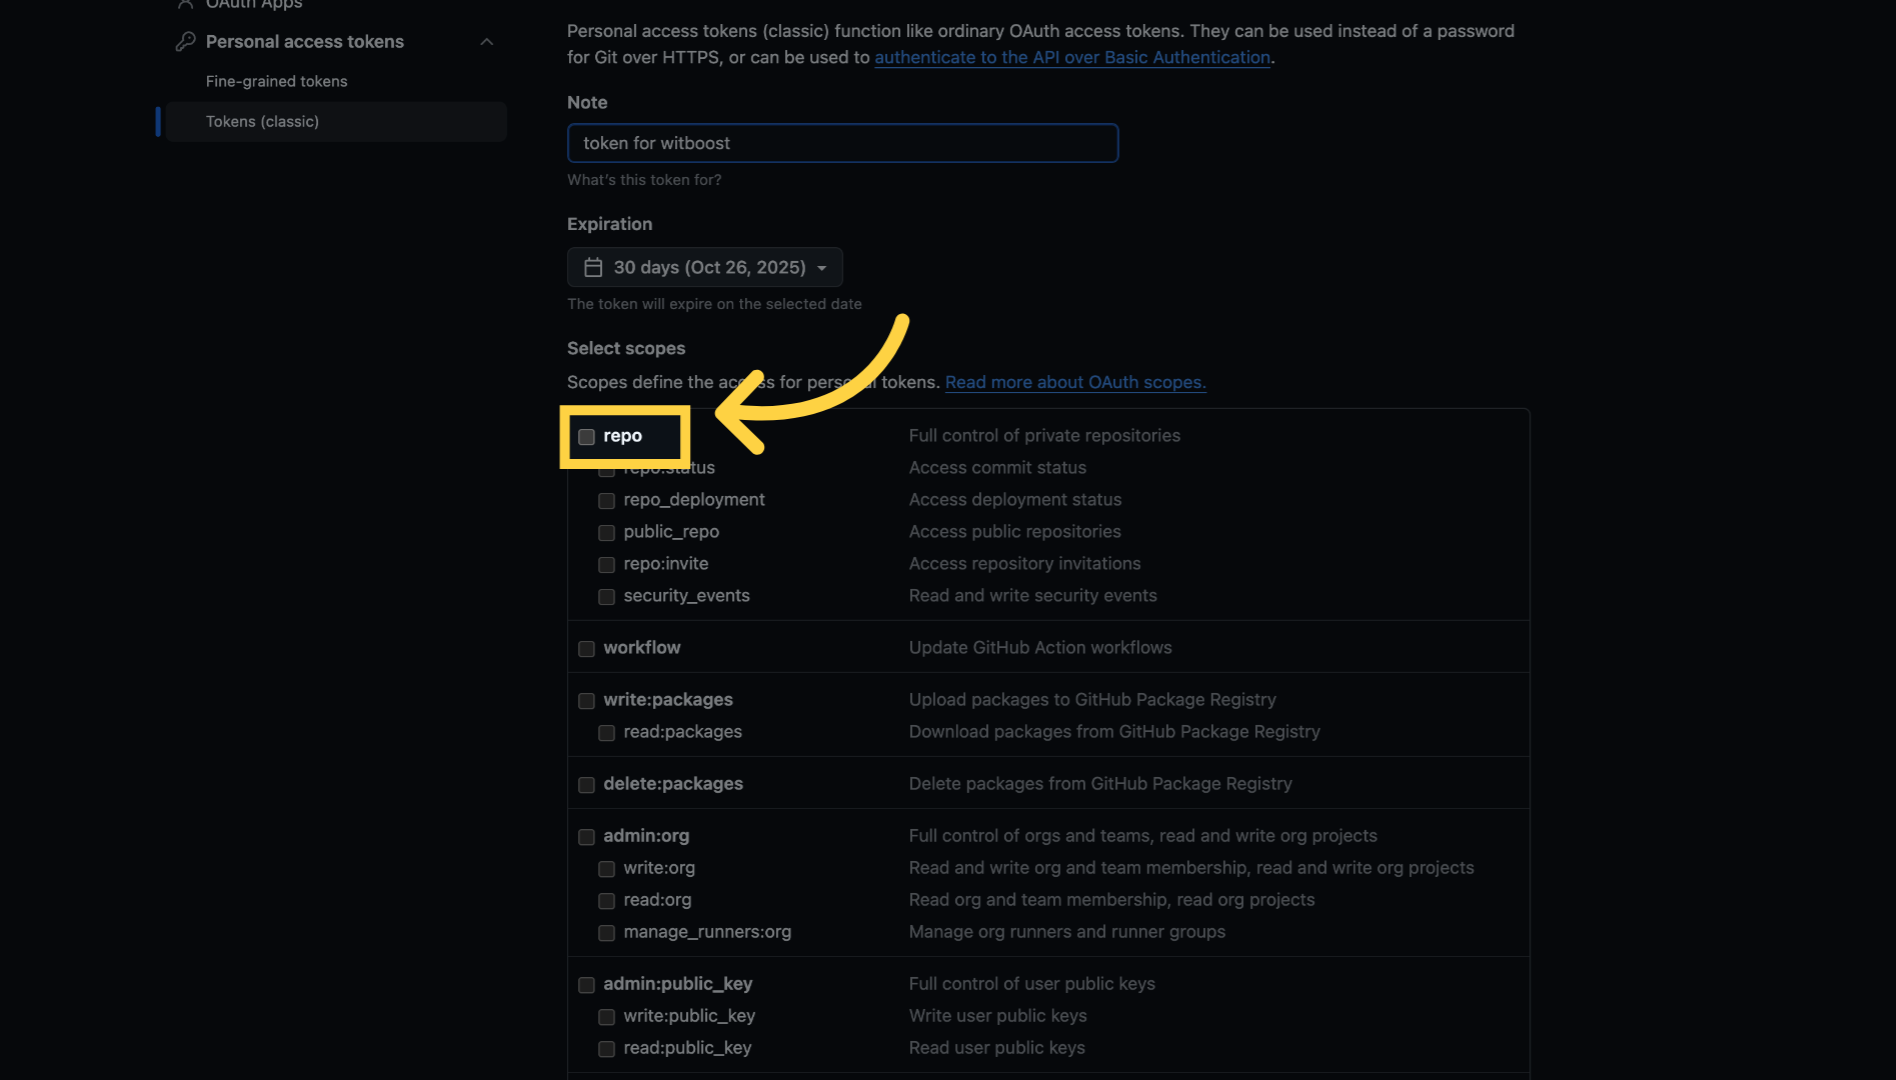
42. Fill "token for witboost"
Fill in the token description field with a meaningful name to identify its purpose.

43. Select "repo"
Select the "repo" scope
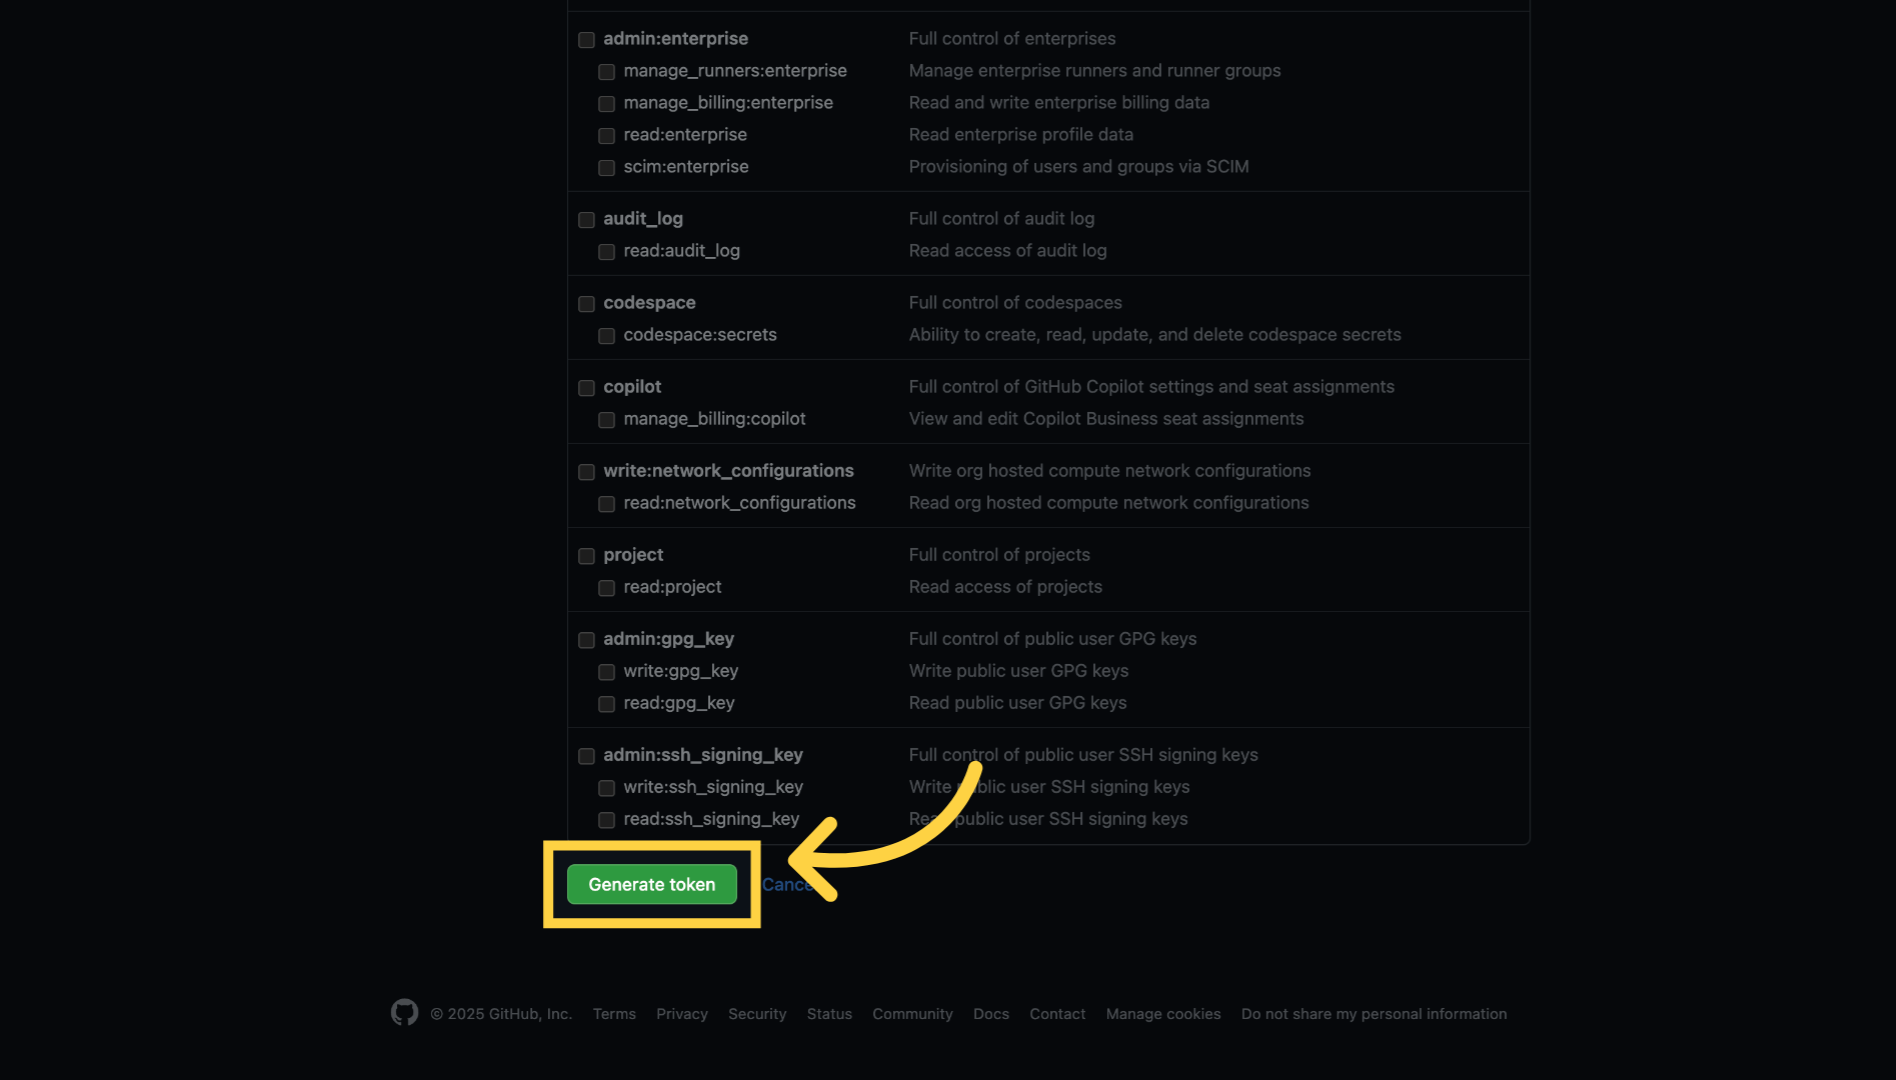
44. Click "Generate token"
Click "Generate token".
45. Save the token
Be sure to copy and save the token, as it will no longer be displayed once you close the page.
46. Thank you
You have successfully created a GitHub personal access token with the appropriate permissions.

47. How to create BitBucket access token
This tutorial guides you through creating an access token in BitBucket.

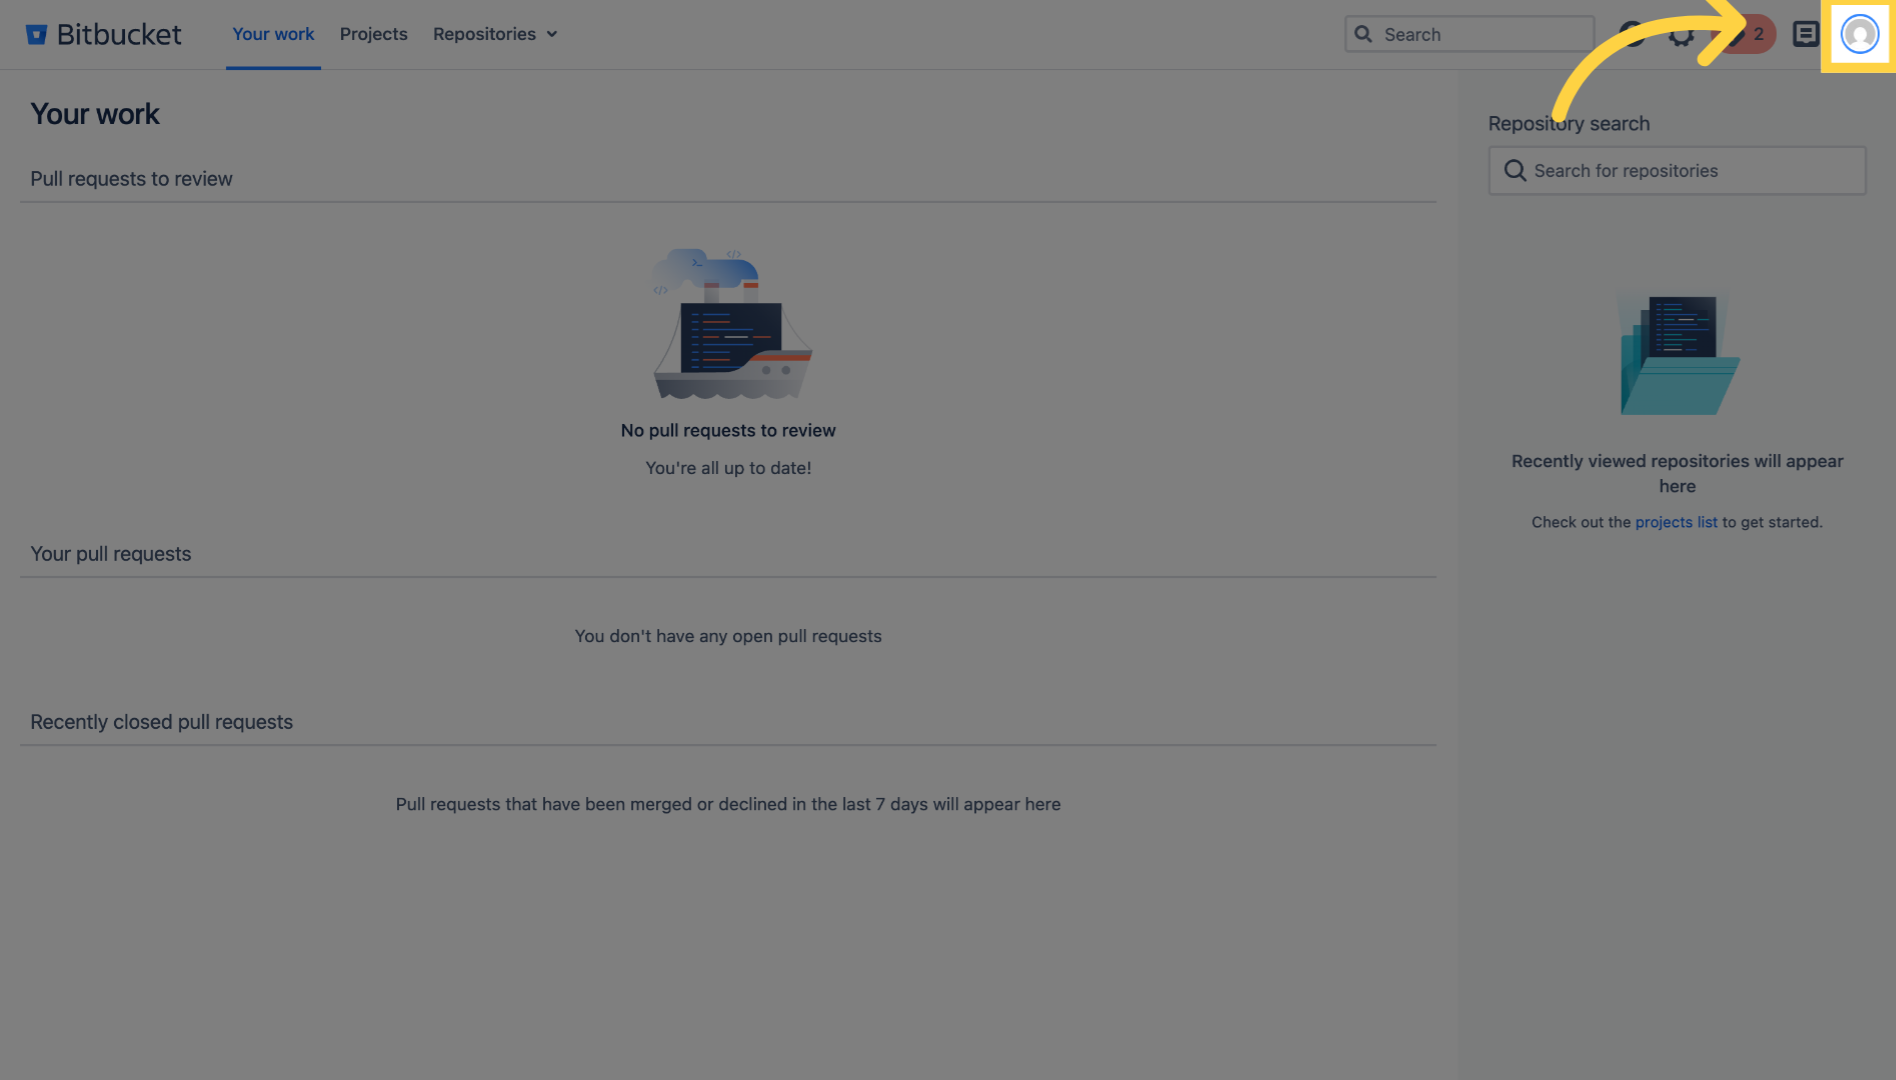
48. Click on the user profile icon
Click the user profile icon to open the account menu where you can access your settings and account options.
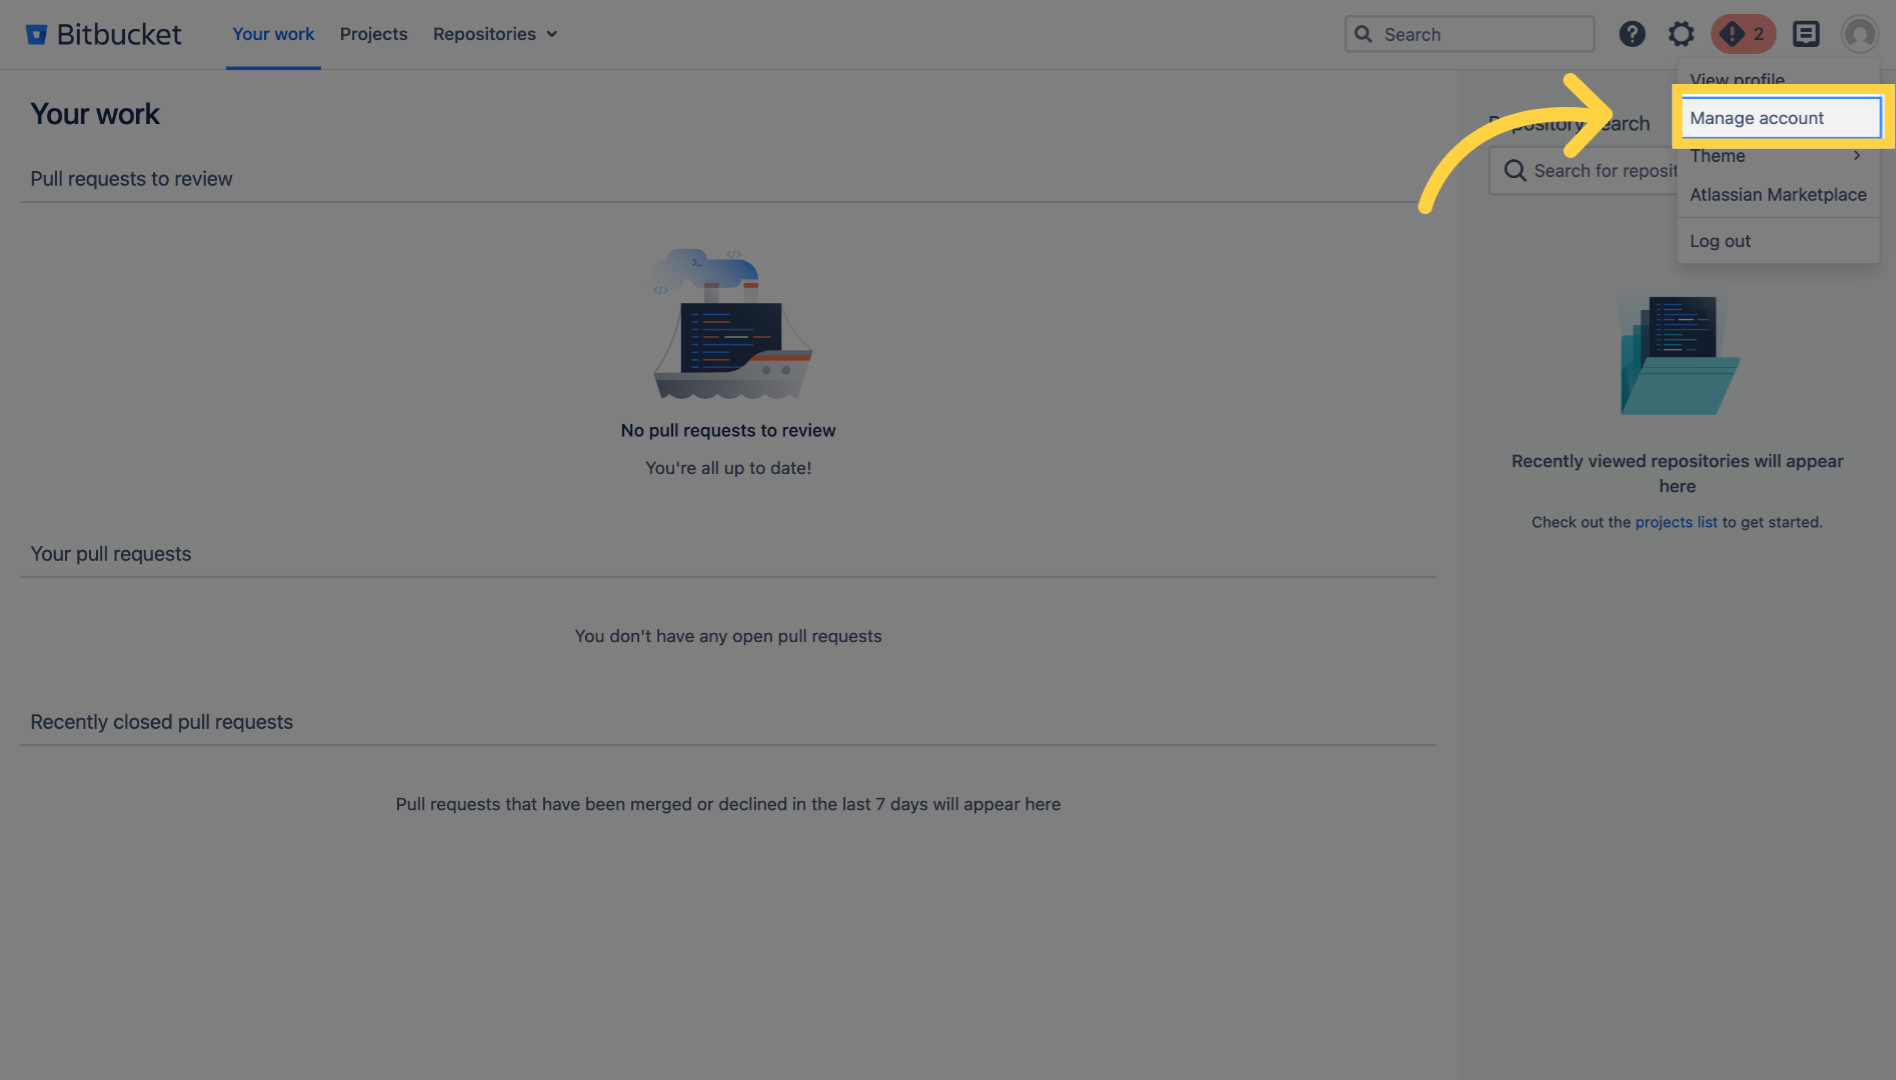
49. Click "Manage account"
Click "Manage account" to open your account management page.
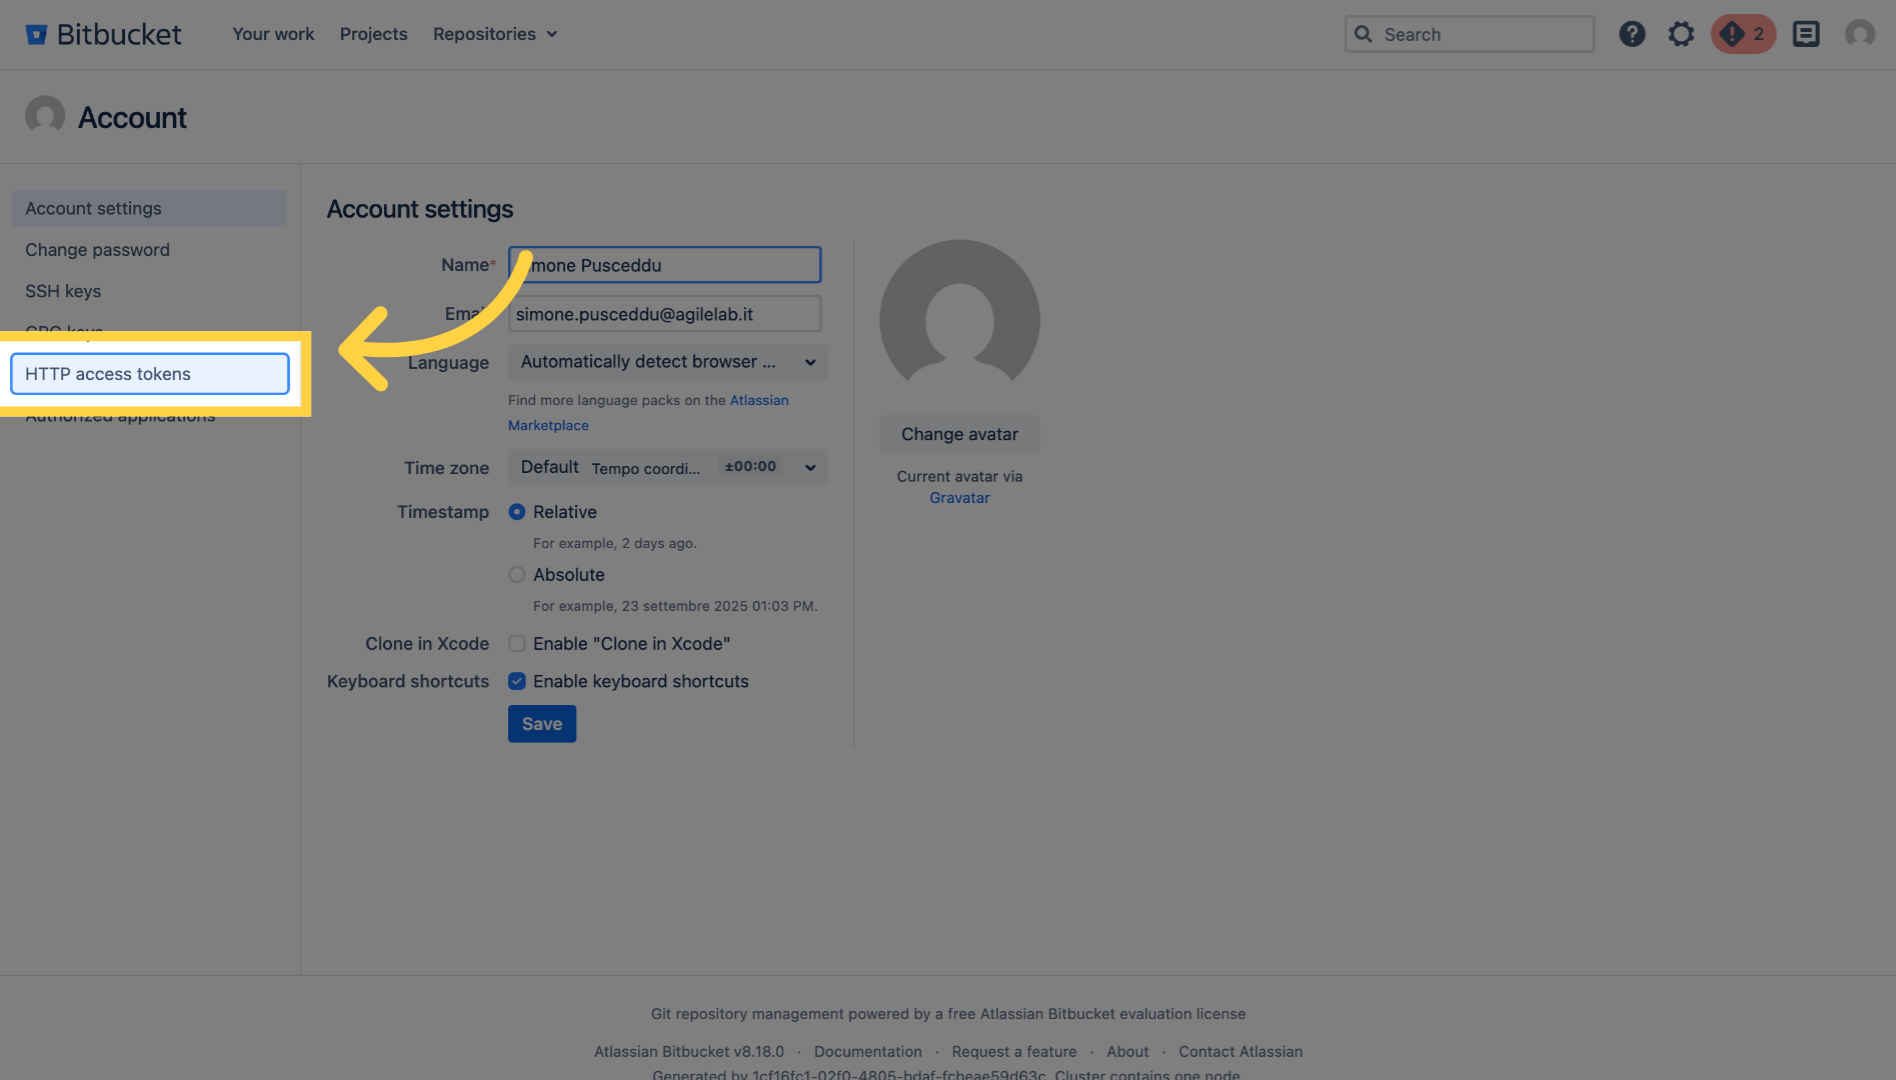
50. Click "HTTP access tokens"
Click "HTTP access tokens" to navigate to the section where you can create and manage your access tokens.
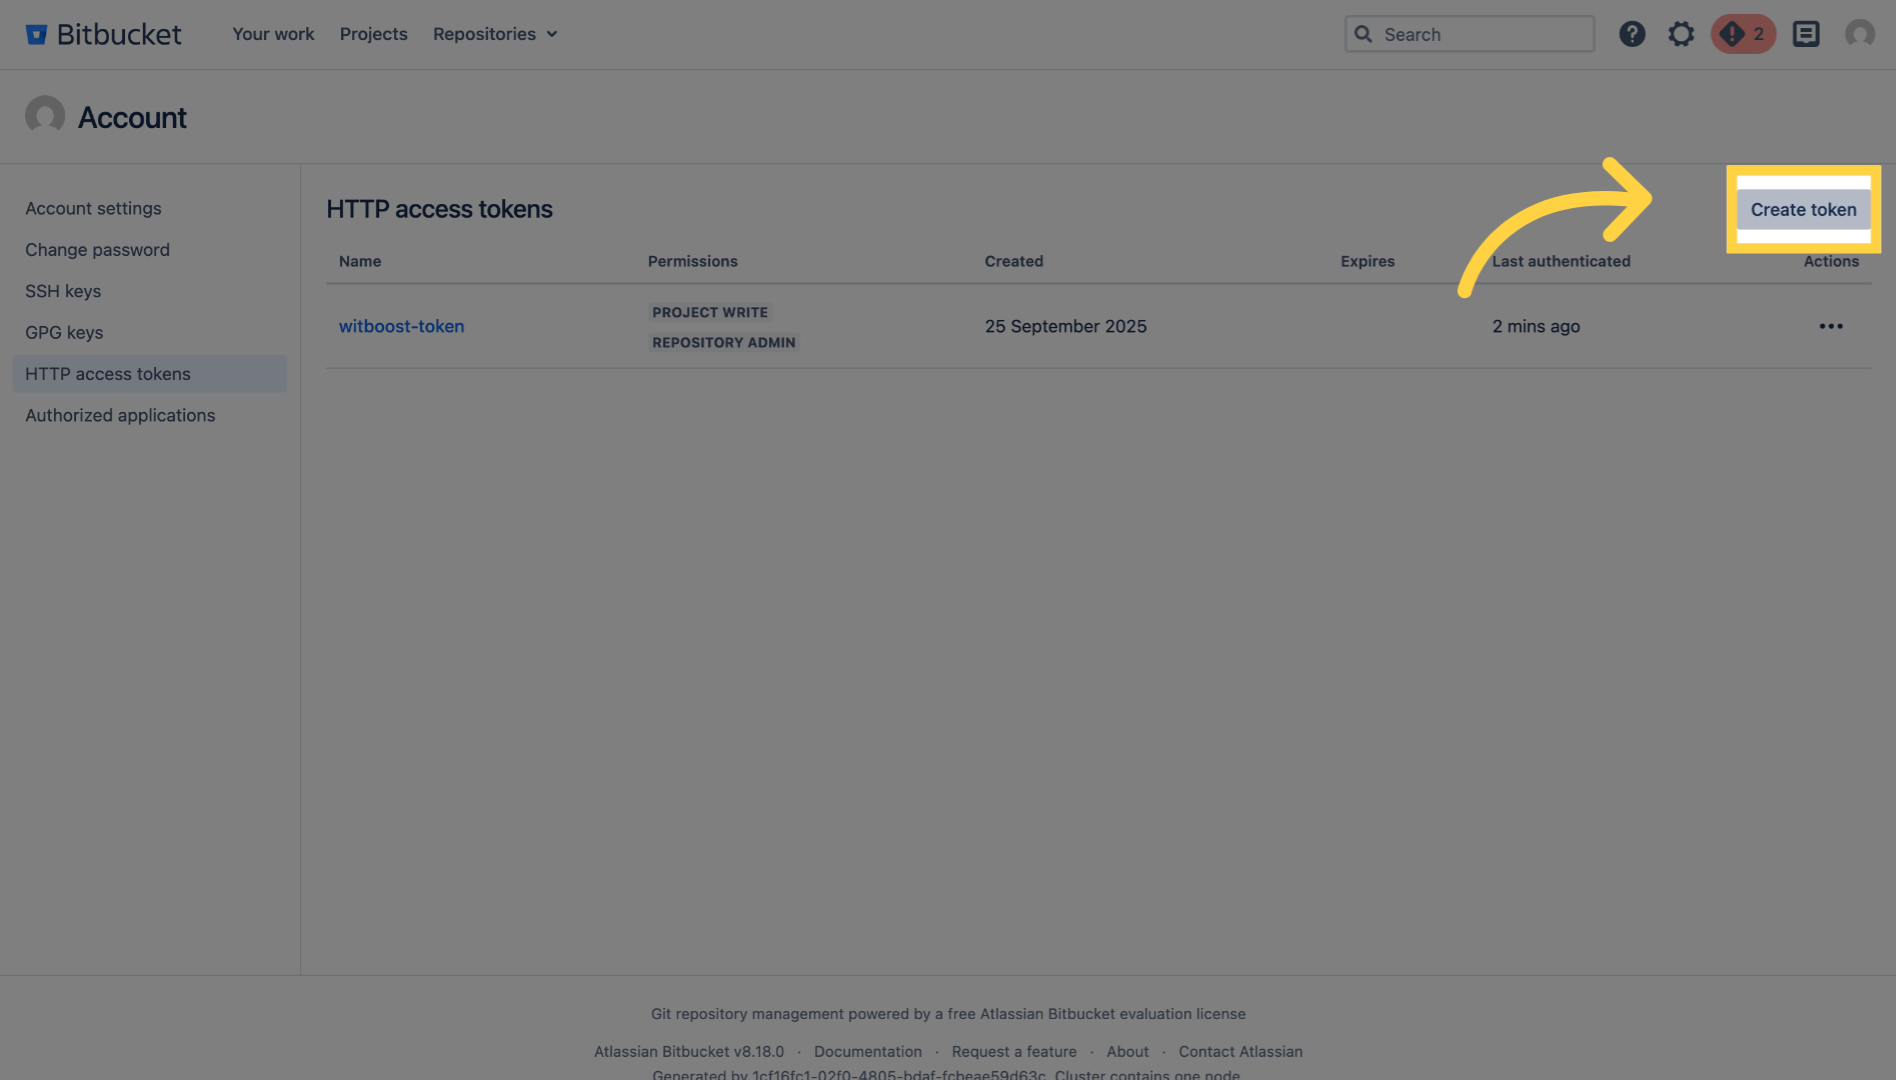
51. Click "Create token"
Click "Create token" to start generating a new access token that will allow secure access to your BitBucket projects.
52. Fill name field
Fill in the token name field with a descriptive name to identify your token, so you can recognize its purpose later.

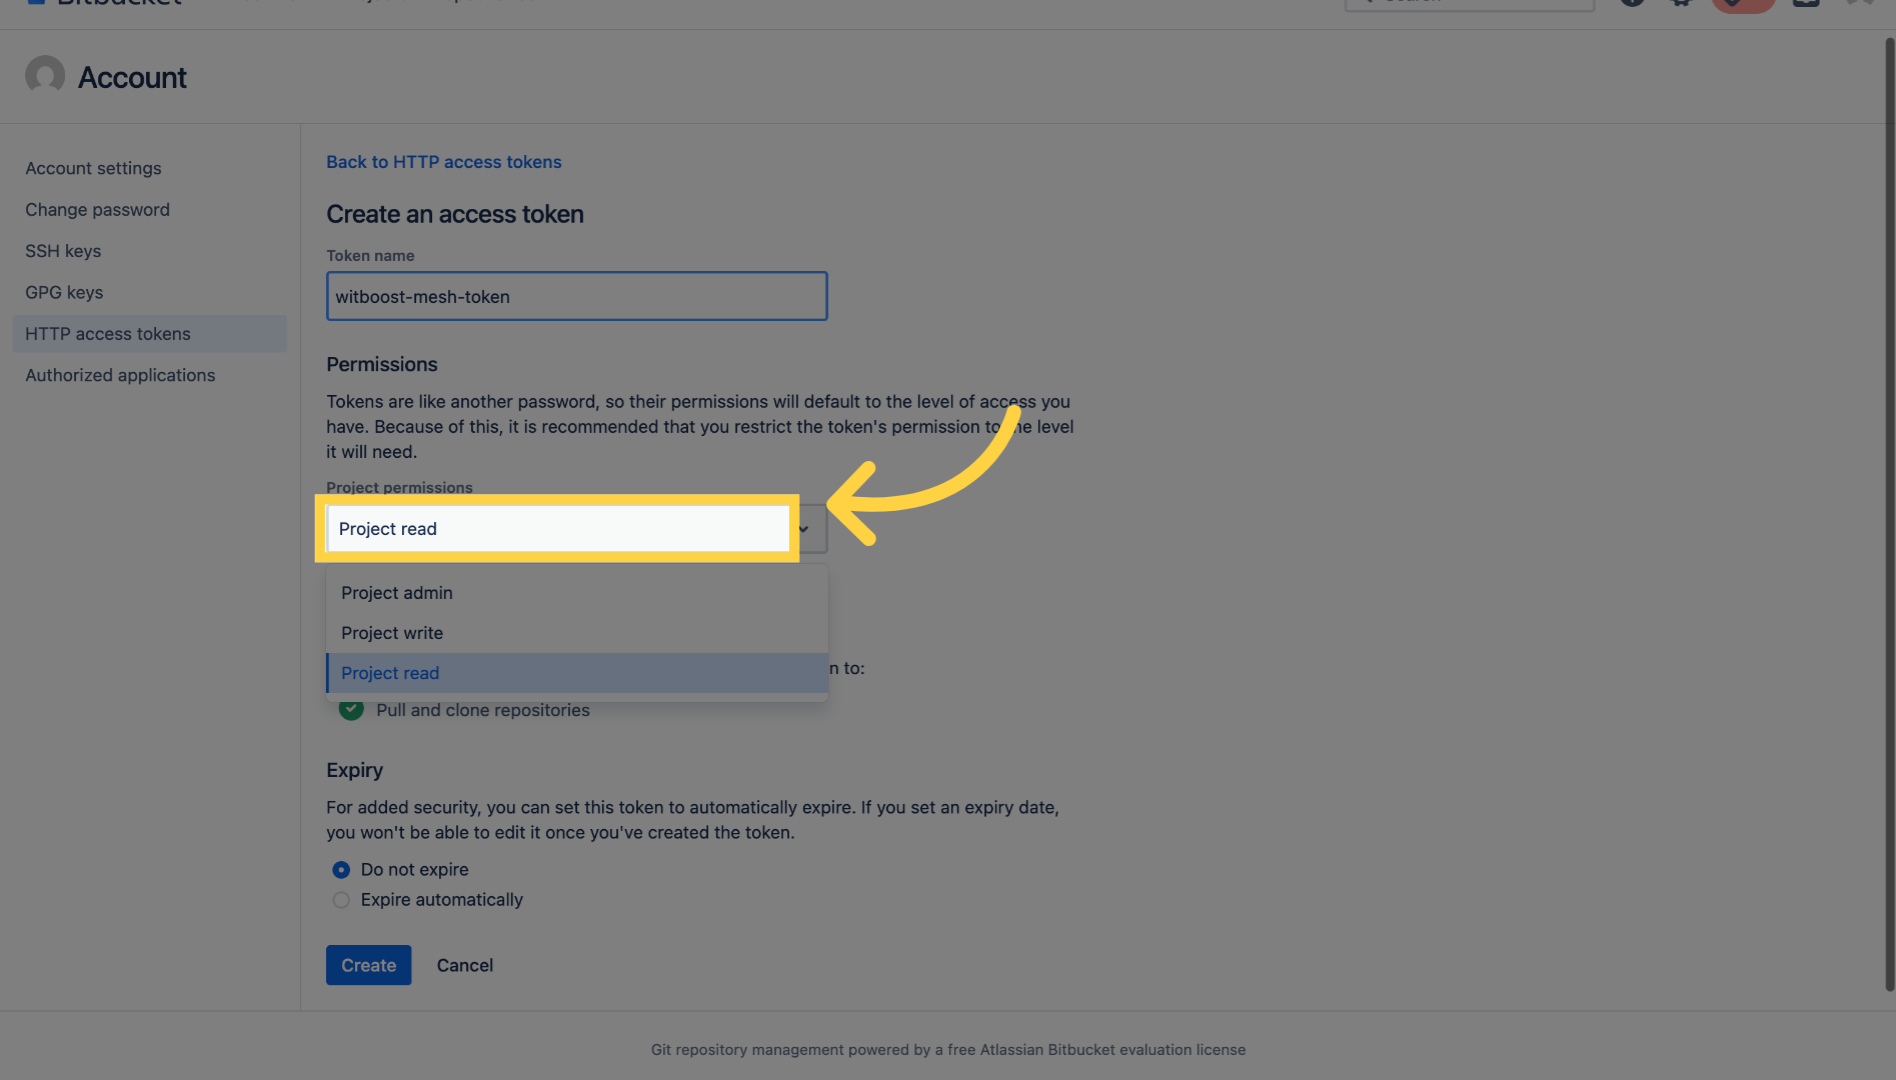
53. Click "Project permissions"
Click "Project permissions" to grant read permissions to the token, allowing it to access project data without modification rights.
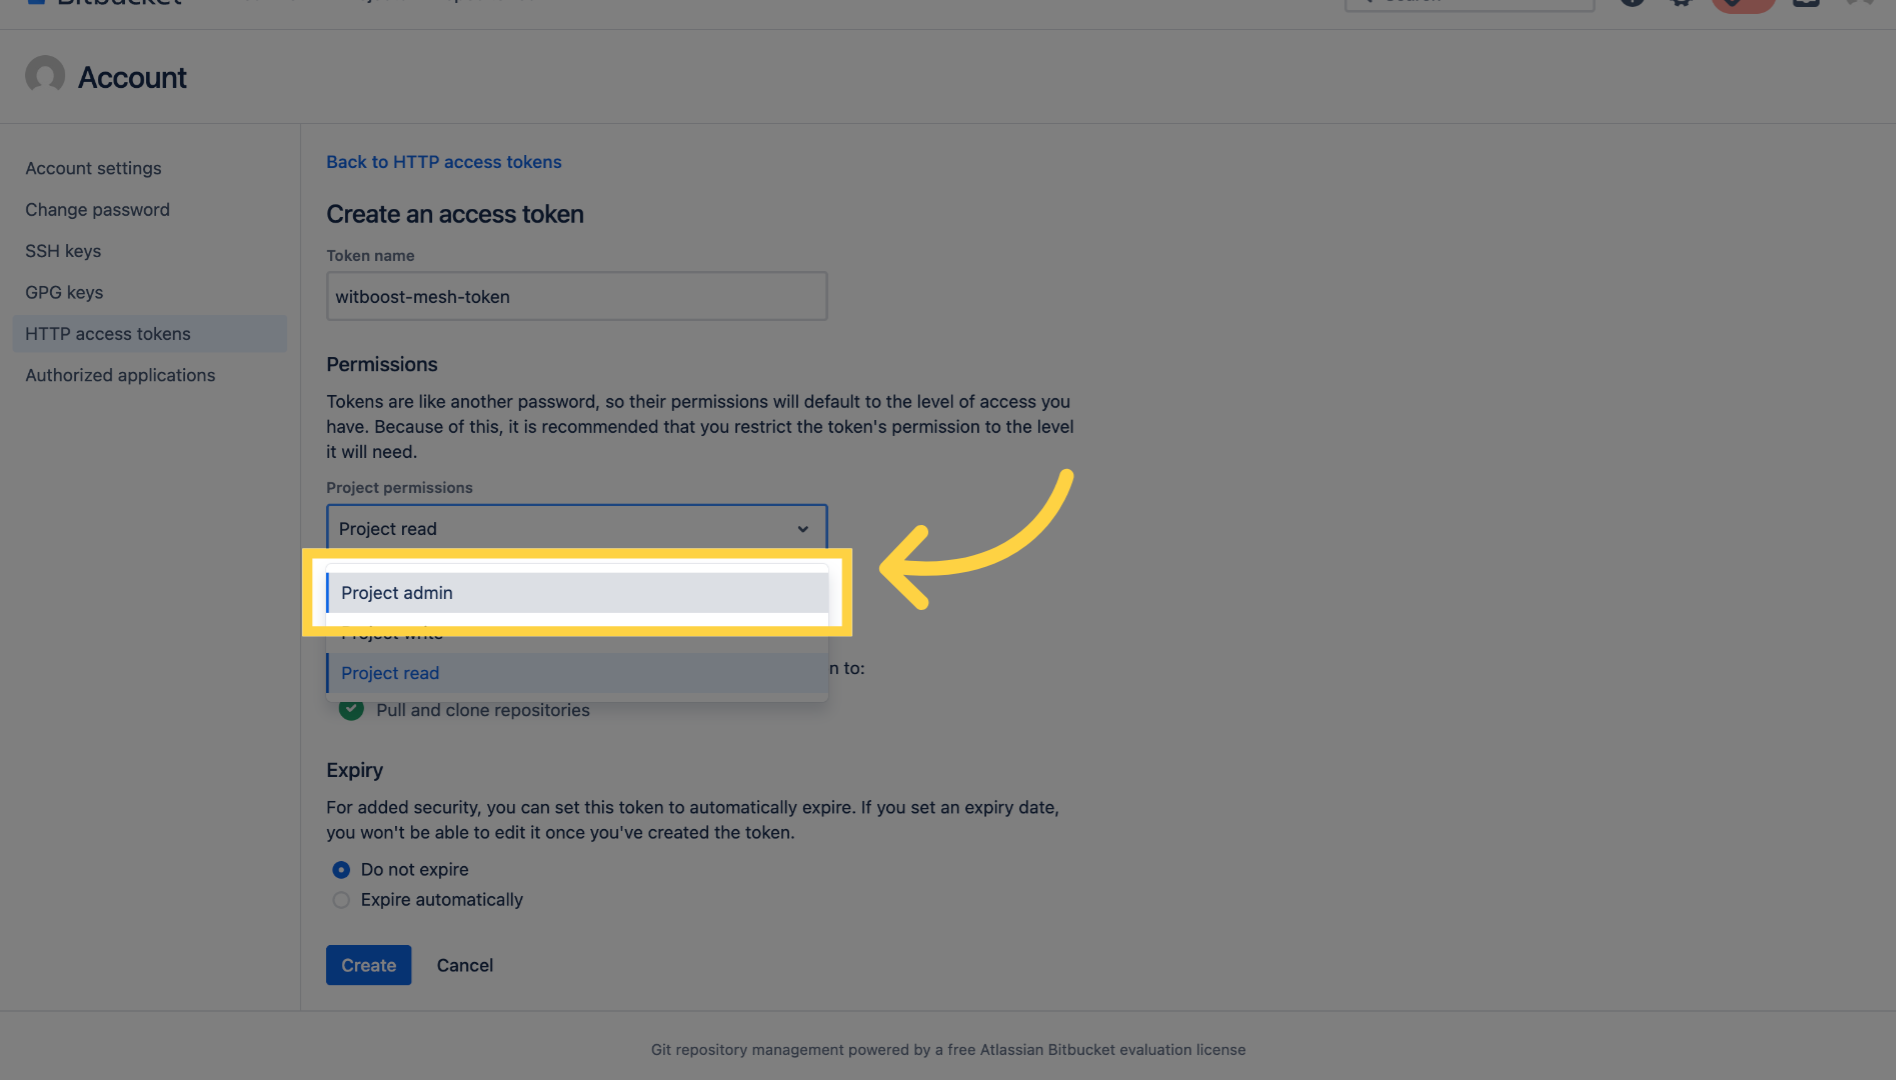
54. Select "Project admin"
Click "Project admin" to assign administrative permissions to the token, enabling full control over the project settings and repositories.
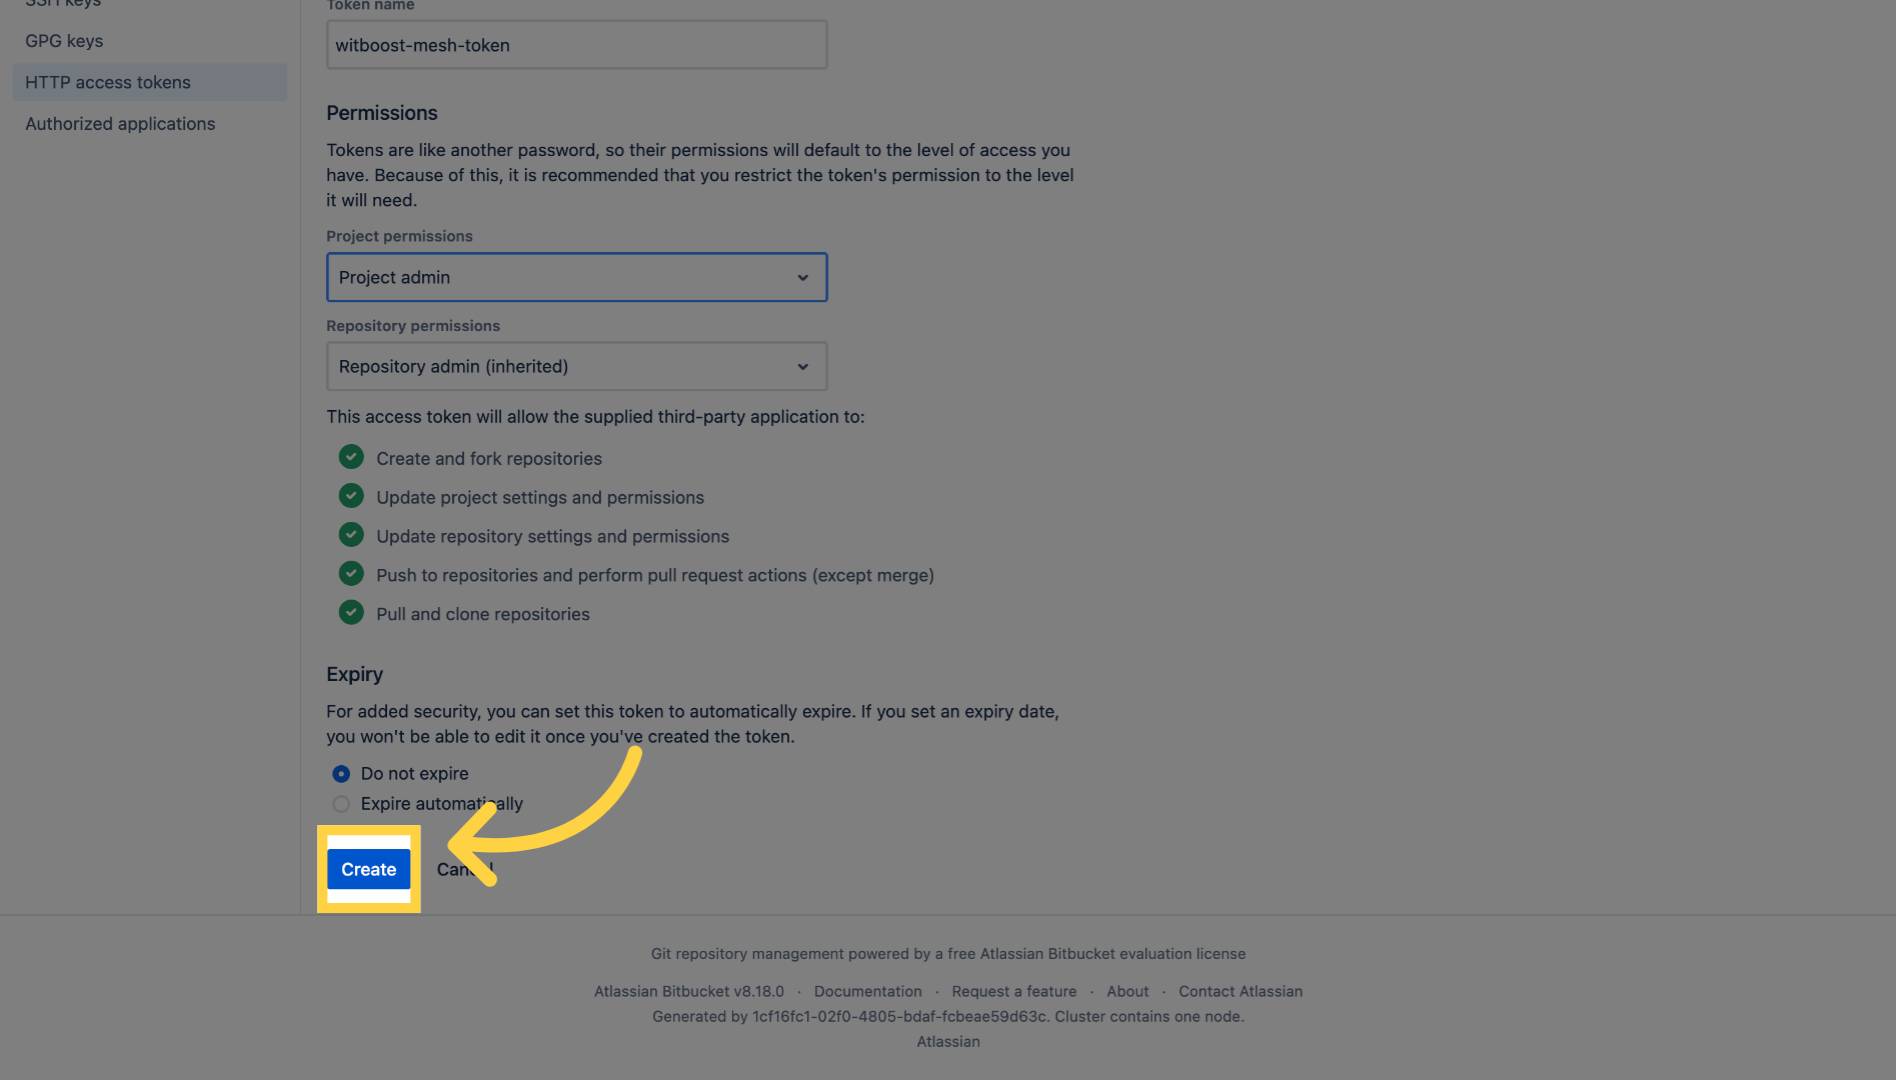
55. Click "Create"
Click "Create" to finalize the token creation process and generate the access token with the specified permissions.
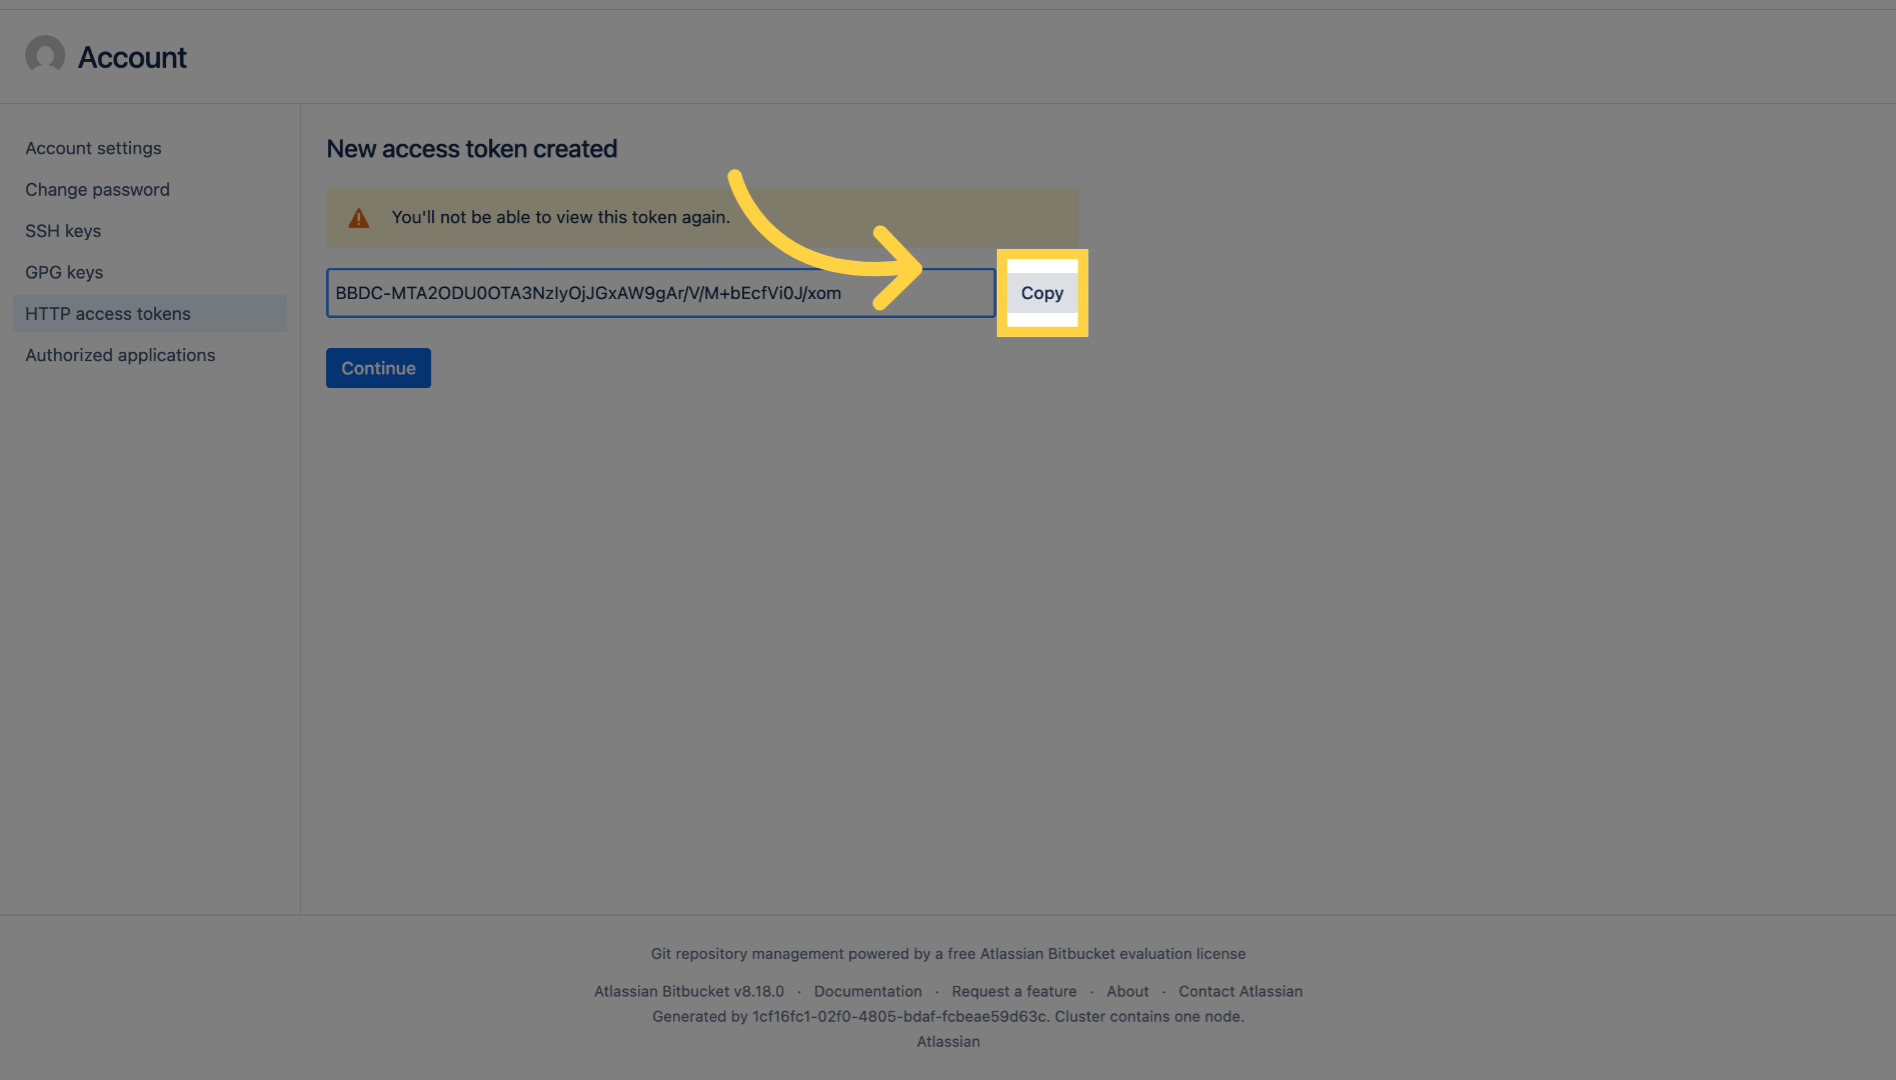
56. Save the token
Click "Copy" to copy the newly created access token to your clipboard so you can securely store it or use it in your applications.
57. Thank you
You have successfully created a BitBucket access token with reed and admin permissions for your project. Remember to store your token safely and avoid sharing it publicly.

Please add a description