Access Control Requests Notifications
Every time an access or revoke request is configured to produce a notification, the resource owner (or Data Access Manager) will receive a new message on Witboost, that looks like this:
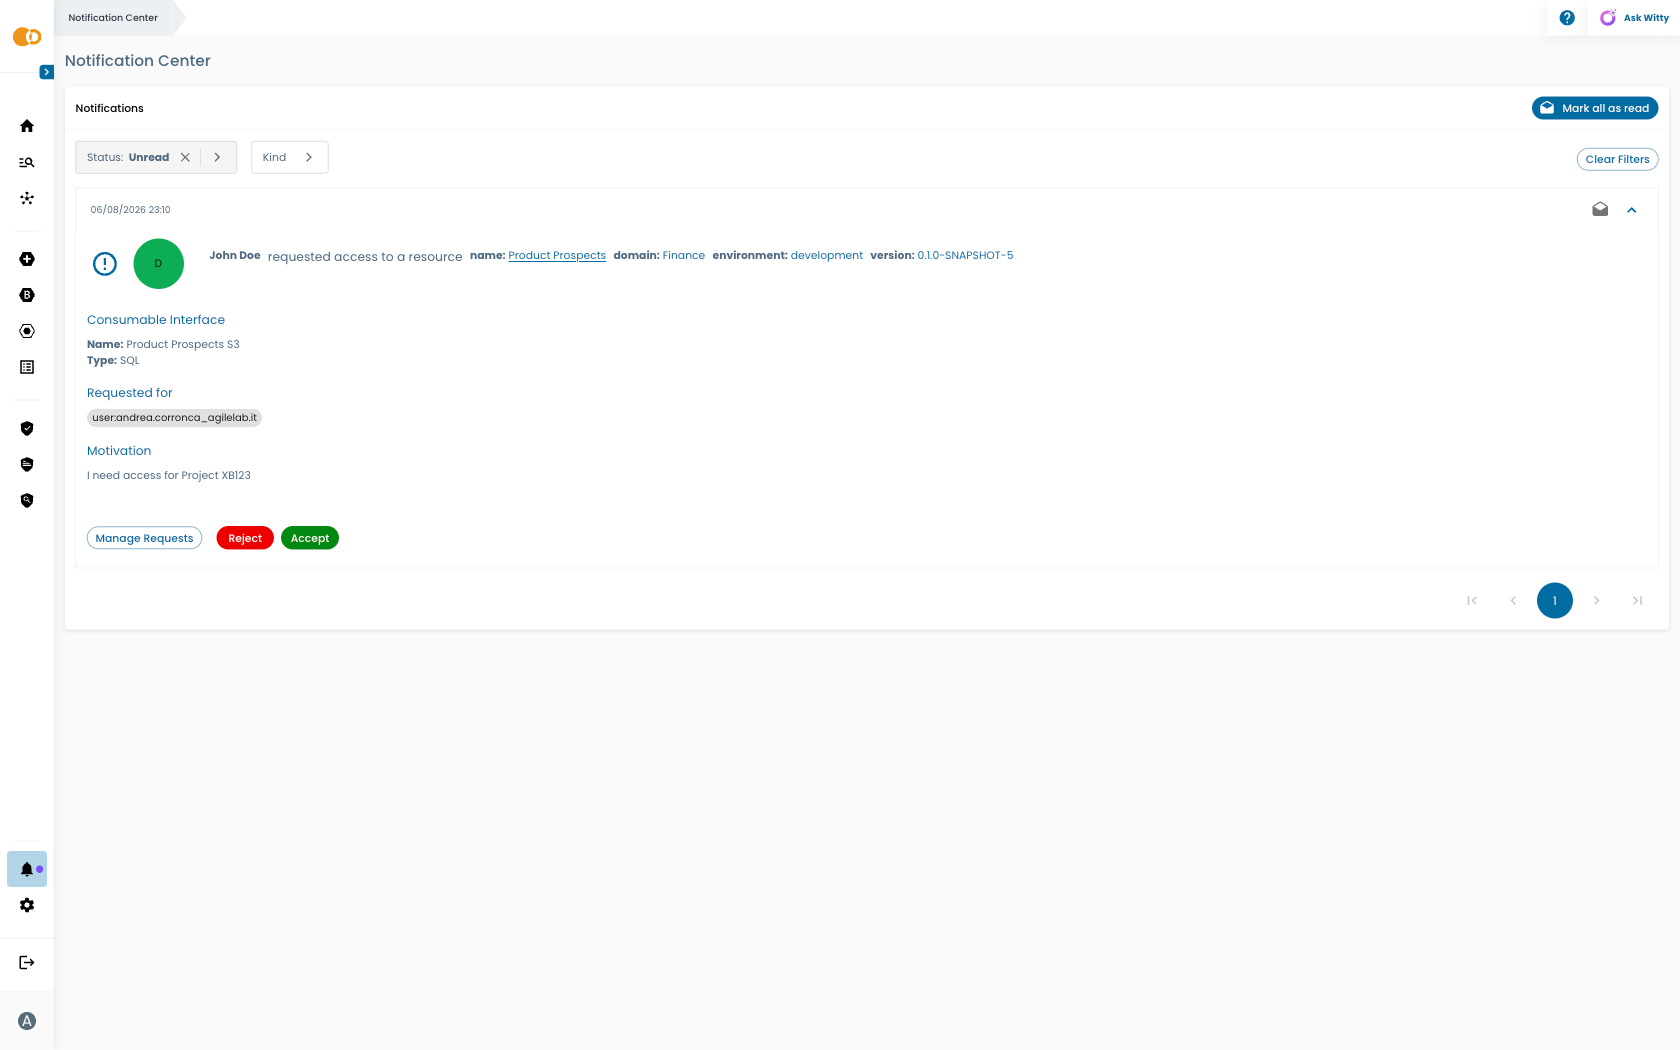
In addition to the Accept and Reject buttons, access request notifications include a Manage Requests button that navigates the user to the Pending Requests view in the relevant product's Access Control panel.
The owner of the resource should have all the contextual information needed to take a decision, and by default, Witboost will display:
- Name, domain, environment and version of the resource where the consumable interface belongs to
- Name and type of the specific consumable interface where the owner is asked to provide access (e.g. the output port details in case of a data mesh scenario)
- The user that is going to be granted access in case the request is accepted
- All the fields that are defined under
fieldsin the access/revoke template
The fields of an access/revoke request can contain information that are not directly readable to the end user. Hence, there is a preprocessing ongoing that can lead your notification message to unexpected results:
- A JSON object field is always skipped, as this is not user-friendly, unless its shape is that of an Attachment
- A list of objects is always skipped.
- A base64 encoded string (e.g. a base64 encoded file content) is always skipped, unless shaped as an Attachment
- A list of strings is always converted into a list of chips
- A boolean or number value found in fields is always displayed as-is
- A file is treated as an attachment if it comes from a FilePicker and no further manipulation with Nunjucks has been applied
Crafting a different notification message
If you would like to enhance the message shown to owners for access and revoke requests, to match your specific use-case, you can leverage the displayFields field in your templates.
Take this template as an example:
apiVersion: witboost.com/v1
kind: AccessControlRequestTemplate
metadata:
  name: access-control-request-template
  title: Access Control Request Template
  description: Template definition for requesting access
spec:
  type: grant
  # the parameters section of an access control request template

  steps:
    - id: send_request
      name: Send Request
      action: access-request:send
      input:
        identities: '${{ parameters.identities }}'
        fields:
          identities: '${{ parameters.identities }}'
          motivation: '${{ parameters.motivation }}'
          name: '${{ parameters.name }}'
          surname: '${{ parameters.surname }}'
          document: '${ parameters.document }}'
        displayFields:
          - title: Motivation
            text: '${{ parameters.motivation }}'
          - title: Identities
            text: 'requested for ${{ parameters.identities }}'
          - title: List
            text: 'This is a list:'
            textList: ['abc', 'def', '123']
          - title: Document
            text: 'An attachment for the access request:'
            attachment: '${{ parameters.document }}'
If a displayFields field is defined, you will override the default notification message that is generated by witboost. In particular, each notification section in the list is defined by:
title: The title of the sectiontext: (optional) Some text to display in the notificationtextList: (optional) A list of text blocks to display in the notificationattachment: (optional) A file to display as an attachment to users. This attachment can be downloaded by them. You can reference a field where a FilePicker is defined.
If none of text, textList nor attachment is defined, the section is skipped and won't be displayed.
The attachment field of a section's configuration expects a JSON object shaped like this:
{
  "fileName": "myfilename.pdf",
  "fileContent": "<a valid base64 encoded file>"
}
Managing Pending Access Control Requests
Outside the Notification Center, the Pending Requests view in the Access Control panel provides a centralized surface for reviewing, sorting, filtering and accepting (or rejecting) pending access requests for a specific product, with support for bulk operations.
Opening the Pending Requests View
You can reach the Pending Requests view in three ways:
-
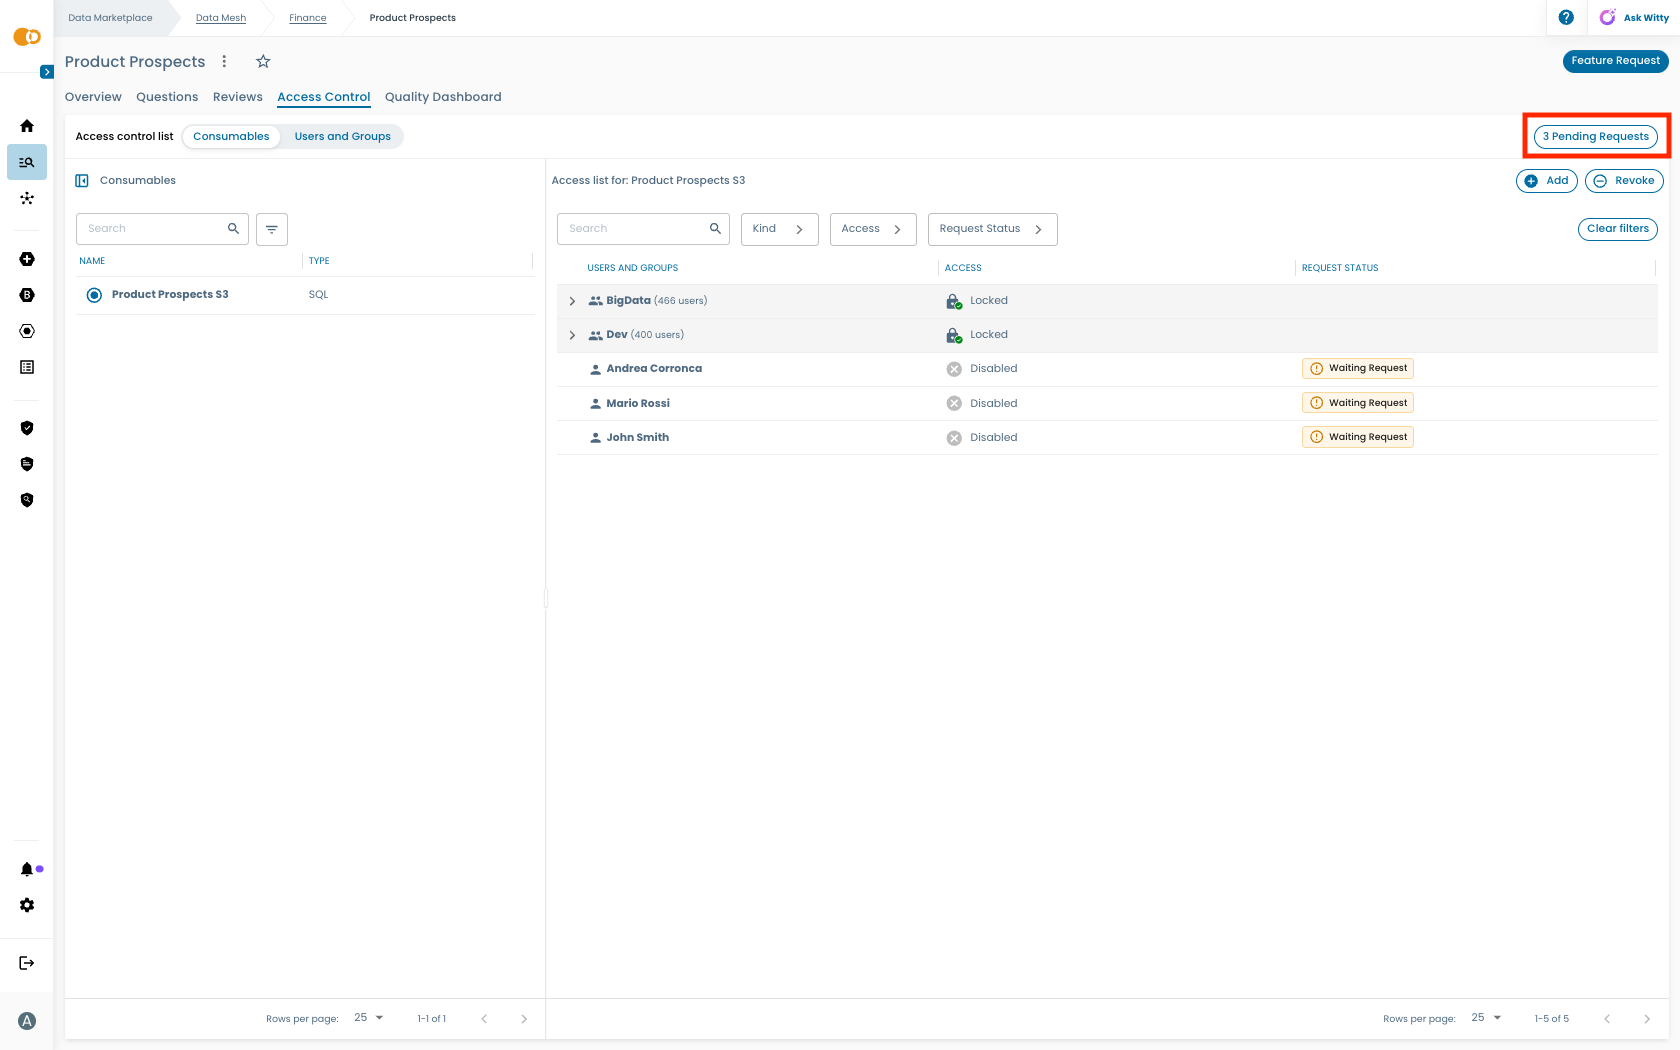
From the Access Control panel: Navigate to your product's page in the Marketplace, open the Access Control panel in the Control Center, and click Pending Requests.
-
From a notification: When you receive an access request notification, click the Manage Requests button. This navigates you directly to the Pending Requests view for the relevant product.
-
From an email notification: Access request email notifications also include a direct link to the Pending Requests view for the product.
Approving or Rejecting Individual Requests
-
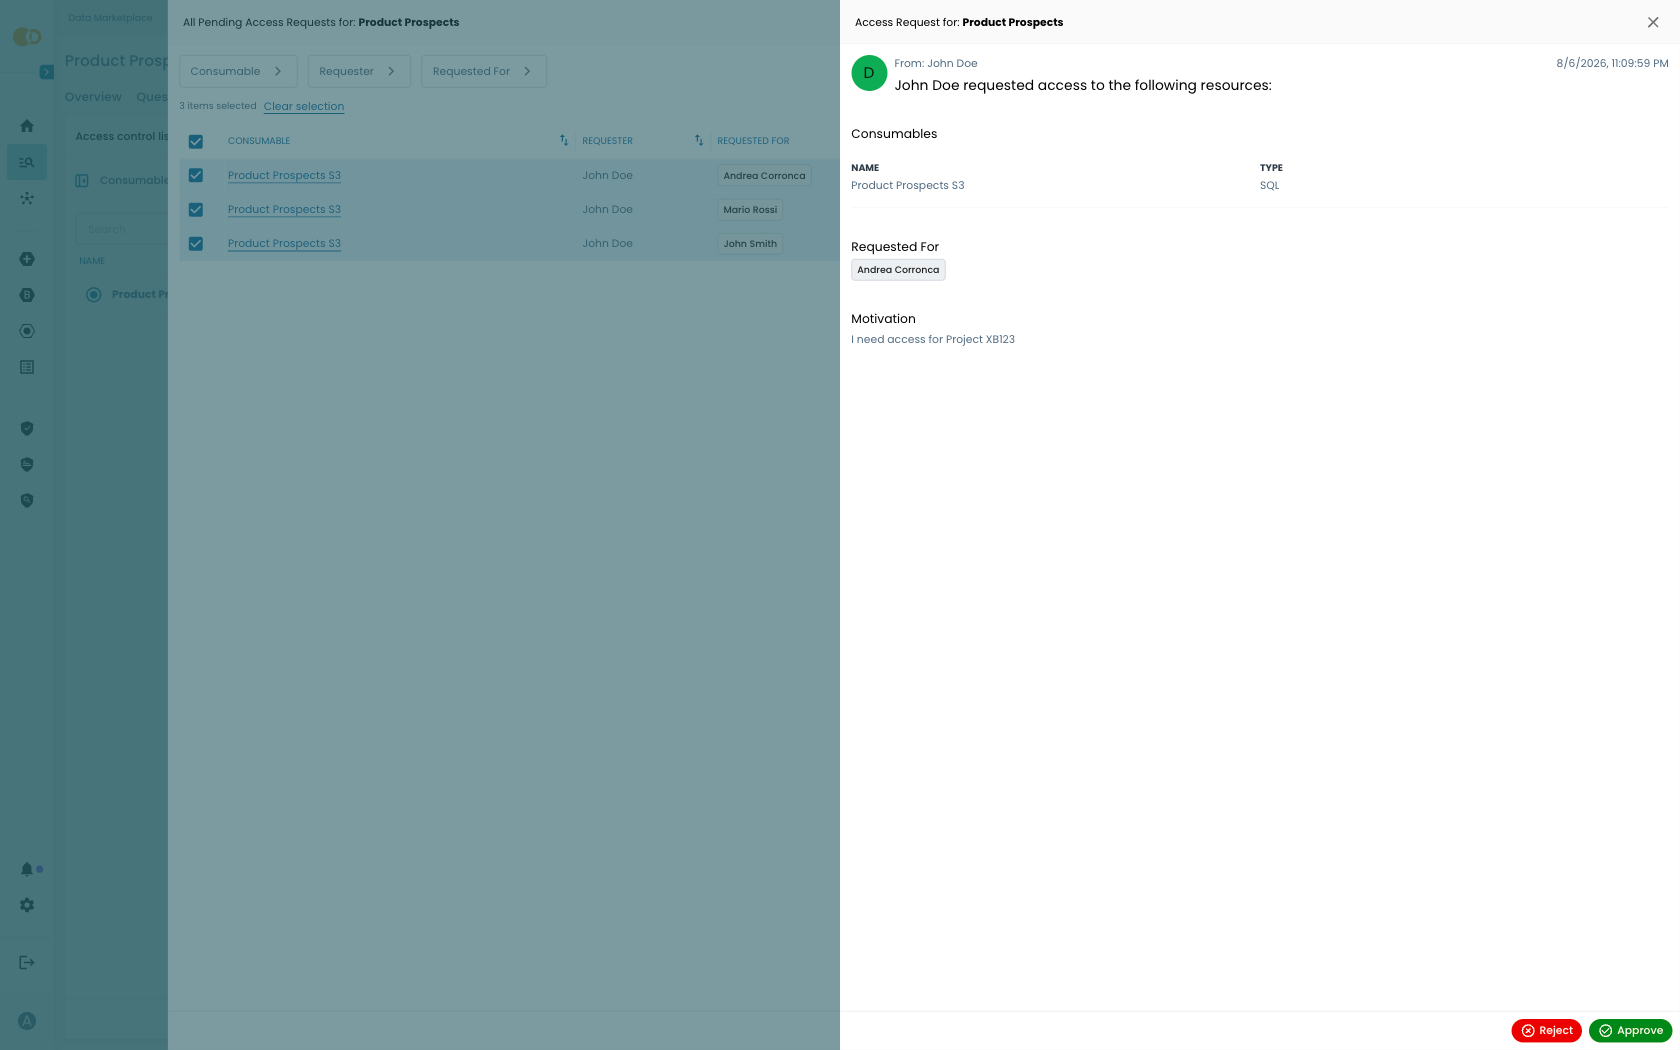
Review the request details in the list. You can click on a request to open a detail drawer with the full information (all the display fields will also be visible here):
-
Click Approve to approve the request or Reject to deny it.
-
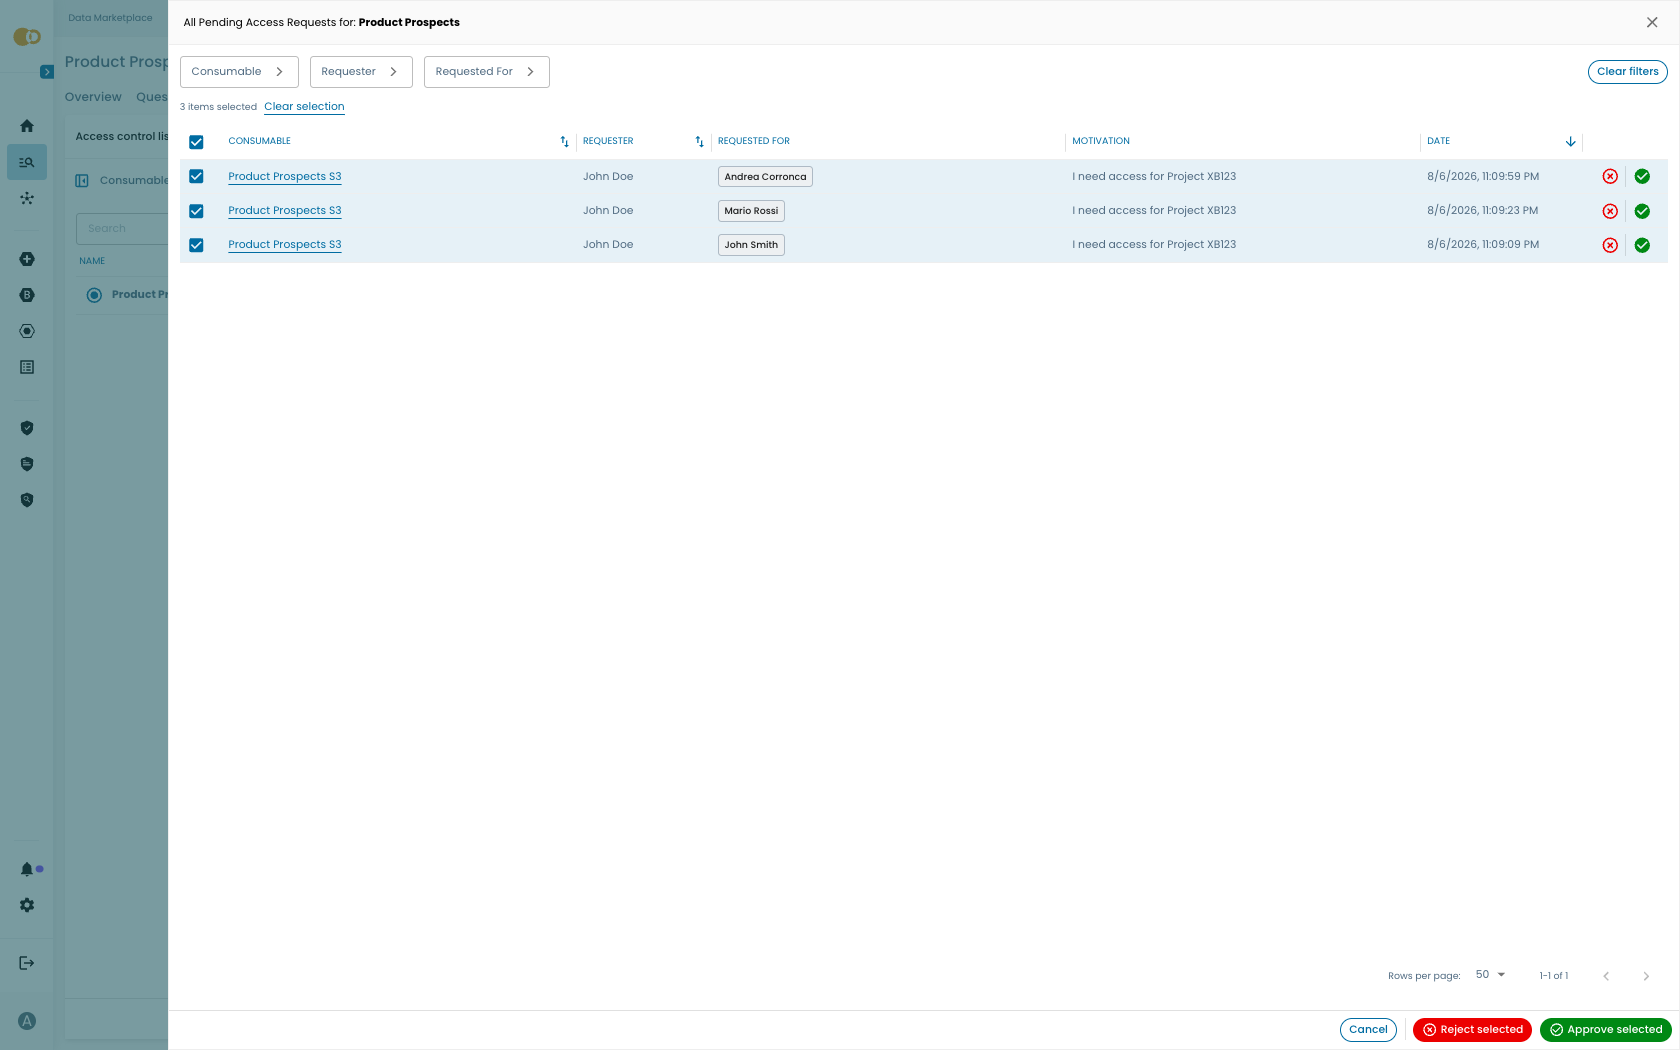
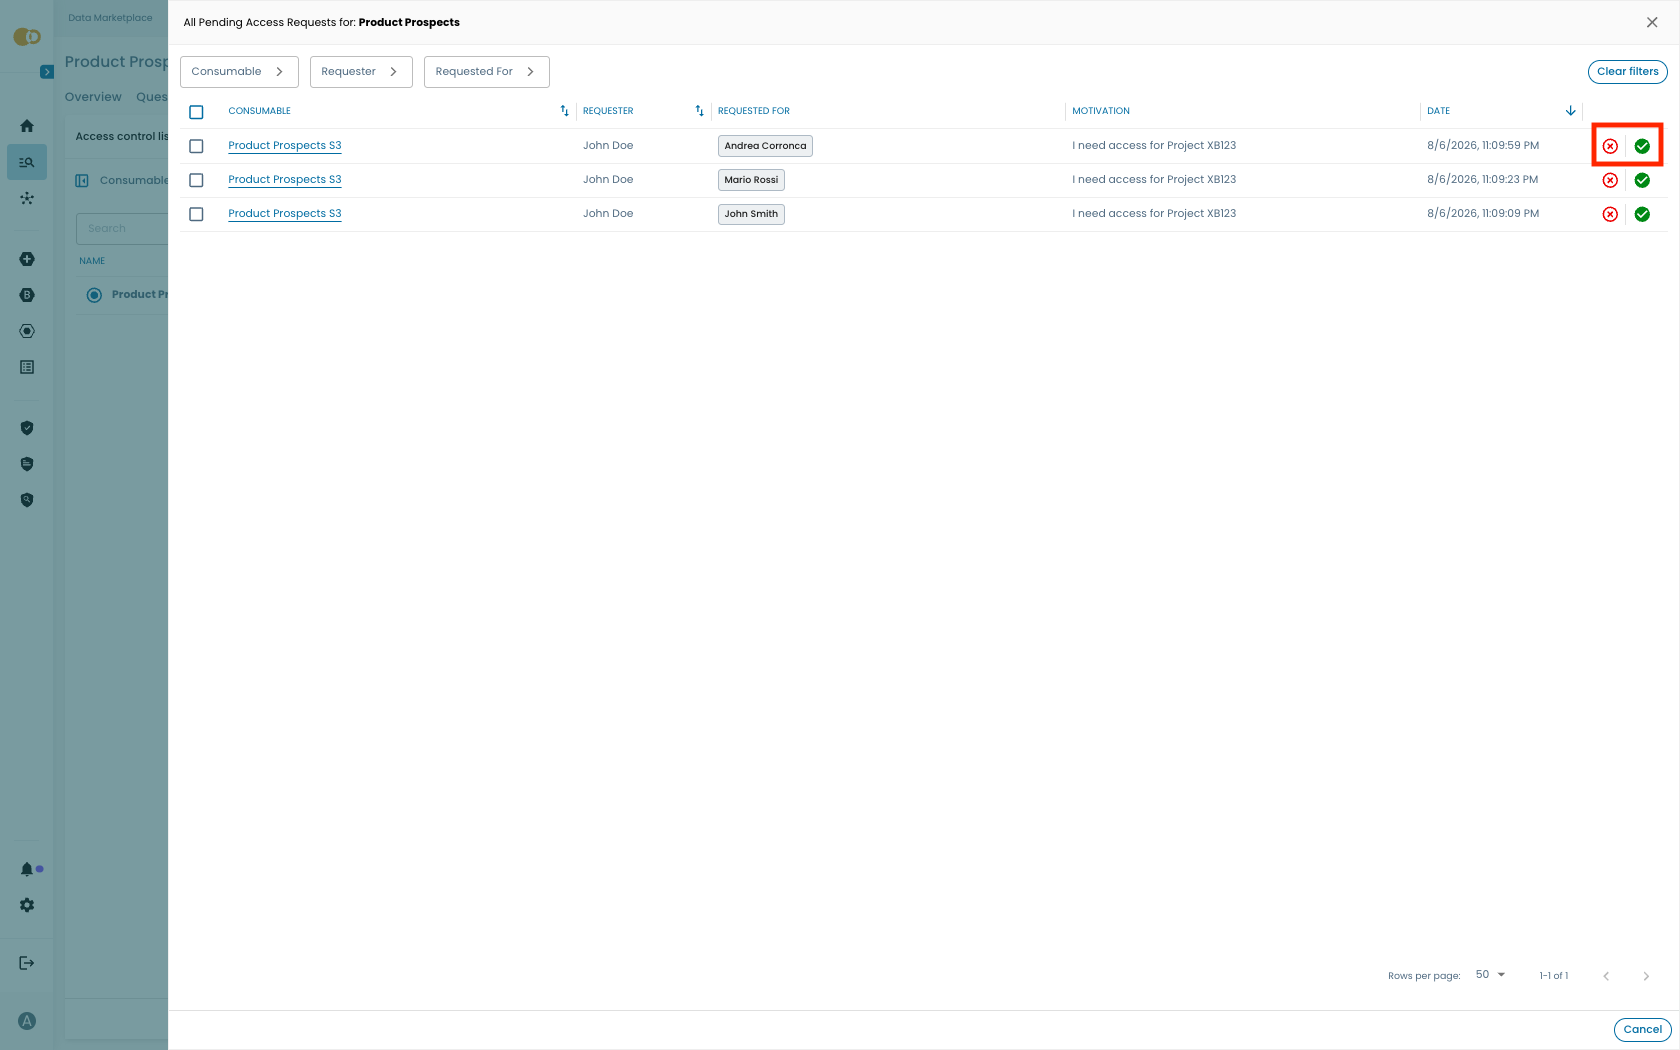
You can also Approve or Reject individual requests from the list without opening the detail drawer:
Managing Multiple Requests at Once
When you have many requests, you can act on multiple of them at once:
-
Select requests: Use the checkboxes to select individual requests, or use the column header checkbox to select all visible requests.
noteApply filters such as Consumable, Requester and Requested For to quickly restrict the subset of requests you want to select and then select them all with one click.
-
Click Approve or Reject to apply the action to all selected requests.