Guidelines
The purpose of this document is to provide guidance on how to create a template that is useful, comprehensive, and easy-to-use. Good developer experience is key for productivity and adoption, so even though working on templates may not be as fun as writing code, it is crucial to put effort in them, as otherwise users may find themselves stranded or frustrated. When creating a template you should have the user's experience as a top priority.
There are some general guidelines that can help in creating powerful templates that are easy to use:
- Use the right terminology: use the glossary your users are accustomed to, don't force them to learn a new set of terms and their meanings if it's not necessary.
- Be consistent: you are building part of the experience of a larger platform. Eg: schema configuration should always use the same structure so that users don't have to learn it every time.
- Use good names: the name of a template should be descriptive. Most likely you want it to specify the technology that powers it, and what kind of component it is for (Workload, Output Port, etc). Avoid "Template" int the template name, it's redundant.
- Use icons: they make them easy to find what the user is looking for, especially if you have a lot of options.
- Design templates to work together: make them easy to combine.
- Combine templates with blueprints: use them to suggest a complete structure for a system, providing components that connect together. It really lowers the cognitive load for users unfamiliar to what the platform offers.
Along with these general ideas, in each of the following sections we'll go through an aspect of template creation and outline a series of important things to keep in mind and provide suggestions on how to approach them.
Creation wizard
The creation wizard is the first impact that a user has with a template. It guides the user in defining the component. You should start from one of the base templates provided in this repository, as they provide most of the functionality needed for each component type, and go from there.
The following are some practical suggestions you should always follow when developing a wizard:
- Provide default values: for most things, you can provide a meaningful default, and save the user the time to come up with it. It makes the wizard faster, and it lowers the burden on the user.
- Use entity/descriptor pickers: don't ask the user to grab the value of a field of another component. You can do it for them, and it avoids errors and misunderstandings.
- Avoid overly technical fields: unless absolutely necessary, don't ask the user for super technical information. You can in most cases have fields like a database, schema, table or view name for the new component as non-mandatory, and generate values for them if they don't care. Use entity/descriptor pickers if those information are already available, or a custom url picker to fetch it from somewhere. Don't have the user input the EC2 instance type, give him options from a dropdown.
- Provide fields for all reasonable things a user might want to customize: don't force the user to mess with the catalog-info.yaml directly, give him a way to set things via a wizard.
- Avoid field overload: following the above suggestion can lead to a lot of fields to display. Hide them in an accordion, so the users who are not looking for them are not overwhelmed.
- Don't ask what a user can't know: it may be the case that some information are not yet known at creation time. Don't force the user to put dummy values that they need to remember to change later on. Use the edit template for things that may not be known at creation time or that can change; don't make the creation wizard an exhausting experience!
- Provide meaningful descriptions for fields: tell the user what they are supposed to provide. Keep in mind the user may be unfamiliar with a technology or even the entire platform, so the field name is not always enough.
- Field validation: use regex pickers or other validation systems to stop the user from providing invalid values, don't let them run wild only to punish them with a policy down the line.
- Use sections: split the wizard into coherent parts. Provide brief introductions to sections; use Markdown syntax to help.
- Avoid using the RepoUrlPicker in favour of predefined paths (see Repository Location example).
Edit wizard
The edit wizard is what allows your users to change a component after it has been created, without having to modify the catalog-info.yaml directly. It's very useful for less-technical users as it avoids having to deal with the repository, and it saves time for all users, as well as avoiding errors.
You should always provide edit templates, even just for metadata such as the description of a component.
The suggestions for the creation wizard also apply here, with one notable addition: remember lock down things the user is not allowed to change after creation (see the base edit templates for how to do this). Otherwise, the platform will refuse the changes and the user will have to fix mistakes that could have been avoided, but that you allowed to happen.
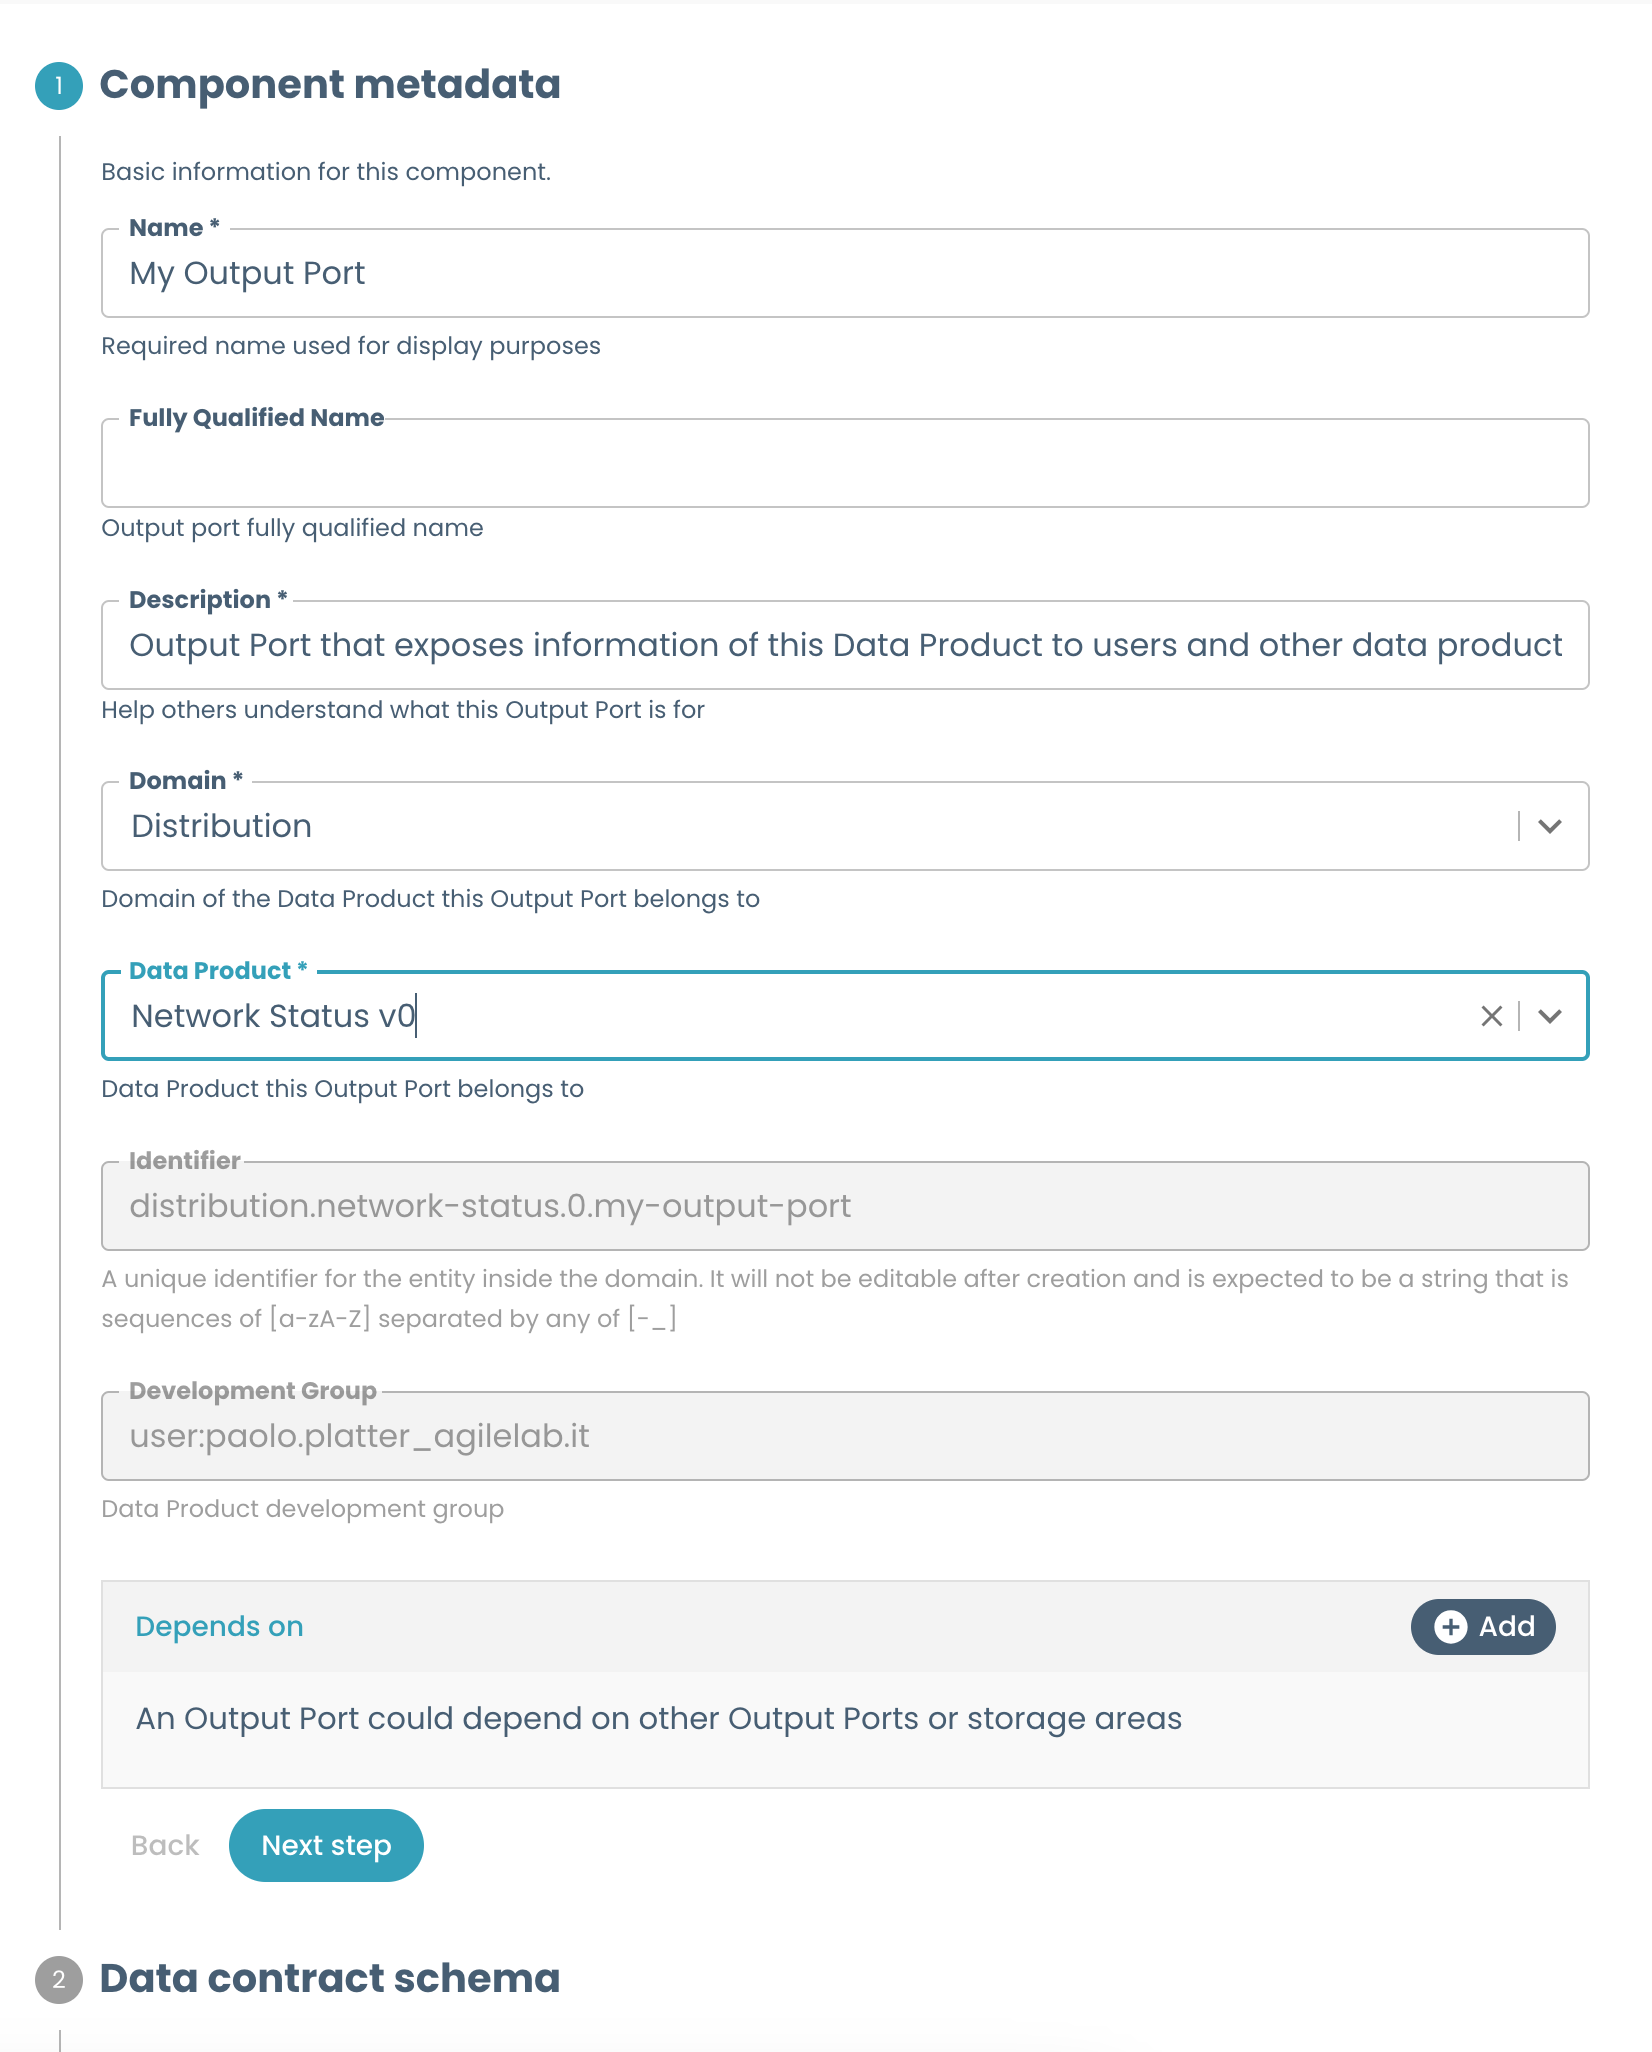
The following is a minimal list of fields that cannot be changed since they are locked by the platform after creation:
- Name
- Domain
- Parent system (eg, Data Product)
- Identifier
- Development Group
You may have to lock additional fields, depending on the component that has been created and how flexible the platform is. Keep in mind the edit wizard can be used at any moment, even after the component has already been deployed.
Skeleton
The skeleton/ folder contains the skeleton of the component. All the contents of the files inside of it, including the file names, can be templated with Nunjucks syntax.
The result of this templating operation ends up as the initial contents of the new component's repo. For example, a basic PySpark project for a Workload. For many components, such as Output Ports and Data Products, the skeleton includes the catalog-info.yamlfile and some default documentation. Other components, such as Workloads, usually have a more complex skeleton.
The skeleton is your way of giving an imprinting to new components built from the template. Provide guardrails, implement best practices, set expectations for how the components should be.
Since the skeleton is the starting points for new components, you should take care to make sure it is:
- Easy to use: provide clear instructions or tutorials if needed. The user should not be scared by the new component repo.
- Easy to work on and extend: component developers will work on this, make their life easy. Don't hide things or make them hard to modify.
- Well documented: we all know how boring writing documentation can be, and how hard it is to start with a blank slate. Provide something that can be built on.
- Compliant by default: don't leave the user with a non-compliant component.
- Deployable: ideally, it should be deployable with zero further modifications.
Documentation
A template should have comprehensive documentation for multiple kinds of personas: users and developers. In addition to this, being a template, there's also two layers to it: template documentation, and default component documentation.
This means that you should try to cater to different audiences:
- TD, Template Developers: members of the platform team. They need to know how to develop and extend the template itself.
- TU, Template Users: members of the developer teams that use the platform. They need to know what the template is for and how to use it.
- CD, Component Developers: members of the developer team of the system to which the component is attached. They need to know how to develop on the component.
- CU, Component Users: users of the component; this mostly applies to output Ports, as other components are rarely exposed to final users. They need to know how to use the component; mostly centers on data consumption.
- EU, End Users: business stakeholders; this applies to products and consumables published on Marketplace. They need to understand business value and use cases.
With these needs in mind, here is the typical documentation layout, along with the intended audience and contents:
.
├── docs/
│   └── index.md (TU: template usage docs, instructions for filling in the wizard. Shown in the template docs in Witboost.)
├── mkdocs.yaml (default contents)
├── README.md (TD: template development docs. How the template works, list of tools needed for development and customization, etc; link to index.md above for usage docs. Shown in template repo welcome page.)
└── skeleton (component skeleton)/
    ├── docs/
    │   └── index.md (CU: component usage docs, metadata of the component such as name/id/technology, instructions to consume data for output ports; workloads & storage probably don't have meaningful usage docs so just metadata for them. Shown in component docs in Witboost.)
    ├── mkdocs.yaml (default contents)
    └── README.md (CD: component development docs. How the component works, list of tools needed for development and customization, etc; link to index.md above for usage docs. Shown component in repo welcome page.)
    └── end-user-docs/                # Marketplace documentation folder
        ├── mkdocs.yml                # Configuration for Marketplace docs
        └── docs/                     # (EU: Business documentation. Shown in Marketplace)
            └── index.md
Please refer to the Documentation section for more information.