Template registration
The Builder must be able to save all the infrastructure and use case template metadata in order to bind them to a specific policy.
The main idea is to register a template in two main cases:
- Every time a new use case template is registered;
- Every time a new infrastructure template is created;
Use Case Template registration
In order to register a Use Case Template, you need to add it inside the Builder. The template must be registered in YAML format and needs to have the following fields, at least:
- useCaseTemplateId: is the main identifier of your use case template and must comply with the format urn:dmb:utm:${name}:${version}, e.g.: urn:dmb:utm:aws-cdp-outputport-impala-template:0.0.0
- name: is the name displayed in witboost UI.
- description: few words of what your template does.
- version: the version of the Use Case Template. It must match the same version specified in useCaseTemplateId
- infrastructureTemplateId: is the identifier of the infrastructure template that your use case template refers to. It must comply to format urn:dmb:itm:${name}:${version}, e.g.: urn:dmb:itm:aws-cdp-outputport-impala-provisioner:1
Remember: all URNs are treated as case-insensitive values, except for infrastructureTemplateId. This is deprecated, in the future it will be all case-insensitive.
These fields are all mandatory because they can discriminate an infrastructure template from a use case one. Please check createYourOwnTemplate.md file for further details about the required format for fields useCaseTemplateId, infrastructureTemplateId and version. If such requirements are not fulfilled, the registration procedure will output a validation error
Once a template is registered, periodically witboost update its metadata. So, you can change everything inside the YAML template (except for the useCaseTemplateId).
Infrastructure Template registration
Infrastructure templates can be registered via UI (recommended) or API.
Register an Infrastructure Template via UI (recommended)
Infrastructure Templates (from now on "Tech Adapters") can be registered through the Administration > Extension Manager page. This section allows you to manage and extend the capabilities of your system by integrating technology-specific adapters and linking them with appropriate infrastructure templates.
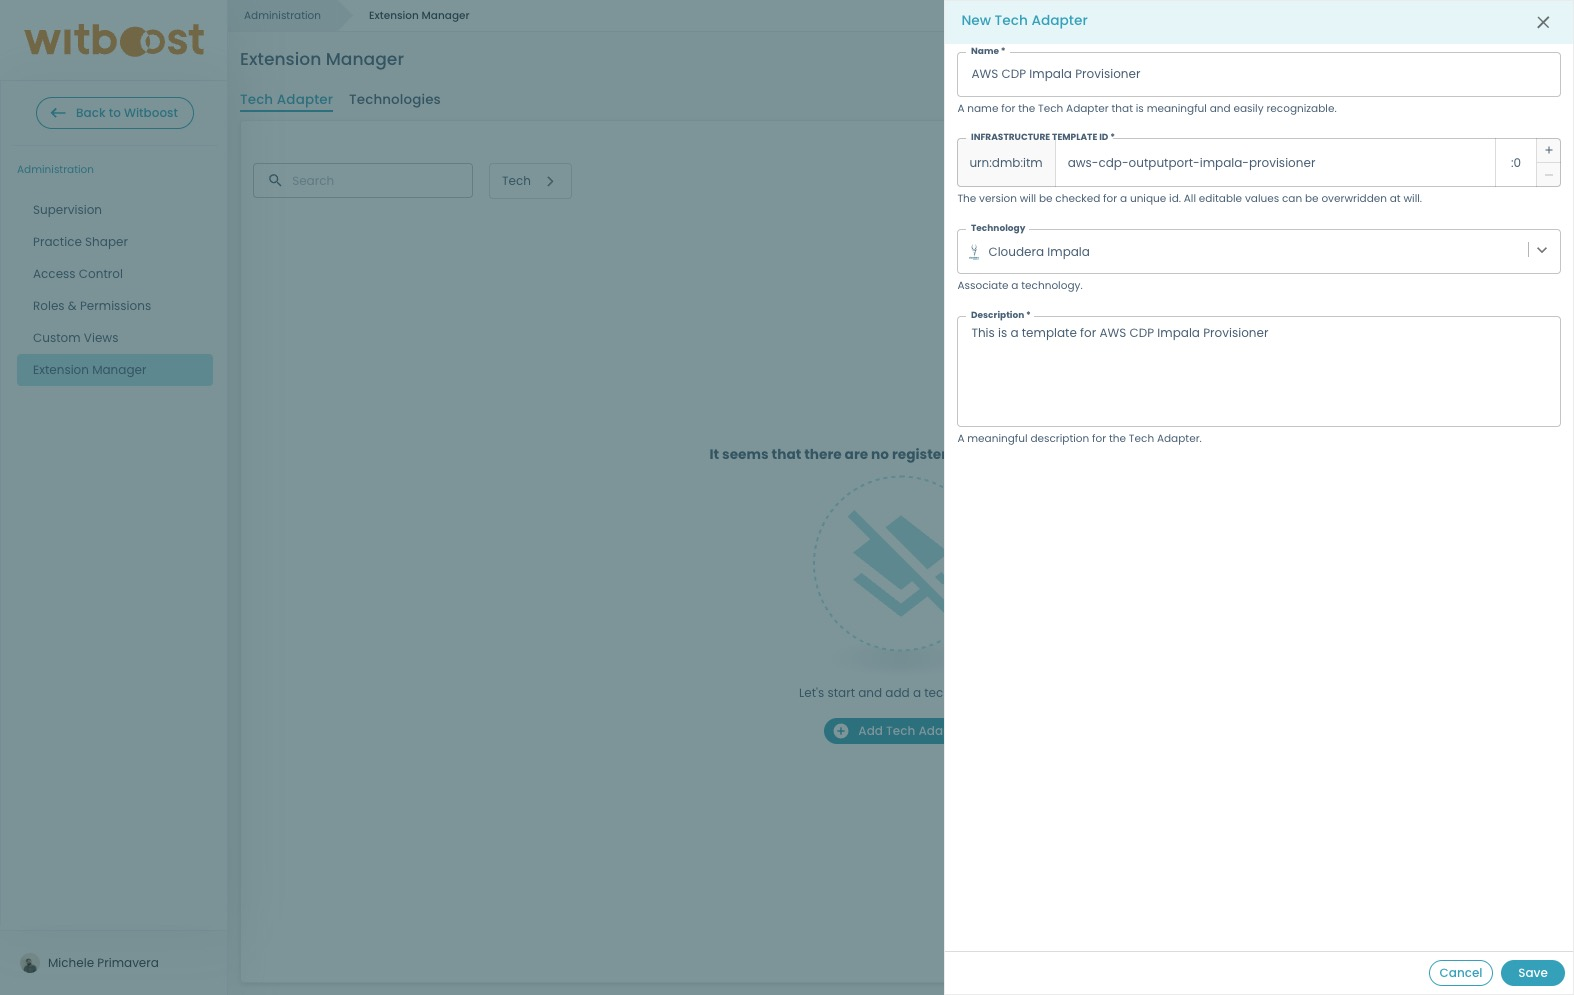
To create a new Tech Adapter, click the "Add Tech Adapter" button.
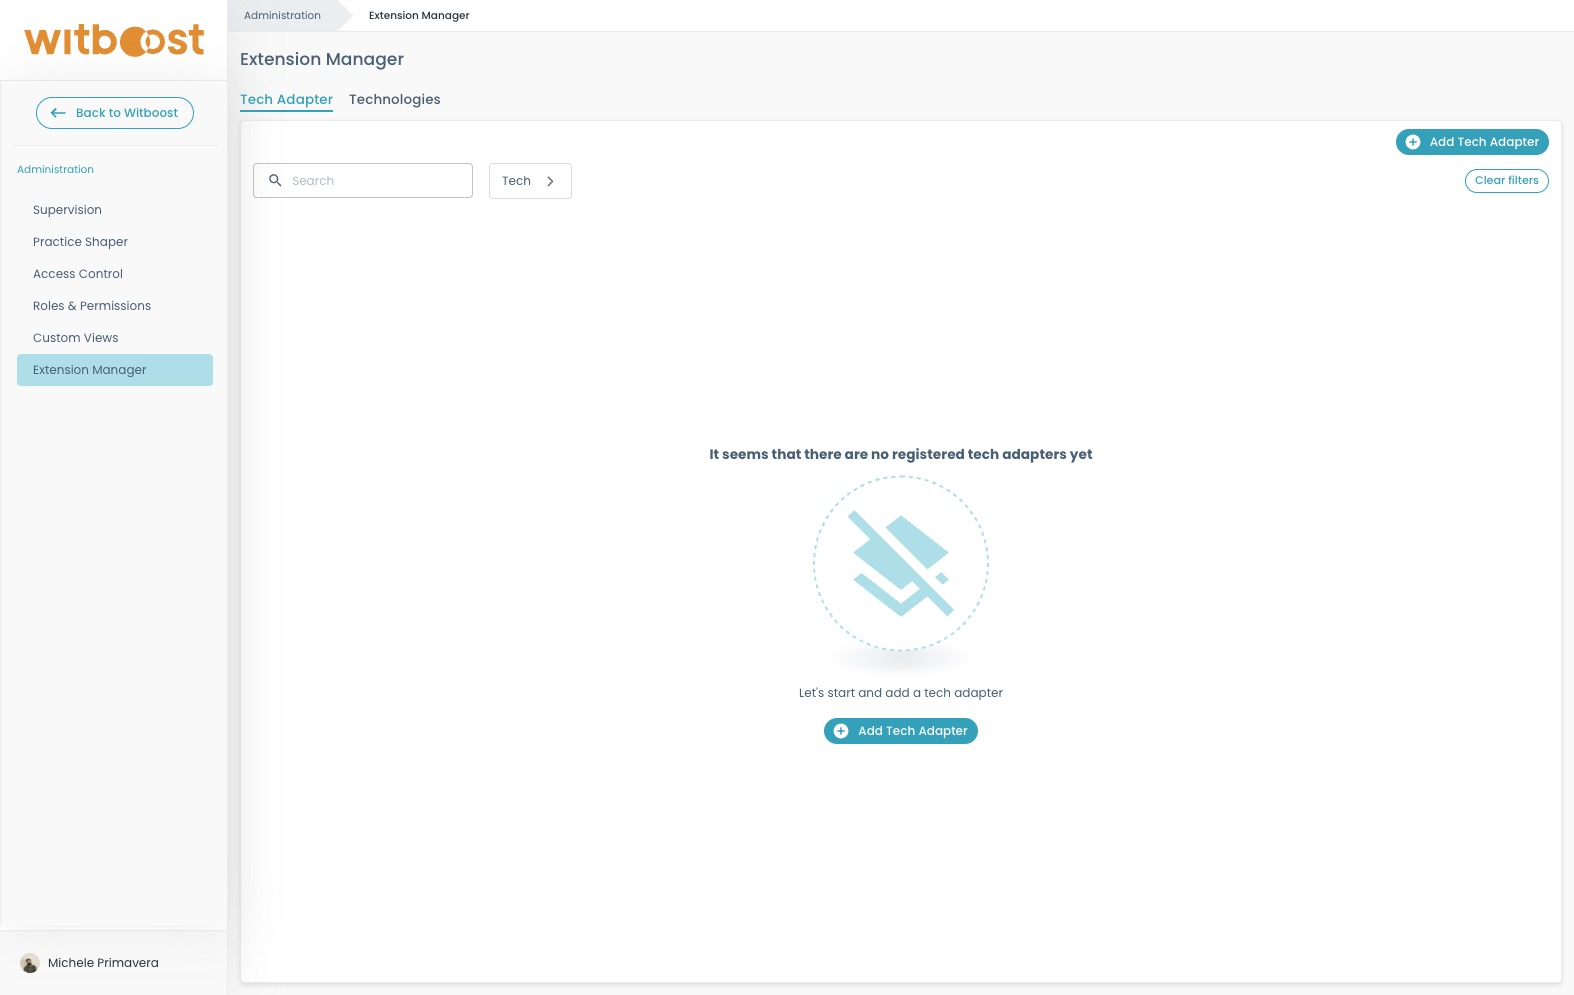
A Tech Adapter is a representation of a specific integration with a particular technology (e.g., AWS, Azure, Kubernetes). When creating a Tech Adapter, you can link it to a specific technology that it supports. All available technologies can be managed in the Technologies tab, where you can view, add, or edit technology definitions.
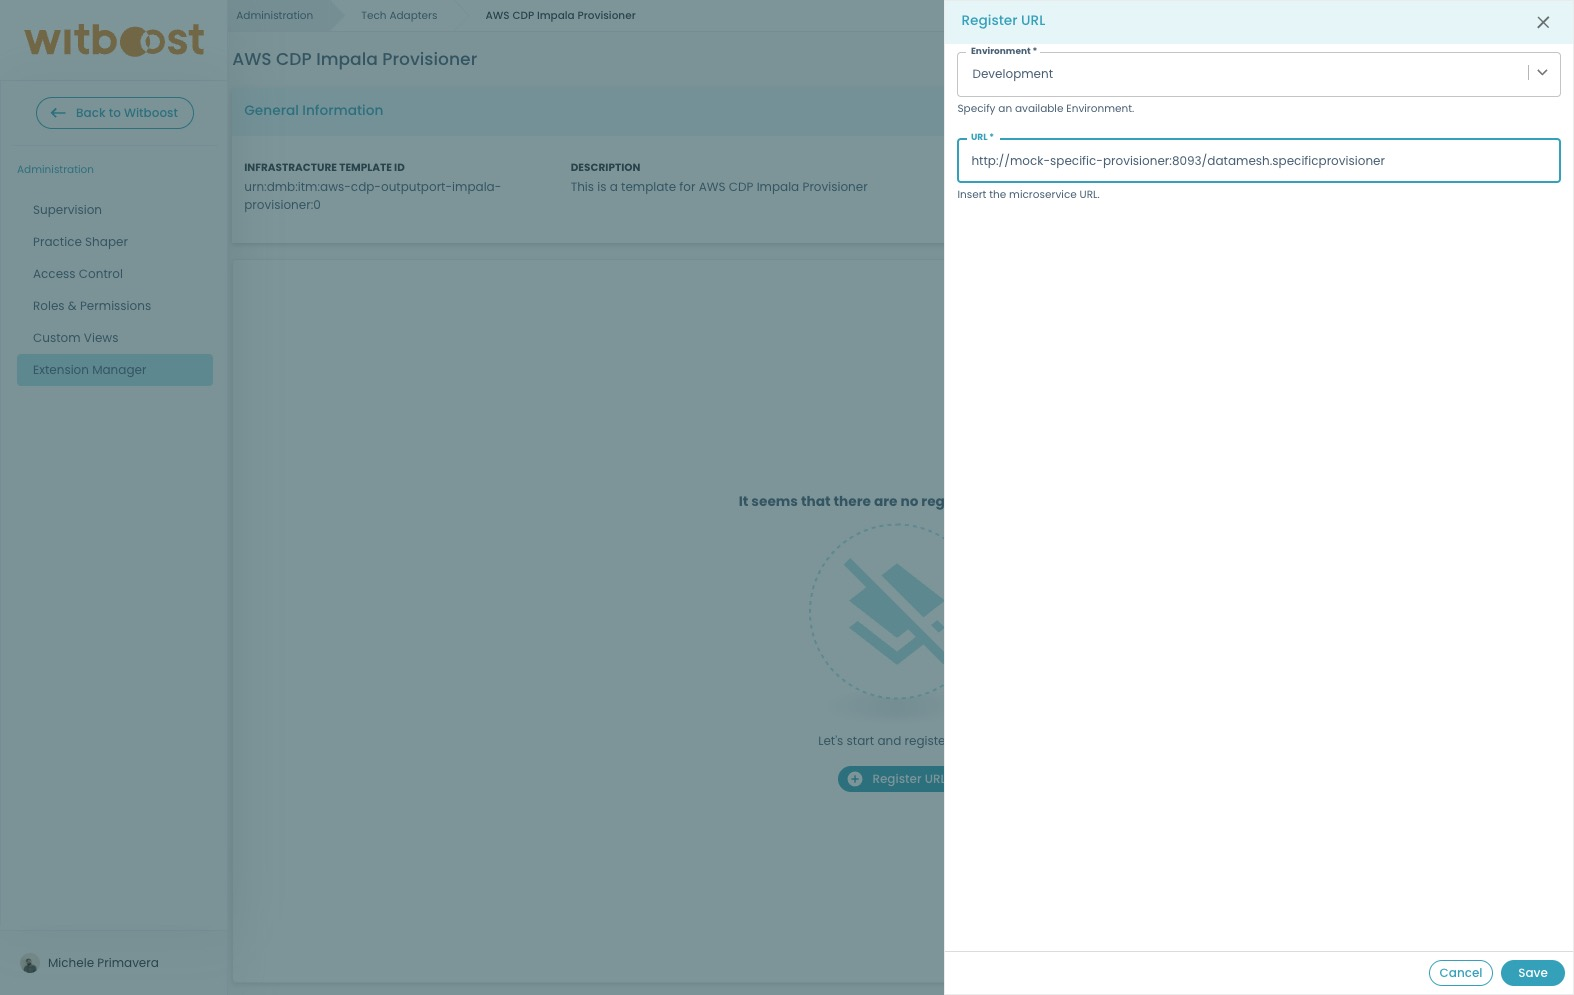
After creating a Tech Adapter, click on the adapter name to enter its detail page. Here, you can associate different environments and their corresponding URLs by clicking on the "Register URL" button.
In this step, you’ll need to:
-
Select the environment (e.g., development, staging, production) where the infrastructure template will be deployed.
-
Specify the URL of the Tech Adapter that corresponds to the selected environment.
This mapping ensures that the system correctly routes integration requests to the appropriate endpoint based on the deployment environment.
Register an Infrastructure Template via API
In order to register a Tech Adapter, you need to make an HTTP request to the Builder endpoint which is POST /register and for the request body, we need to specify some scenarios:
- We register an infrastructure template with URLs.
- We register an infrastructure template without URLs.
In the first case, we need to pass an object with the following fields:
- id: is the identifier of your infrastructure template, it must also contain the version, e.g. 'urn:dmb:itm:aws-cdp-outputport-impala-provisioner:1'.
- name: is the name chosen by the user to simplify its recognition.
- description: few words of what your template does.
- version: version of the infrastructure template.
- environment: the environment in which the infrastructure template is deployed.
- url: the url of the Tech Adapter related to a specific environment.
In the second case, we need to pass an object with the following fields:
- id: is the identifier of your infrastructure template, it must also contain the version, e.g. 'urn:dmb:itm:aws-cdp-outputport-impala-provisioner:1'.
- name: is the name chosen by the user to simplify its recognition.
- description: few words of what your template does.
- version: version of the infrastructure template.
Example body:
{
  "id": "urn:dmb:itm:aws-cdp-outputport-impala-provisioner:1",
  "name": "Impala template",
  "description": "This is a template for Impala",
  "version": "1",
  "environment": "dev",
  "url": "https://impala-template.com"
}
The version field must be equal to the last section of the id field. In the example above the id field ends with :1 representing the version, so version must also be equal to 1.
Since the registration is performed by an API, it can also be called by a CI/CD.
You can use the same endpoint to update an existing Infrastructure Template by sending again the request using the same id field, and updating the necessary fields.